Showing posts with label paperartsy. Show all posts

Monday, March 4, 2019

She was a good egg


Hi Everyone,
I'm up on the Gypsy Soul Laser Cuts blog today with this altered tin.


My crafty mojo has been on a major hiatus the past couple of weeks.  You know when you sit down and everything you make is just blah? Or you just sit there and stare at all of your supplies and you've got no ideas? That's been me.  I decided to just play.
I started by taking the Feathers and some PaperArtsy Infusions to colorize them.  I gave each feather a layer of gesso.  Once the gesso is dry I made a puddle of white paint and sprinkled in some infusions.  The infusions will react with the paint, but if you lightly spritz it with water they really come to life.  I dipped and dragged the feathers through the paint.  On a few of them I sprinkled some extra infusions on top of the first layer and spritzed with water. I inked the edges(on the feather I used on this project I used Peacock Feathers) and added a bit of gold using a paint pen. Now I have a whole bunch of feathers in different colors and shades for future projects. 
A while back I got a blank tin from Gina(Ms. Gypsy Soul) and I decided it was time to use it.  I painted the tin using a layer of clear gesso.  I added a crackle glaze from Deco Art.  It's a super fine crackle and I ended up covering most of it up with my paint job, but in certain areas the crackle peeks through.  

The main color is Dina Wakley Turquoise mixed with a hint of Umber.  The speckles were added using Distress Oxide Sprays in Vintage Photo and Walnut Stain.   I wanted the tin to look like a robin egg.  
For the inside of the tin I added Tim Holtz Collage paper to the shallow side. I used collage medium to adhere the paper to the tin.  Using water on my finger I ran it around the edge of the tin to rip the paper.  I didn't want it to be exact in the tin.  If you peek there are little spaces where the silver of the tin can be seen.  The frayed and wrinkled edges make me happy.  You all know by now that perfection is not my thing!I added some clipping stickers and edged the paper with a gold paint pen. I love how it looks like loose gold leaf on the ragged edges.  
On the deep side of the tin I cut a piece of paper to fit the back and glued it in using collage medium.  I took one of the Scalloped Tin Inserts and ran it though my 3d Kaleidoscope embossing folder.  Using my finger I ran a thin layer of white paint over the surface.  Before it was dry I rub it to expose the raw chipboard underneath.  I ran my Hickory Smoke Oxide pad over the top to age it too.  The inside edge was inked gold using the paint pen. 

The good egg fairy is sitting on a small plastic egg that I smushed so it was dented on either side.  This gave me a flat surface to glue to the bottom of the tin and a concave side to sit a second egg in.  She is propped forward by placing a small wooden die behind her.
The fairy is a tiny Tim Holtz paper doll that was coated in clear gesso and colored using distress markers.  She has tiny shrink plastic wings and a crown.  The "good egg" was trimmed out of a dictionary and glued to her dress using collage medium. 
To finish the outside of the tin I layered up three washi tapes and glued them to the tin. I used a rub on word in the bottom corner and used foam tape to attach the feather.
I feel like I am back in the groove and hope to start making more projects! 

Can you tell I am ready for Spring? What do you do to break out of a creative funk?
Jess


Friday, February 15, 2019

Not qualified

Hi Everyone,
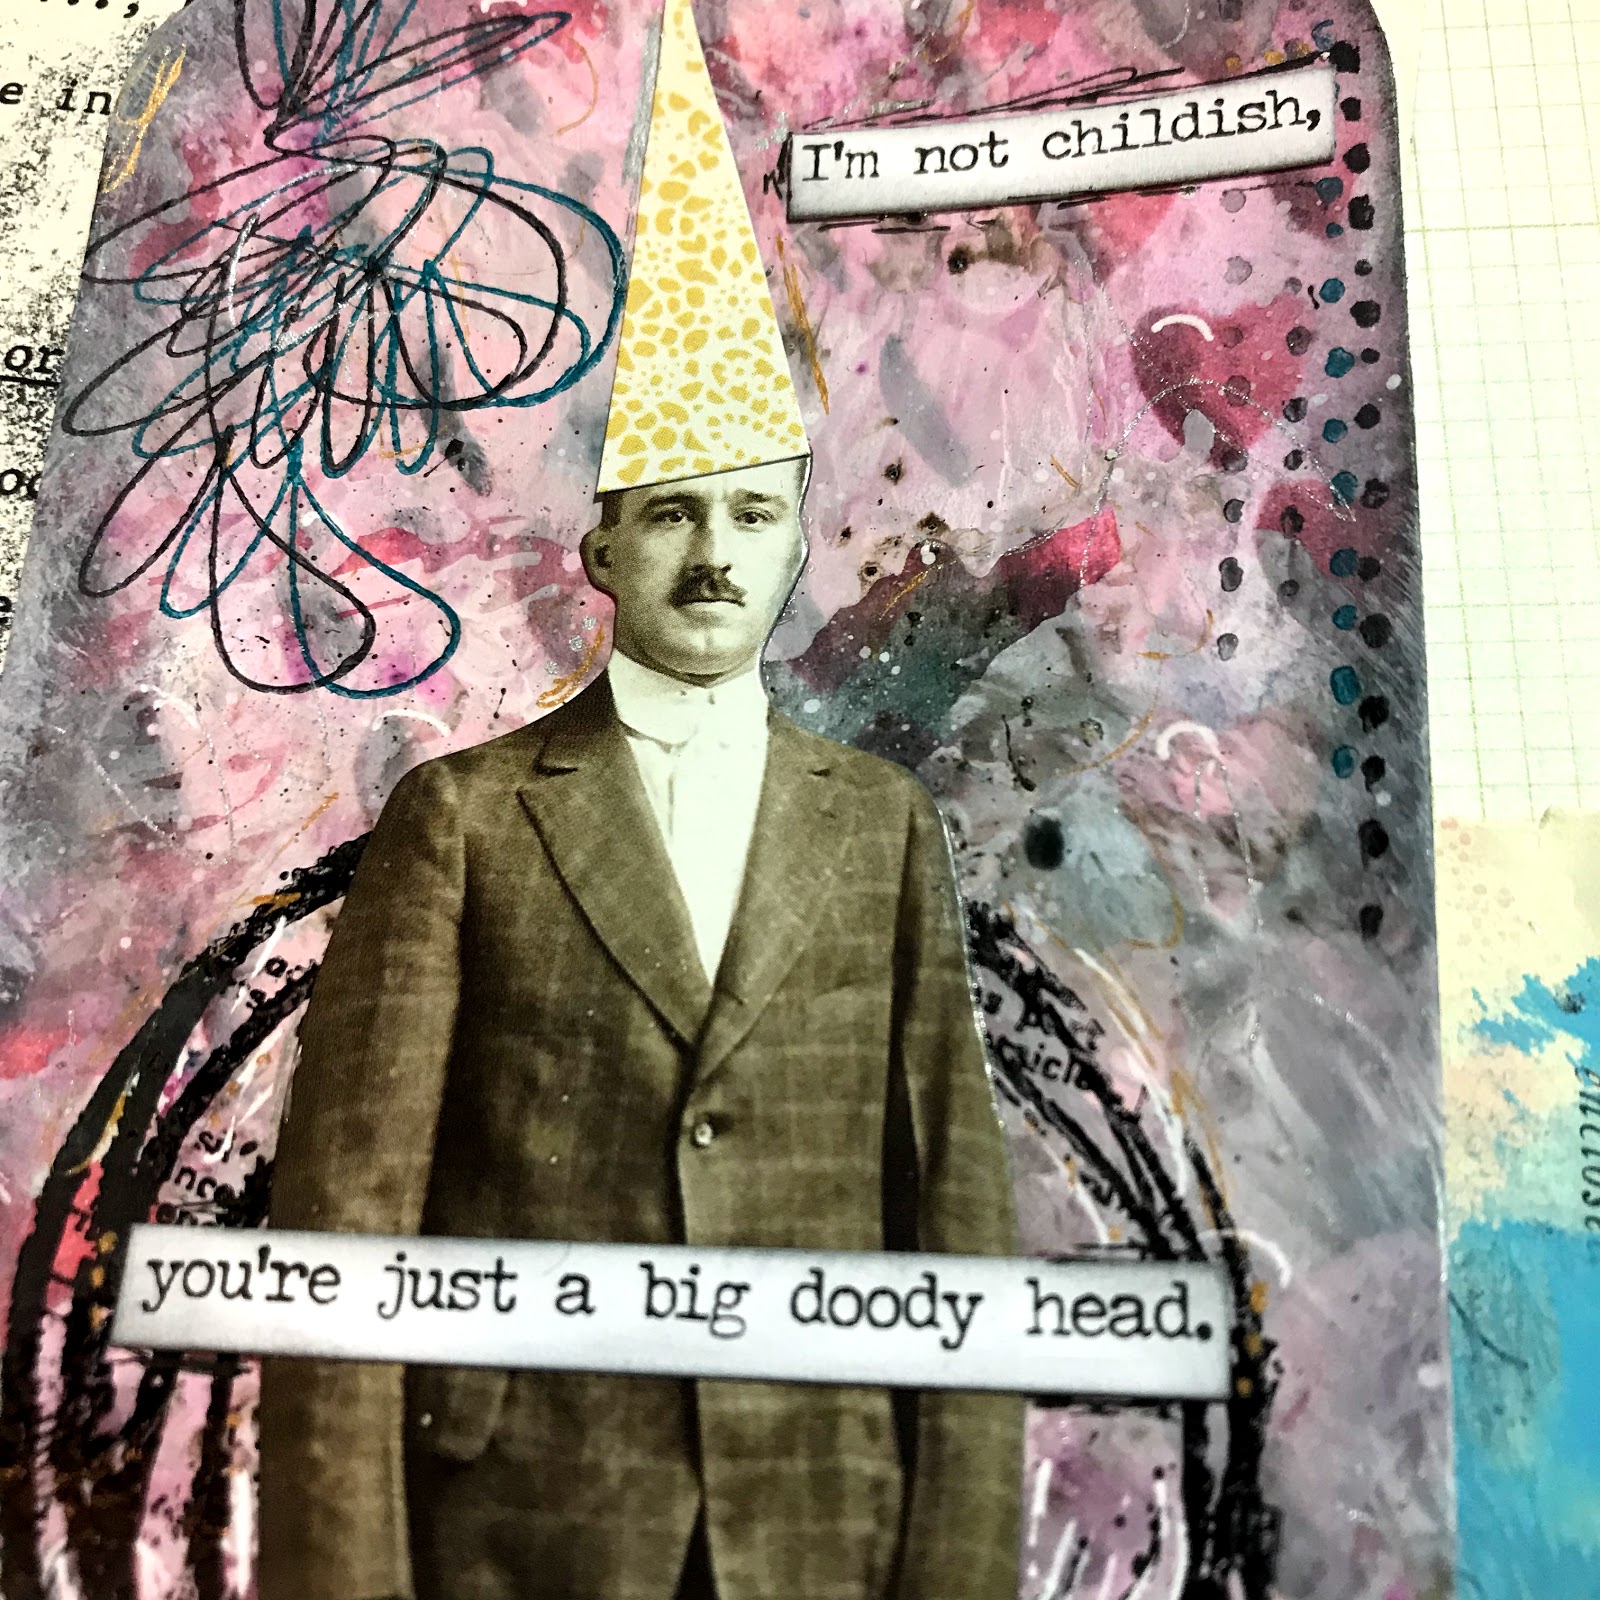
I haven't really taken much time to make projects just for me lately.  I took a day and decided to do just that.  While at Creativation I took a class with ScrapCosy that was hosted by PaperArtsy.  We got to play with Infusions.  They are similar to Magenta's Nuance Powders or Brushos, but they have walnut crystals in them so they make really cool effects.  When I got home I pulled out my Nuance Powders and the couple Infusions I got during class to play(I have since ordered more).  I wound up making a trio of tags using this paper doll.  
For this first tag I put white paint on my craft sheet and added some powder to the paint.  Just a teny shake of the bottle.  Then I spritzed with water and watched the color bloom.  I plopped my tag into the paint and lifted.  I repeated until my tag was covered.  Once it was dry I used a Tim Holtz Stencil to add some hearts to the background using Picked Raspberry Distress Ink.  I added a shadow by using a Wendy Vecchi mini detailing tool and Black Soot Distress Ink.  A white gel pen added an extra pop to some of the hearts.  
I used the new Tim Holtz Mini Media Marks(CMS364) to add some detail around the edge of the tag.  To stamp them I used a new Tsukineko StazOn Pigment Pad.  I am in love with the super bold colors.  The circle behind the doll is from the Dina Wakley Weird is Good Stamp set.  I glued him down and added a party hat.  The final touch was the snarky sentiment.  
The second tag was made in the same basic manner for the background.  I did add more nuance powders to my glass mat and just spritz with water to get the black/gray splatters.  I used the same stamp set from Tim Holtz and the tsukineko ink.  
This dude has seen some things.  He was actually just hanging out on my desk and was a victim of over splatter from several previous projects.  I colored his jacket using the tsukineko ink and a qtip.  It left him with a super bold jacket and it would not rub off at all.  I cut a slit in the doll and added a teeny pocket square made from vintage seam binding.  using the Tim Holtz tiny attacher I added a bit more of the seam binding to the top of the tag.  
I love the snarky sentiment this guy got.  I think it works perfectly for this paint splattered gentleman.
The final gentleman has found himself in a fine mess.  This tag used leftover mess from the Nuance and Infusions.  I just ran my tag through and left it to dry.  I added color using Distress Inks in Picked Raspberry, Cracked Pistachio, Hickory Smoke, and Black Soot.  I used a new stamp set from Seth Apter and Paper Artsy for the circles.   The cross hatching and arrows are the Tim Holtz set mentioned above.  
I used the Tim Holtz Craft Thread to add detail by just hand stitching randomly on the tag.  I colored his shirt using Cracked Pistachio Oxide ink.  It kind of looks like he's sporting a turtleneck.  You can see the detail I added with gel pens here too.  Each tag has scribbles of white, black, gold, and silver.

I hope you like my crazy mess dudes.  Have you ever played with the Infusions? Do you have an favorite techniques?   

Jess


Disclaimer Notice

I've received products/compensation as part of the Gypsy Soul Laser Cuts Design teams. My projects, however, are 100% my own.