Showing posts with label snark. Show all posts

Monday, May 20, 2019

The house that snark built

This is the house that snark built.  
It's a bittersweet day for me today.  After three years with the Gypsy Soul Laser Cuts team today will be my last post.  I have loved every second I have been on the team and promise I won't be gone forever.  So, for this post I decided to go out the way I came in- full of snark.  

This project was made with the House Oddities box.  This kit includes the box and all the little houses inside.  It's pretty amazing.  
I started with two sheets of watercolor paper and used Distress Oxide Sprays to color them.  The first sheet has Broken China, Wilted Violet, Pumice Stone, and Cracked Pistachio Oxides.  After the initial layer of Oxides I added some PaperArtsy Infusions in Rocky Road. I areas that were still exposed got hit with Distress Ink in the corresponding colors.  
The second sheet was made using Picked Raspberry, Peacock Feathers, and Squeezed Lemonade Oxide Sprays.  I added Infusions in Violeta and filled in the blanks with Distress Ink.
The houses are hinged together using plain white sports tape.  I cut a small piece and put it on the front of the house.  A second piece went on the back so there was no stick exposed tape.  I knew I wasn't going to make the pages too thick with embellishments.  If you want to recreate this house and know you will have chunky pages just make the hinges longer.  The hinges are painted with colors that correspond to the pages.  
I cut the watercolor paper to fit each house and then stamped up the backgrounds.  I used several of Tim Holtz Stampers Anonymous sets (CMS364, CMS341, CMS328,CMS302, CMS294,CMS261, CMS187, CMS172,CMS083, and CMS081) for this.  Some of the backgrounds were stamped using Archival ink in Hydrangea and the rest were stamped using Staz-on Pigment inks.  
Part of the stamping was done before the embellishments were added.  After the paperdolls, sentiments, and other bits were glued down I added a bit more stamping. 
Once all the stamping was done I went back in with various gel pens to add doodles and scribbles.  
So this is what the front row of houses looks like all stretched out.  
You can see I added bits to some of the pages.  The little crown, chain, party hats, and coin add just a bit of bulk but I took that into account when making the hinges. 
 Here are the back pages of the house.
 Now these could be the front.  It just depends on how you fold them up.
 I had so much fun picking out the paperdolls and the snarky sentiments for each.
The exterior is quite simple to put together. 
I painted the exterior black and the interior with Dina Wakley's Lime.  Once it was all dry I used Beacon 3 in 1 glue to stick it all together.  Don't glue the front to the box or you won't be able to get inside! I gave the exterior a spritz of gold ink spray just so it wasn't flat black.

 The interior was splattered with the same color paints I used to color the hinges in the book. You can see the little houses all fit right inside the box.  
You can hinge the door to the houses, so when you pull the door open all the houses come right out.  I decided to do mine a bit differently and I actually used Tim Holtz hinges to hinge the door to the box.  The door panels were covered using the same background paper that covers the houses inside. 
Here you can see the top of the box was stuck to the door using a layer of foam tape.  The door is hinged to the side of the box using the metal hinges.  I used an awl and then was able to use brads to attach the hinges.  Please pardon my hand in here, the wooden base I use to take my photos is a bit warped so sometimes projects want to fall over.  
The final touches were added by spraying the finials with Oxide sprays in Peacock Feathers and Cracked Pistachio.  They got splattered with the paint too.  The baseboard doll was edged with gold(and the entire backside is painted gold too).  He got his snarky sentiment and was glued to the box using super glue.  
I hope you enjoyed my project today.  I had so much fun making it! 
Happy Crafting,
Jess


Friday, February 15, 2019

Not qualified

Hi Everyone,
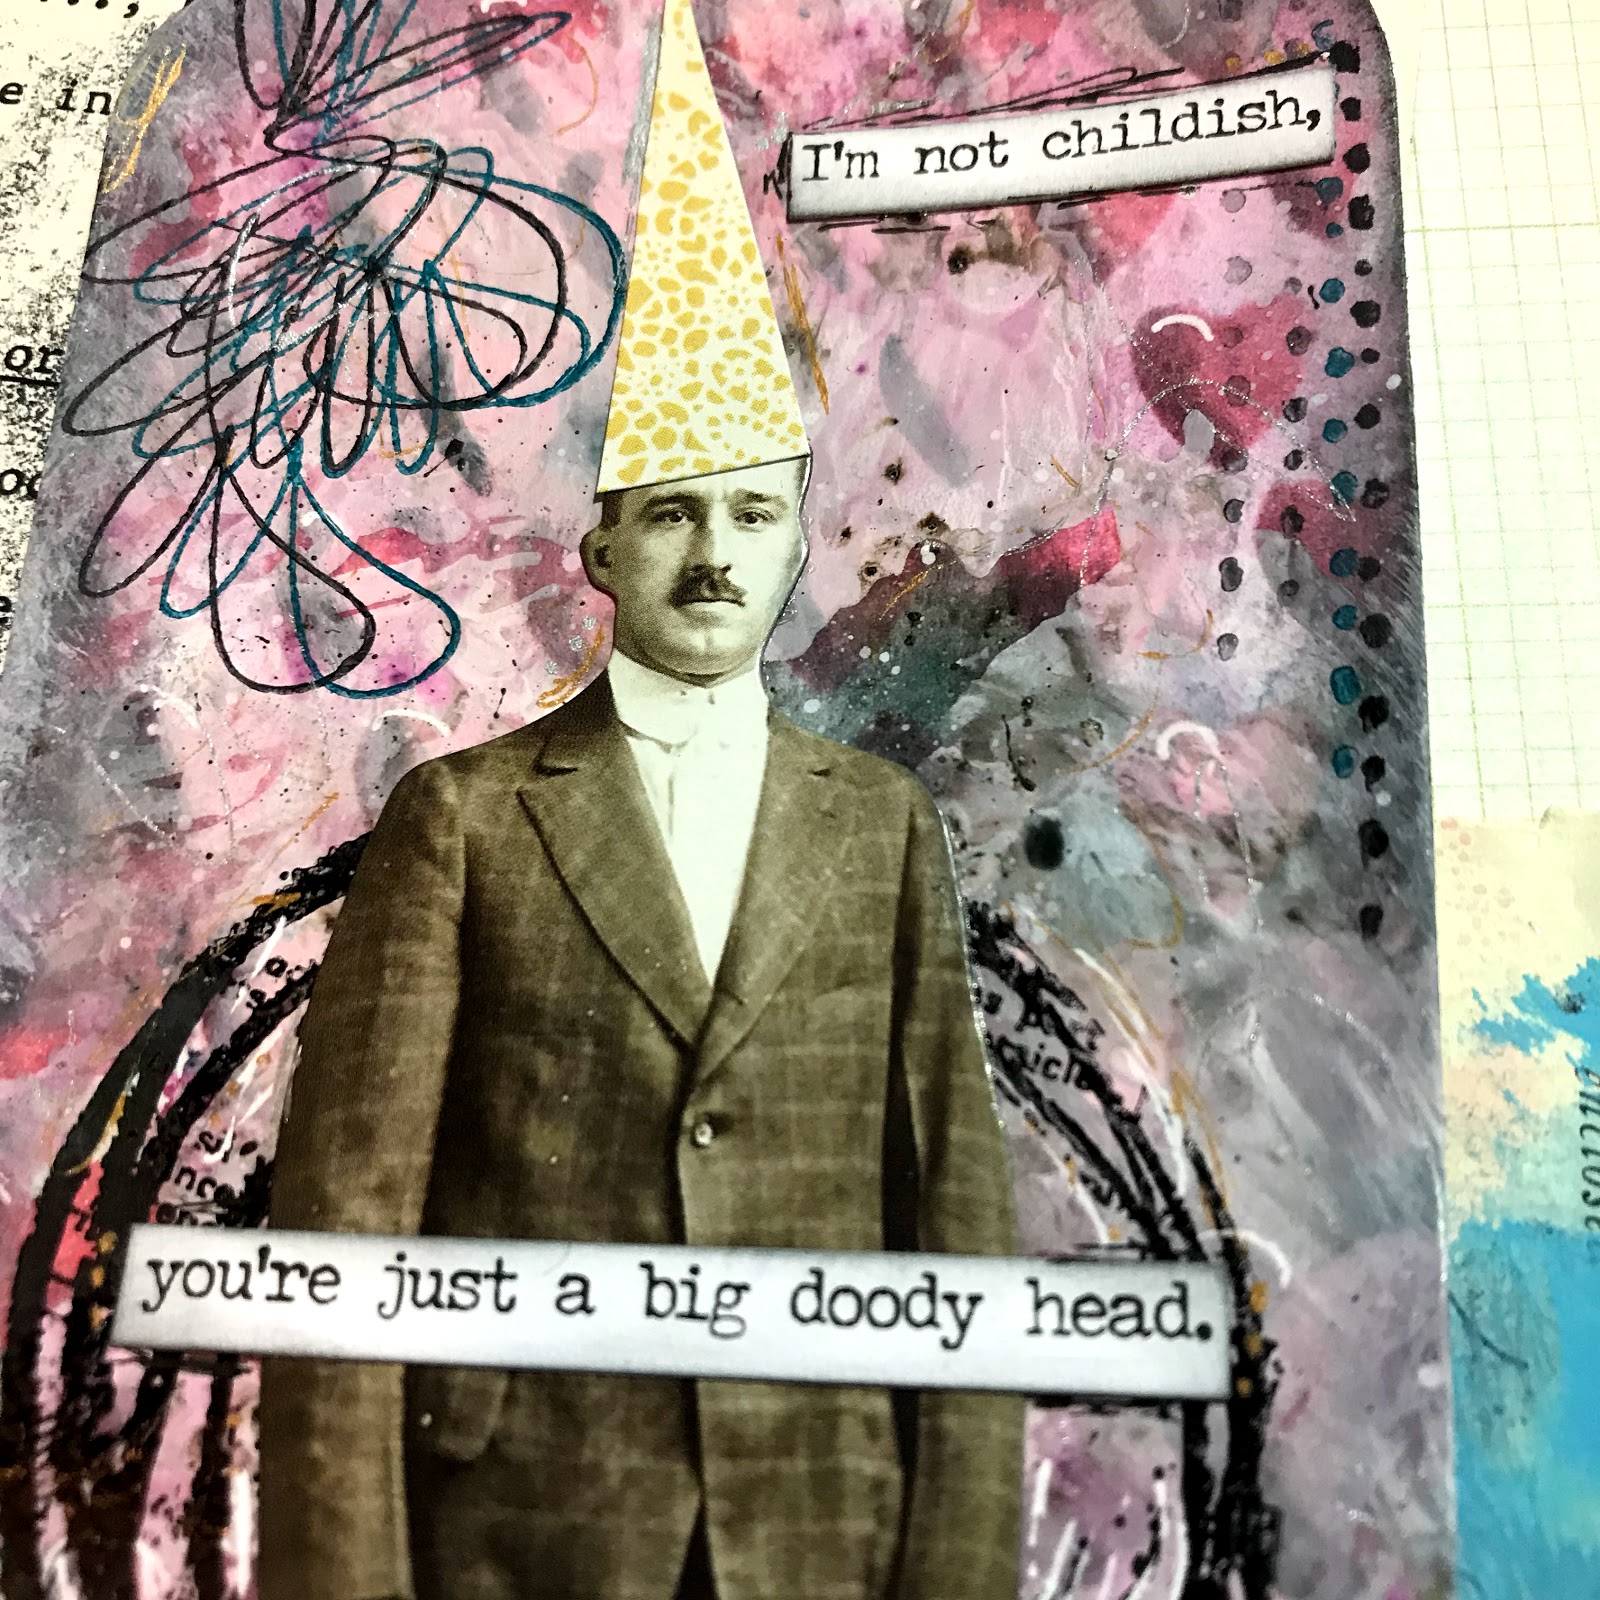
I haven't really taken much time to make projects just for me lately.  I took a day and decided to do just that.  While at Creativation I took a class with ScrapCosy that was hosted by PaperArtsy.  We got to play with Infusions.  They are similar to Magenta's Nuance Powders or Brushos, but they have walnut crystals in them so they make really cool effects.  When I got home I pulled out my Nuance Powders and the couple Infusions I got during class to play(I have since ordered more).  I wound up making a trio of tags using this paper doll.  
For this first tag I put white paint on my craft sheet and added some powder to the paint.  Just a teny shake of the bottle.  Then I spritzed with water and watched the color bloom.  I plopped my tag into the paint and lifted.  I repeated until my tag was covered.  Once it was dry I used a Tim Holtz Stencil to add some hearts to the background using Picked Raspberry Distress Ink.  I added a shadow by using a Wendy Vecchi mini detailing tool and Black Soot Distress Ink.  A white gel pen added an extra pop to some of the hearts.  
I used the new Tim Holtz Mini Media Marks(CMS364) to add some detail around the edge of the tag.  To stamp them I used a new Tsukineko StazOn Pigment Pad.  I am in love with the super bold colors.  The circle behind the doll is from the Dina Wakley Weird is Good Stamp set.  I glued him down and added a party hat.  The final touch was the snarky sentiment.  
The second tag was made in the same basic manner for the background.  I did add more nuance powders to my glass mat and just spritz with water to get the black/gray splatters.  I used the same stamp set from Tim Holtz and the tsukineko ink.  
This dude has seen some things.  He was actually just hanging out on my desk and was a victim of over splatter from several previous projects.  I colored his jacket using the tsukineko ink and a qtip.  It left him with a super bold jacket and it would not rub off at all.  I cut a slit in the doll and added a teeny pocket square made from vintage seam binding.  using the Tim Holtz tiny attacher I added a bit more of the seam binding to the top of the tag.  
I love the snarky sentiment this guy got.  I think it works perfectly for this paint splattered gentleman.
The final gentleman has found himself in a fine mess.  This tag used leftover mess from the Nuance and Infusions.  I just ran my tag through and left it to dry.  I added color using Distress Inks in Picked Raspberry, Cracked Pistachio, Hickory Smoke, and Black Soot.  I used a new stamp set from Seth Apter and Paper Artsy for the circles.   The cross hatching and arrows are the Tim Holtz set mentioned above.  
I used the Tim Holtz Craft Thread to add detail by just hand stitching randomly on the tag.  I colored his shirt using Cracked Pistachio Oxide ink.  It kind of looks like he's sporting a turtleneck.  You can see the detail I added with gel pens here too.  Each tag has scribbles of white, black, gold, and silver.

I hope you like my crazy mess dudes.  Have you ever played with the Infusions? Do you have an favorite techniques?   

Jess


Saturday, May 12, 2018

Drinks with my girls


Hi Everyone, 
I have a fun tropical tag for you.  I am sharing this on the Gypsy Soul Laser Cuts blog today. I used one of the tags from the  Extra Large Tag set for the background here.  I created this tag to share as part of a new stamp release for Blank Page Muse Stamps.  One of the Gypsy Soul Laser Cuts Design Team Alumni drew all of these stamps.  Pam Bray is a woman that wears many hats!

Cover your Extra Large Tag with cardstock and stamp with Distress Ink in various shades of green.  I used stamps from the Blank Page Muses Tropical Dreams set.  Once your leaves are stamped cover the entire tag with Antique Linen Distress Ink and spritz with water. 
Stamp the hibiscus flower using Stampin Up ink in tip top taupe. This completes the background of your piece.
Paint the Flowers using Folk Art paint in color shift Green Flash and the flower centers in Distress Paint in Abandoned Coral and Picked Raspberry.  
I doubled up the small flower and one of the large flowers on the top of the tag.  The top flower was stamped with the Pineapple stamp to add some texture.  

The other large flower helps ground the girls.  
The big hats and flowers called for big drinks too! I think most of you know by now that I am pretty snarky and this sentiment was perfect for this tag.  I did a bit of scribbling using gel pens and paint on the tag to complete it.  
I think this would be a really fun gift for your best friend! I hope you're inspired to create a tag too.
Jess

Simon Says Stamp Ombre Challenge(their drinks are ombre)

Tuesday, April 24, 2018

New Stamps from Blank Page Muse Part One

Hi Everyone,
I am super excited to be showing you the new stamps from the Blank Page Muse. 
My first two projects feature new stamps from Pam Bray.  Pam's new set is called Art Journaling Mixed Media Stamps Set 1. 
How cute is this background?! 

I love the background on this one too.  It looks like birch bark to me.  

Now, I was a bad crafter and didn't take  photos of the process.  I can walk you through how I created them though.  
This is the only process photo I shot.  I used the Sketchy Doodle Bricks to create the background.  I love this stamp.  I think it's my favorite in the set.  It has a very 1950's vibe.  I used Jet Black Archival Ink and stamped it filling my tag. 
I blended Squeezed Lemonade, Picked Raspberry, and Twisted Citron Distress Inks on the background using my blending tool.  A pop of Black Soot on the edges finished it out.  
I added a paper doll from Tim Holtz.  I gave him some funky pants and a bow tie using patterned paper.   There are two flowers in the set.   Using the flower that has the stem, I stamped it twice on white shrink plastic using the Jet Black Archival. I colored them using Distress Crayons in Twisted Citron and Picked Raspberry.  I used my heat gun to shrink the flowers and then added some stickles to the center.  
A bit of twine made pup's leash.  A tiny scrap of paper created his collar(his collar matches his owner's pants).  
Snarky chit chat finishes out this tag.  

The second tag came together really quickly.  
I used the Corrugated Stripe Pattern to create the background.  I stamped it using Jet Black Archival.  Then to color it I used Hickory Smoke, Old Paper, and Antique Linen.  You can also see the stickers from Tim Holtz here and I used gel pen for a pop of bling. 

I stamped the Doodle Leaf Vine Border several times using Jet Black Archival.  I then put some ink from my pads onto my glass mat and using my water brush added color to the leaves.  I used Crushed Olive, Lucky Clover, and Mowed Lawn.    
I fussy cut them out and placed them on the tag.  Once they were glued down I added some vintage flowers and some flowers from Little Birdie Crafts.  
I used a stablio pencil for some shadows and gold gel pen to pick up on the gold in the stickers. 

I hope you check out the new set.  For a limited time it is being offered for only $14.99!!! And it is being offered as the full set or you can buy them individually.  The price is better if you order the whole set(you're going to want the whole set).  
Pop back tomorrow to see another new set!

Happy Crafting!
Jess


Monday, March 26, 2018

Which way do I turn?


Hi Everyone,
Are you directionally challenged like I am? I seriously can get lost in a paper bag. 
Check out my tutorial on how to create this card over on the Blank Page Muse Blog today.
Jess

Monday, March 19, 2018

Try to Cooperate

Hi Everyone,
Back with my second post of the month for Gypsy Soul Laser Cuts. 

The base of this project is a small Tim Holtz Etcetera tag and the Botanical Journaling Blocks fit on them perfectly! 
 They make a great background piece and really create a nice focal point.  This is the medium sized block and there are three in the set.  
I knew I wanted to use this image and I put a Mini Petal Corner crown on her head.  The crown has been embossed using Seth Apter's Baked Texture powder in Ancient Amber.  I added a brad to the center for her jewel.   
The base tag was covered with Tim Holtz Wallflower paper and then splattered with various Distress paints and inks. 
The journaling block was covered with gesso and then painted using various shades of green and brown Distress Paint.  The spaces between the stitches were inked using a gold gel pen.  

The edge of the frame was inked using Distress Ink in Peeled Paint and then Distress Crayon in Black Soot was used to darken the edge and draw your eye in toward the center. 
The Layered Frame Bella Oval was placed on top of the journaling block.  This frame has a front and a back, but for this project I just used the top piece.  This piece was left completely raw.  I really liked how it picked up the browns in the background paper.  
You can see I played around with the placement quite a bit on this piece.  Things got moved up, down, and all around  
This is what I landed on for final placement.  I used foam tape to attach her since the chipboard frame is directly behind her.  I didn't want her to wind up with a big bump in the middle of her body. 
Flowers were added to the top.

The snarky chit chat sentiment was placed in her lap and a vintage brass token was added to the bottom corner to balance the piece.  

Happy Crafting!

Disclaimer Notice

I've received products/compensation as part of the Gypsy Soul Laser Cuts Design teams. My projects, however, are 100% my own.