Showing posts with label Seth Apter. Show all posts

Monday, April 1, 2019

Spring Cleaning

Hi Everyone,
I'm up on the Gypsy Soul Laser Cuts Blog today.

Well it's time to do some spring cleaning and that includes my desk.  I try to be a neat crafter, but my desk always ends up looking like a large bomb exploded in the general vicinity.  For today's project I used only items that were on my desk or within reach of my desk.  I will admit some of these are mop up tags, so I don't know exactly what is on there.

Adventure is out there tag-

The butterfly man background was made using Vintage Photo Oxide Spray and then I added Hickory Smoke ink through a stencil(THS091).  I shifted the stencil and added Peeled Paint Oxide Ink.  I splatted on some Black Soot Distress Paint and then stamped the flourish(CMS070) in  Ground Espresso Archival Ink.  The edges got a bit of Vintage Photo Distress Crayon for shadow.

The paper doll was inked up using Tsukineko Inks.  His buttons and watch chain were colored using gel pens.  Get got a pair of wings and was glued to the tag.  I had a snippet of the mini provincial impresslit left so I popped that in the top corner.  Chic chat words were inked up using Peacock Feathers Distress Ink and glued down.

A snippet of the Meadow Flowers was on my desk so I added a couple layers of gesso and once that was dry I added PaperArtsy Infusions in The Sage to the stems.  I added grit paste to the flowers and used Peacock Feathers Distress Ink to color them.  There was some leftover Distress Crayon on my desk from edging the tag and I used that to dirty up the flowers.  Once that was glued down, I added detail using gel pens.

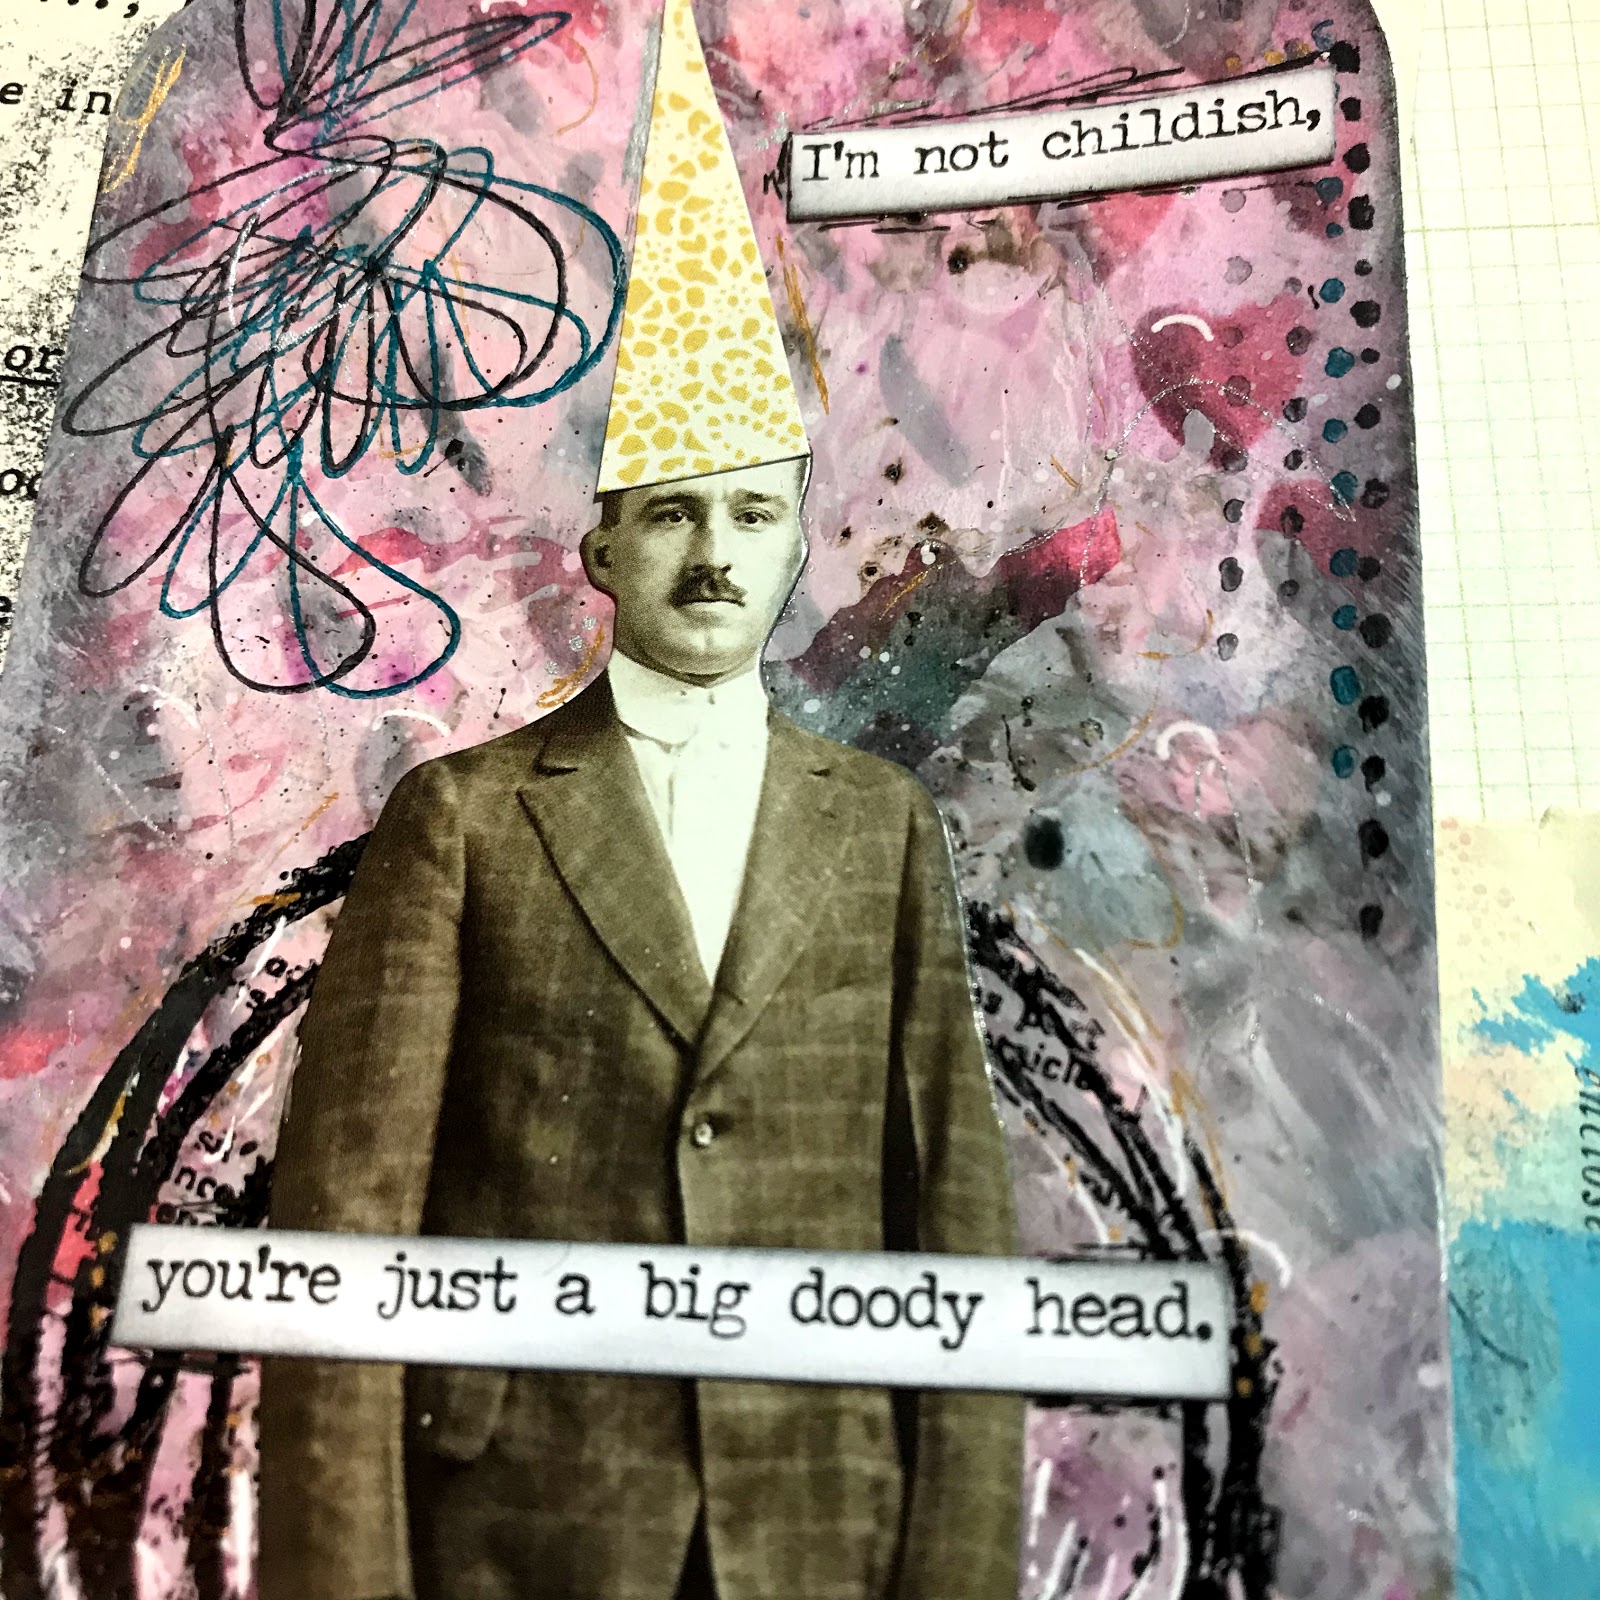
Eccentric, but very estimable gentleman-

For the eccentric, but very estimable gentleman tag I used a mop up tag that had some blues and purples on it.  I added some leftover rust from when I was rusting up bits and some Seth Apter Stamps(Eclectica3). 
The circles are from the Mixed Media Fragments 1 Small.  I rusted them using PaperArtsy's Rusting Powder and then added Verday Paint from 10 Second Studios for the oxidized brass bits.  I cut the circles into three segments and attached them to the card using glue.  I added Tim Holtz Hardware heads to make them appear to be bolted down. I added alcohol ink in Patina, Mushroom, and Coffee to the hardware heads.  Then I popped on a bit of Distress Crayon in Cracked Pistachio for a bit more dimension.

I tied a little brass heart to his wrist and glued him down.

 Clipping stickers make for really fun stories and gel pens add the final bits to this tag.

The Proprietor of Ideas-

This little guy gets stuck in all kind of things.  Today I popped him in a lightbulb from the Steampunk Lightbulb Set.  The lightbulb was painted white and then the bulb portion was given a layer of DecoArt Crackle Glaze.  Once the glaze was dry I added Distress Crayon in Black Soot and Brushed Pewter.  A thin piece of acetate was added behind the bulb and colored with mushroom alcohol ink.  The tiny crown on his head will be coming soon to the GSL cuts store(I cannot wait for you to see all of these teeny crowns).
The base of the bulb was painted with Tarnished Brass Distress Paint and then pounced with Mushroom, Latte, and Coffee Alcohol Inks. I snuck in another hardware head here and a story stick.
This tag was made by using Oxide Spray on my gel plate.  It makes such gorgeous and dreamy backgrounds.  I used a Tim stencil(THS051) for the words and numbers.  I used Hickory Smoke and Black Soot Distress Ink for the coloring.  White paint is splattered all over the back, Perfect Pearl spray, and gel pens finish the background.
The main title is from the Tim Holtz Noble Gent set(CMS301).  That was stamped in Black Soot Archival.  The little halo around the bulb is the same set.  I used Dina Wakley Paint in Ancient and Gilt to stamp out the halo.  Be sure to clean paint off your rubber stamps right away!   


Do you save all of your little bits to make projects with later or do you toss out the scraps?

Jess

Friday, February 15, 2019

Not qualified

Hi Everyone,
I haven't really taken much time to make projects just for me lately.  I took a day and decided to do just that.  While at Creativation I took a class with ScrapCosy that was hosted by PaperArtsy.  We got to play with Infusions.  They are similar to Magenta's Nuance Powders or Brushos, but they have walnut crystals in them so they make really cool effects.  When I got home I pulled out my Nuance Powders and the couple Infusions I got during class to play(I have since ordered more).  I wound up making a trio of tags using this paper doll.  
For this first tag I put white paint on my craft sheet and added some powder to the paint.  Just a teny shake of the bottle.  Then I spritzed with water and watched the color bloom.  I plopped my tag into the paint and lifted.  I repeated until my tag was covered.  Once it was dry I used a Tim Holtz Stencil to add some hearts to the background using Picked Raspberry Distress Ink.  I added a shadow by using a Wendy Vecchi mini detailing tool and Black Soot Distress Ink.  A white gel pen added an extra pop to some of the hearts.  
I used the new Tim Holtz Mini Media Marks(CMS364) to add some detail around the edge of the tag.  To stamp them I used a new Tsukineko StazOn Pigment Pad.  I am in love with the super bold colors.  The circle behind the doll is from the Dina Wakley Weird is Good Stamp set.  I glued him down and added a party hat.  The final touch was the snarky sentiment.  
The second tag was made in the same basic manner for the background.  I did add more nuance powders to my glass mat and just spritz with water to get the black/gray splatters.  I used the same stamp set from Tim Holtz and the tsukineko ink.  
This dude has seen some things.  He was actually just hanging out on my desk and was a victim of over splatter from several previous projects.  I colored his jacket using the tsukineko ink and a qtip.  It left him with a super bold jacket and it would not rub off at all.  I cut a slit in the doll and added a teeny pocket square made from vintage seam binding.  using the Tim Holtz tiny attacher I added a bit more of the seam binding to the top of the tag.  
I love the snarky sentiment this guy got.  I think it works perfectly for this paint splattered gentleman.
The final gentleman has found himself in a fine mess.  This tag used leftover mess from the Nuance and Infusions.  I just ran my tag through and left it to dry.  I added color using Distress Inks in Picked Raspberry, Cracked Pistachio, Hickory Smoke, and Black Soot.  I used a new stamp set from Seth Apter and Paper Artsy for the circles.   The cross hatching and arrows are the Tim Holtz set mentioned above.  
I used the Tim Holtz Craft Thread to add detail by just hand stitching randomly on the tag.  I colored his shirt using Cracked Pistachio Oxide ink.  It kind of looks like he's sporting a turtleneck.  You can see the detail I added with gel pens here too.  Each tag has scribbles of white, black, gold, and silver.

I hope you like my crazy mess dudes.  Have you ever played with the Infusions? Do you have an favorite techniques?   

Jess


Tuesday, May 29, 2018

The Traveling Salesman

Hi Everyone,
I made this a couple weeks ago, but hadn't had a chance to blog it yet.
Meet the Traveling Salesman.
I used a mixture of new and vintage pieces here.


It was nice to create without a deadline or project in mind.


Fiddling with the details is always the best part. 

Even the edges got a rusty makeover. 

I hope you like him as much as I do. 
Jess


Monday, April 16, 2018

Beautiful Girl Pennant

Hi Everyone,
I am back with my second post of the month for Gypsy Soul Laser Cuts.  Today I have a pennant for you. 

I love this technique for making art pennants.  You can make really stunning backgrounds. 
Start by adhering tissue wrap to a canvas pennant using Pellon EZ Steam II.  Once the tissue is firmly attached trim it to size. 
Color your pennant using Distress inks, paints, and crayons.  Emboss the edge in gold.  
Yo can see there is a lot of detail on here.  Lots of inky layers and flicks of paint too. 
Paint your mini journaling block with a cream color and let dry.  Add a layer of gesso to your Layered Bella Frame.  Emboss your Medium Fairy using Oil Rubbed Bronze from Emerald Creek. 
Use Distress Crayons to color your journaling block.  
Emboss the back of the Layered Bella Frame using Ancient Amber from Seth Apter. Color the front using Distress Crayons.  The finished frame has white gel pen around the edge to look like stitching. 
Adhere your frame to the journaling block. Use a bit of foam tape to pop the fairy in the frame. 
Glue the whole piece to the pennant.  
Add your Big Chat stickers and using a Stabilo pencil outline the words a bit.  Add dots with a white gel pen.  
Use a Distress Marker to color the edge of vintage seam binding and wet to make color feather and wrinkle the binding.  Run the seam binding through the slot in the pennant and create your hanger.  Add a large fluffy bow made out of the seam binding.  
I hope you enjoyed the tutorial!
Jess

Tuesday, April 10, 2018

Black, white, and blue all over

HI Everyone,
I know my post title sounds like a bruise, but no no one was hurt making this card! Our current challenge over at the Blank Page Muse is using black, white, and one color. 
I started this card by using my stamp platform to stamp the Vintage Lady with wings.  Using the platform to stamp her allowed me to make sure I got a really crisp image since she has a ton of detail. I stamped her using Jet Black archival and colored her in using a combination of markers, inks and crayons. I stamped a second image to play with color choices and combinations. 
You can see in the image that wound up on the card I used multiple colors on the wings and darker colors on her skirt.
For the layer directly behind her, I stamped the Floral Distressed Vintage Medallion and covered it with a blue embossing powder.  I used a textured paper and a light hand when stamping.  To stamp the medallion I just used the unmounted rubber and rolled it directly onto my cardstock.  I often don't use a block or platform when I want an imperfect or loose image.  
For the background, I used black textured cardstock and the Chain link Pattern Background stamp. I just stamped around the edges and then used a black and white embossing powder. 
Before I added the lady to the card I did some messy stitching around the edges of the card using black thread. I layered up the papers and added a very thin strip of a darker blue paper directly behind the bird cage lady. 
Using black and white pens I added some marks and inked the edges just a bit. 
I hope you join us for the challenge! Don't forget there are prizes to be won if you play along.
Jess


Monday, March 19, 2018

Try to Cooperate

Hi Everyone,
Back with my second post of the month for Gypsy Soul Laser Cuts

The base of this project is a small Tim Holtz Etcetera tag and the Botanical Journaling Blocks fit on them perfectly! 
 They make a great background piece and really create a nice focal point.  This is the medium sized block and there are three in the set.  
I knew I wanted to use this image and I put a Mini Petal Corner crown on her head.  The crown has been embossed using Seth Apter's Baked Texture powder in Ancient Amber.  I added a brad to the center for her jewel.   
The base tag was covered with Tim Holtz Wallflower paper and then splattered with various Distress paints and inks. 
The journaling block was covered with gesso and then painted using various shades of green and brown Distress Paint.  The spaces between the stitches were inked using a gold gel pen.  

The edge of the frame was inked using Distress Ink in Peeled Paint and then Distress Crayon in Black Soot was used to darken the edge and draw your eye in toward the center. 
The Layered Frame Bella Oval was placed on top of the journaling block.  This frame has a front and a back, but for this project I just used the top piece.  This piece was left completely raw.  I really liked how it picked up the browns in the background paper.  
You can see I played around with the placement quite a bit on this piece.  Things got moved up, down, and all around  
This is what I landed on for final placement.  I used foam tape to attach her since the chipboard frame is directly behind her.  I didn't want her to wind up with a big bump in the middle of her body. 
Flowers were added to the top.

The snarky chit chat sentiment was placed in her lap and a vintage brass token was added to the bottom corner to balance the piece.  

Happy Crafting!

Disclaimer Notice

I've received products/compensation as part of the Gypsy Soul Laser Cuts Design teams. My projects, however, are 100% my own.