Monday, February 18, 2019

Wear it again tomorrow


Hi Guys,
I'm up on the Gypsy Soul Laser Cuts blog today.

I've been in a bit of a snarky mood lately and when I saw this lady I knew she needed to be used for a project.

I started by taking my Laurel Frame and covering it with a layer of gesso using a foam brush.  Using the same brush I added some Dina Wakley Paint.  I didn't clean the brush between uses so there was still gesso in there creating different shades of blue.
Using the script stamp from the Tim Holtz Entomology Set(CMS328). I stamped across the frame in Hickory Smoke Oxide Ink.  I sealed the ink using Micro Glaze.
This photo was cut to fit inside the frame.
For the back panel I used a 5x7 canvas board and loosely painted it using the paints pictured.  I added some stamped bits from the Time Holtz Mini Media Marks(CMS364).  These were done with Archival Ink in Black Soot and Hydrangea.  Before I finished my project I added in a bit of Victorian Velvet Distress Paint to pick up the pink you see in the background piece.  
To mount the photo I used a piece of humble cardboard.  Peel parts of the top layer to expose the corrugate and then cover with gesso.  I did a couple thin layers to cover all of the brown.  I added some collage paper to the bits that still had the full cardboard using collage medium.  To color the cardboard and collage paper I used Distress Crayon(Victorian Velvet, Cracked Pistachio, Worn Lipstick, and Gathered Twigs) and water to give it a dreamy hazy look. Pearl details were added to the frame and the snarky sentiment. 
To complete the piece I painted a set of  Mini Petal Corners using Dina Wakley Ancient Paint.  
 A couple close ups of the finished details. I ended up going back with Jet Black Archival ink and restamping the script on the frame.  I added a bit of DIstress Crayon in Gathered Twigs to dinge it up.  There is a teeny bit of the Dina paint in Ancient on there too.
I love the grungy look the cardboard gives. 

Layers and details.  
I hope you like her and take her sage advice!
Jess


Friday, February 15, 2019

Not qualified

Hi Everyone,
I haven't really taken much time to make projects just for me lately.  I took a day and decided to do just that.  While at Creativation I took a class with ScrapCosy that was hosted by PaperArtsy.  We got to play with Infusions.  They are similar to Magenta's Nuance Powders or Brushos, but they have walnut crystals in them so they make really cool effects.  When I got home I pulled out my Nuance Powders and the couple Infusions I got during class to play(I have since ordered more).  I wound up making a trio of tags using this paper doll.  
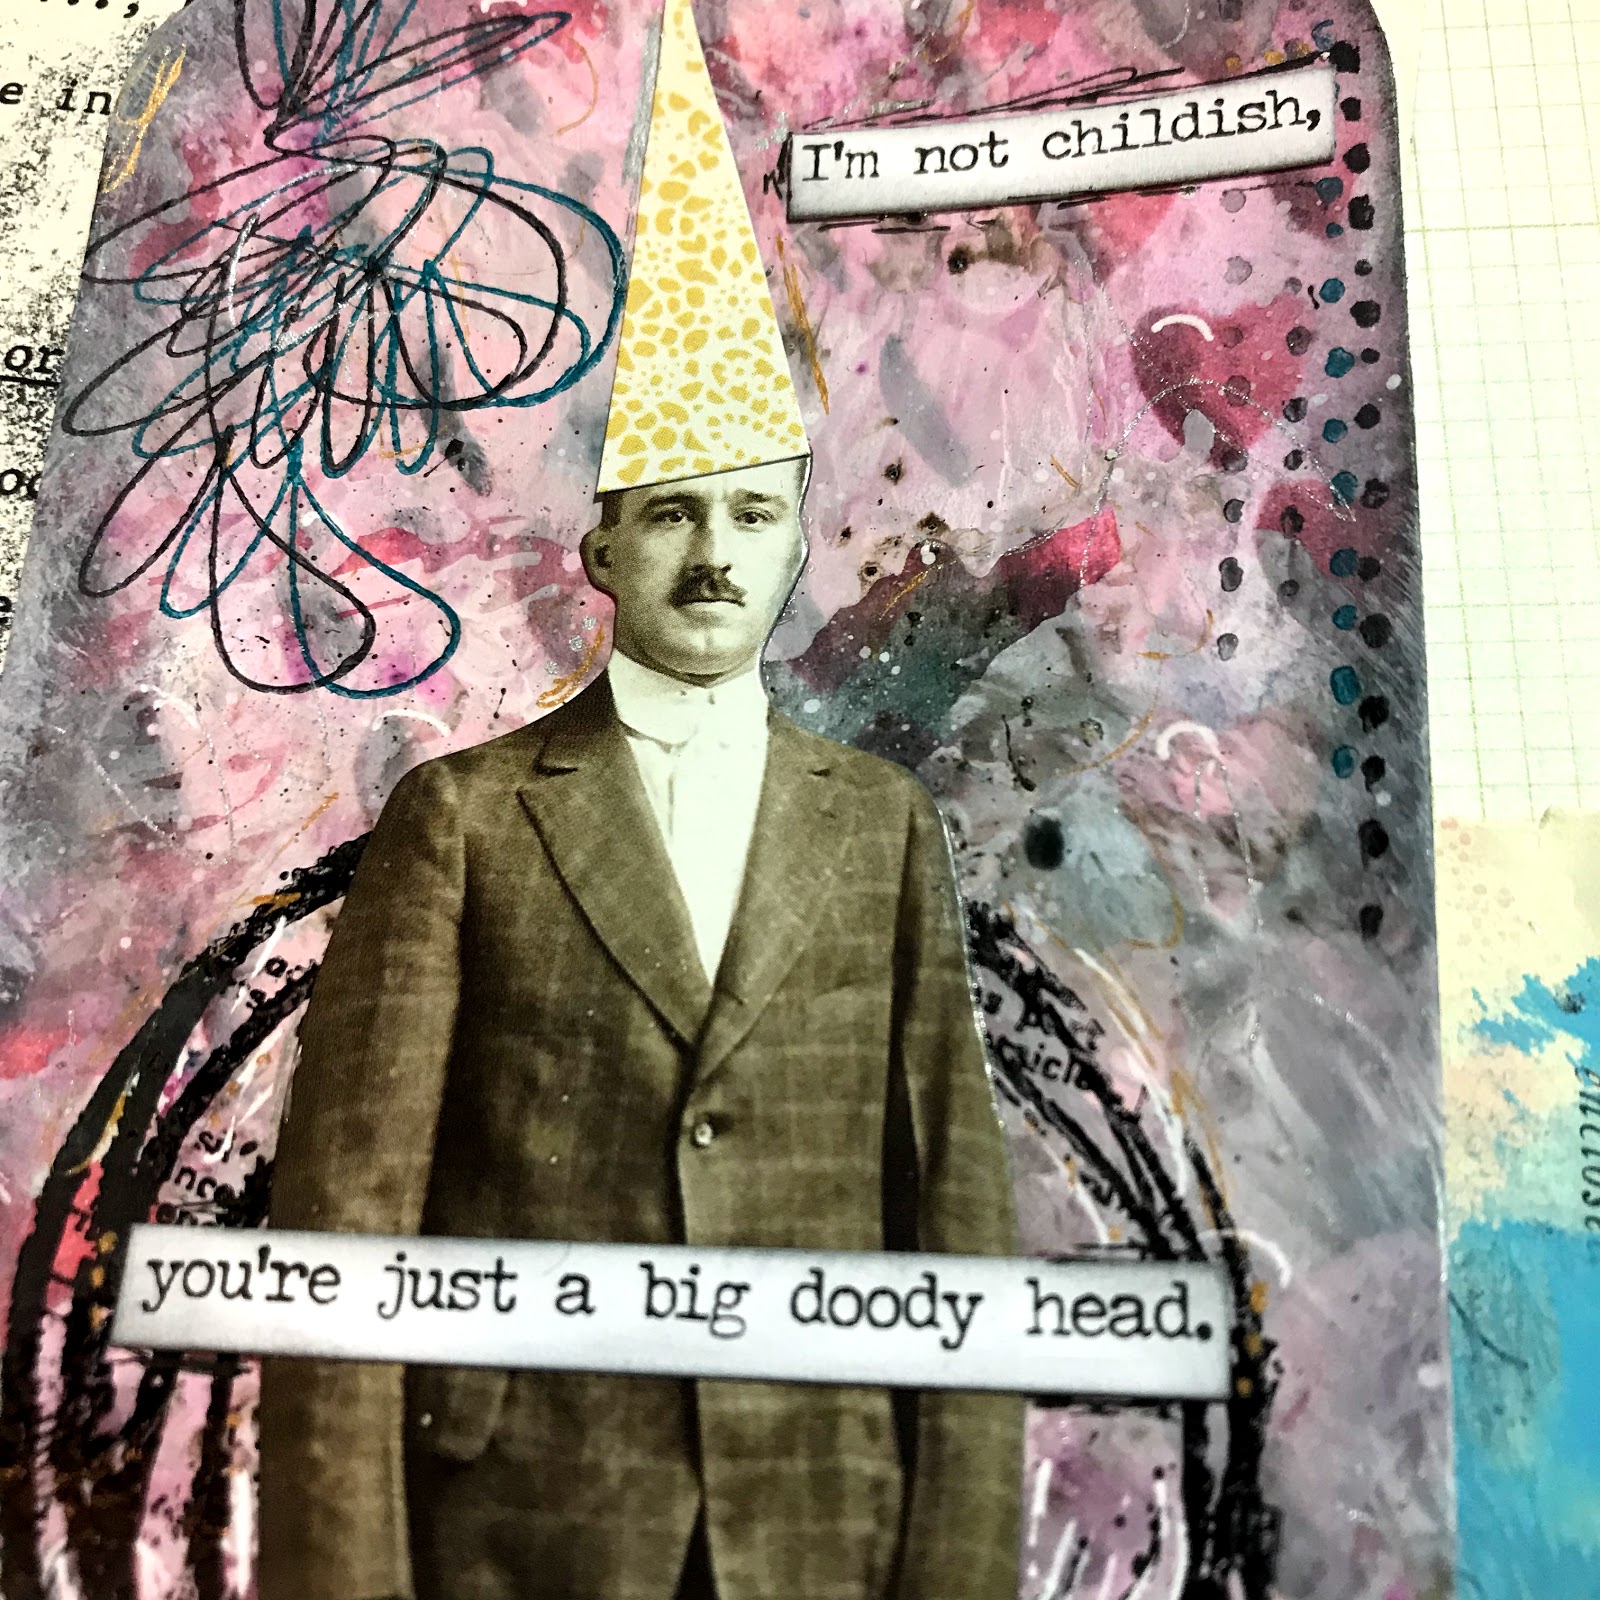
For this first tag I put white paint on my craft sheet and added some powder to the paint.  Just a teny shake of the bottle.  Then I spritzed with water and watched the color bloom.  I plopped my tag into the paint and lifted.  I repeated until my tag was covered.  Once it was dry I used a Tim Holtz Stencil to add some hearts to the background using Picked Raspberry Distress Ink.  I added a shadow by using a Wendy Vecchi mini detailing tool and Black Soot Distress Ink.  A white gel pen added an extra pop to some of the hearts.  
I used the new Tim Holtz Mini Media Marks(CMS364) to add some detail around the edge of the tag.  To stamp them I used a new Tsukineko StazOn Pigment Pad.  I am in love with the super bold colors.  The circle behind the doll is from the Dina Wakley Weird is Good Stamp set.  I glued him down and added a party hat.  The final touch was the snarky sentiment.  
The second tag was made in the same basic manner for the background.  I did add more nuance powders to my glass mat and just spritz with water to get the black/gray splatters.  I used the same stamp set from Tim Holtz and the tsukineko ink.  
This dude has seen some things.  He was actually just hanging out on my desk and was a victim of over splatter from several previous projects.  I colored his jacket using the tsukineko ink and a qtip.  It left him with a super bold jacket and it would not rub off at all.  I cut a slit in the doll and added a teeny pocket square made from vintage seam binding.  using the Tim Holtz tiny attacher I added a bit more of the seam binding to the top of the tag.  
I love the snarky sentiment this guy got.  I think it works perfectly for this paint splattered gentleman.
The final gentleman has found himself in a fine mess.  This tag used leftover mess from the Nuance and Infusions.  I just ran my tag through and left it to dry.  I added color using Distress Inks in Picked Raspberry, Cracked Pistachio, Hickory Smoke, and Black Soot.  I used a new stamp set from Seth Apter and Paper Artsy for the circles.   The cross hatching and arrows are the Tim Holtz set mentioned above.  
I used the Tim Holtz Craft Thread to add detail by just hand stitching randomly on the tag.  I colored his shirt using Cracked Pistachio Oxide ink.  It kind of looks like he's sporting a turtleneck.  You can see the detail I added with gel pens here too.  Each tag has scribbles of white, black, gold, and silver.

I hope you like my crazy mess dudes.  Have you ever played with the Infusions? Do you have an favorite techniques?   

Jess


Monday, February 4, 2019

You altered my heart

Hi Everyone,


I was totally inspired by a class Tim Holtz just taught at the recent Creativation show(and he was inspired by Paula Cheney).  I wanted to create something similar to what I had seen done, but put my own twist on it.


Start by running the solid half of your Steampunk heart through your die cutting machine using a 3d embossing folder.  Spritz the chipboard on both sides before using the embossing folder so the chipboard really gets nice texture.
Using collage medium adhere Floral college paper to the embossed half of the heart.  I did a thin layer on the heart and adhered the collage paper.  I applied another layer on top and really worked the paper in with my fingers so you could see the embossed texture.
Paint the gear side of the heart using Dina Wakley media paint in Umber.  Paint the gears using Dina Wakley Media paint(Gilt and Ancient) and Tim Holtz Distress Paint(Brushed Pewter).  Add metal gears on top of some of chipboard gears for dimension.  Add embossing powder and crackle texture paste randomly on the heart for even more visual interest.  When the crackle paste is dry rub in a bit of Gathered Twigs Distress Crayon.

Take one of your Extra Large Tagand cut about three inches off the bottom.  Cover the entire tag with patterned paper.  Add bits of ephemera and adhere them to your tag.  I used a mix of vintage and reproduction ephemera here.  I love to mix old and new.  The entire tag gets a coat of collage medium. 
Once the collage medium is dry smoosh Distress Oxide inks onto your craft sheet and tap the tag into the ink.  The ink will stay beaded up on the craft sheet and you get neat splotches of color.  When you have a bit of color on your tag spritz with water and allow to air dry. Do this step several times until you achieve the color you like.
   Use the mini gear stencil from Tim Holtz to add a bit of grit paste to the top corner.  

Then add random blobs of grit past on the sides of the tag.  Once the paste is dry, use the same Oxide inks to color the grit paste.  Add Distress Crayon in Black Soot to the edges of the tag.  Splatter the tag with white, black, and gold paint.  
Using foam tape adhere the heart of the tag.  Give the paper doll a layer of clear gesso and color in his suit using Distress Marker in Mowed Lawn. Add a resin flower to his suit.  Glue the ruler to the heart and using foam tape adhere the man so he appears to be sitting on the ruler.  
Use Chit chat stickers to create your sentiment.  
Color in the word token using Distress Crayon in Picket Fence and add a jump ring.  Take an old paint brush and add a jump ring to the top. Add the rings to a vintage laundry pin and stick the pin through the fabric at the top of the tag.  The fabric at the top of the tag is actually a piece of my clean up rag I use in the studio.  I just cut a piece off because I really liked the colors on it.  To complete my tag I took some gel pens and made marks all over the piece.


Happy Monday
Jess


Disclaimer Notice

I've received products/compensation as part of the Gypsy Soul Laser Cuts Design teams. My projects, however, are 100% my own.