Showing posts with label distress markers. Show all posts

Monday, November 26, 2018

Quiet, but not blind


Hi Everyone,
I have a great technique filled card for you today.  Let's jump right in!

Using Distress Heavy stock blend together several shades of Distress Ink (Scattered Straw, Squeezed Lemonade, Fossilized Amber, and Wild Honey).  Spritz with water and dry completely.  Take a tiny bit of Distress Micro Glaze cover most of the background.  Stamp the Floral Lace stamp using Vintage Photo Distress Oxide Ink and spritz with water.  Using the micro glaze on most of the background keeps the top layer of ink from blending into the background.  It also keeps some of the intricate stamp pattern, but not all of it.  The look is wonderfully aged and tattered.
Take clear texture paste and the Latticework stencil to the background.  Don't worry about it looking perfect.  Imperfect looks better! Once the paste is dry use the Forest Moss Distress crayon to scribble over the paste.  Smudge the crayon using your finger and the pattern pops up adding another layer to your background.
Stamp the Large Bird Man on Watercolor cardstock.  Color him in using a waterbrush and Distress Markers.  Once he is dry fussy cut the image.

To finish the background stamp your two sentiments( Oh darling  and I was quiet, but I was not blind) using archival ink.  Back them with black cardstock and play with placement on your background.  Once you're happy with placement you can glue them down.
Run plain black cardstock through your die cutting machine using the Botanical 3d embossing folder.  Take a Distress Crayon in Tarnished Brass and highlight the raised areas.  The slight gilded effect is so gorgeous.  Adhere this piece right under the focal background piece you created.
All that's left to do is layer up your background.  On this card the black is attached to a distressed piece of gold cardstock.  The gold is mounted to a sage green card.  A bit of burgundy ribbon was the finishing touch.

Happy Crafting,
Jess


Friday, October 26, 2018

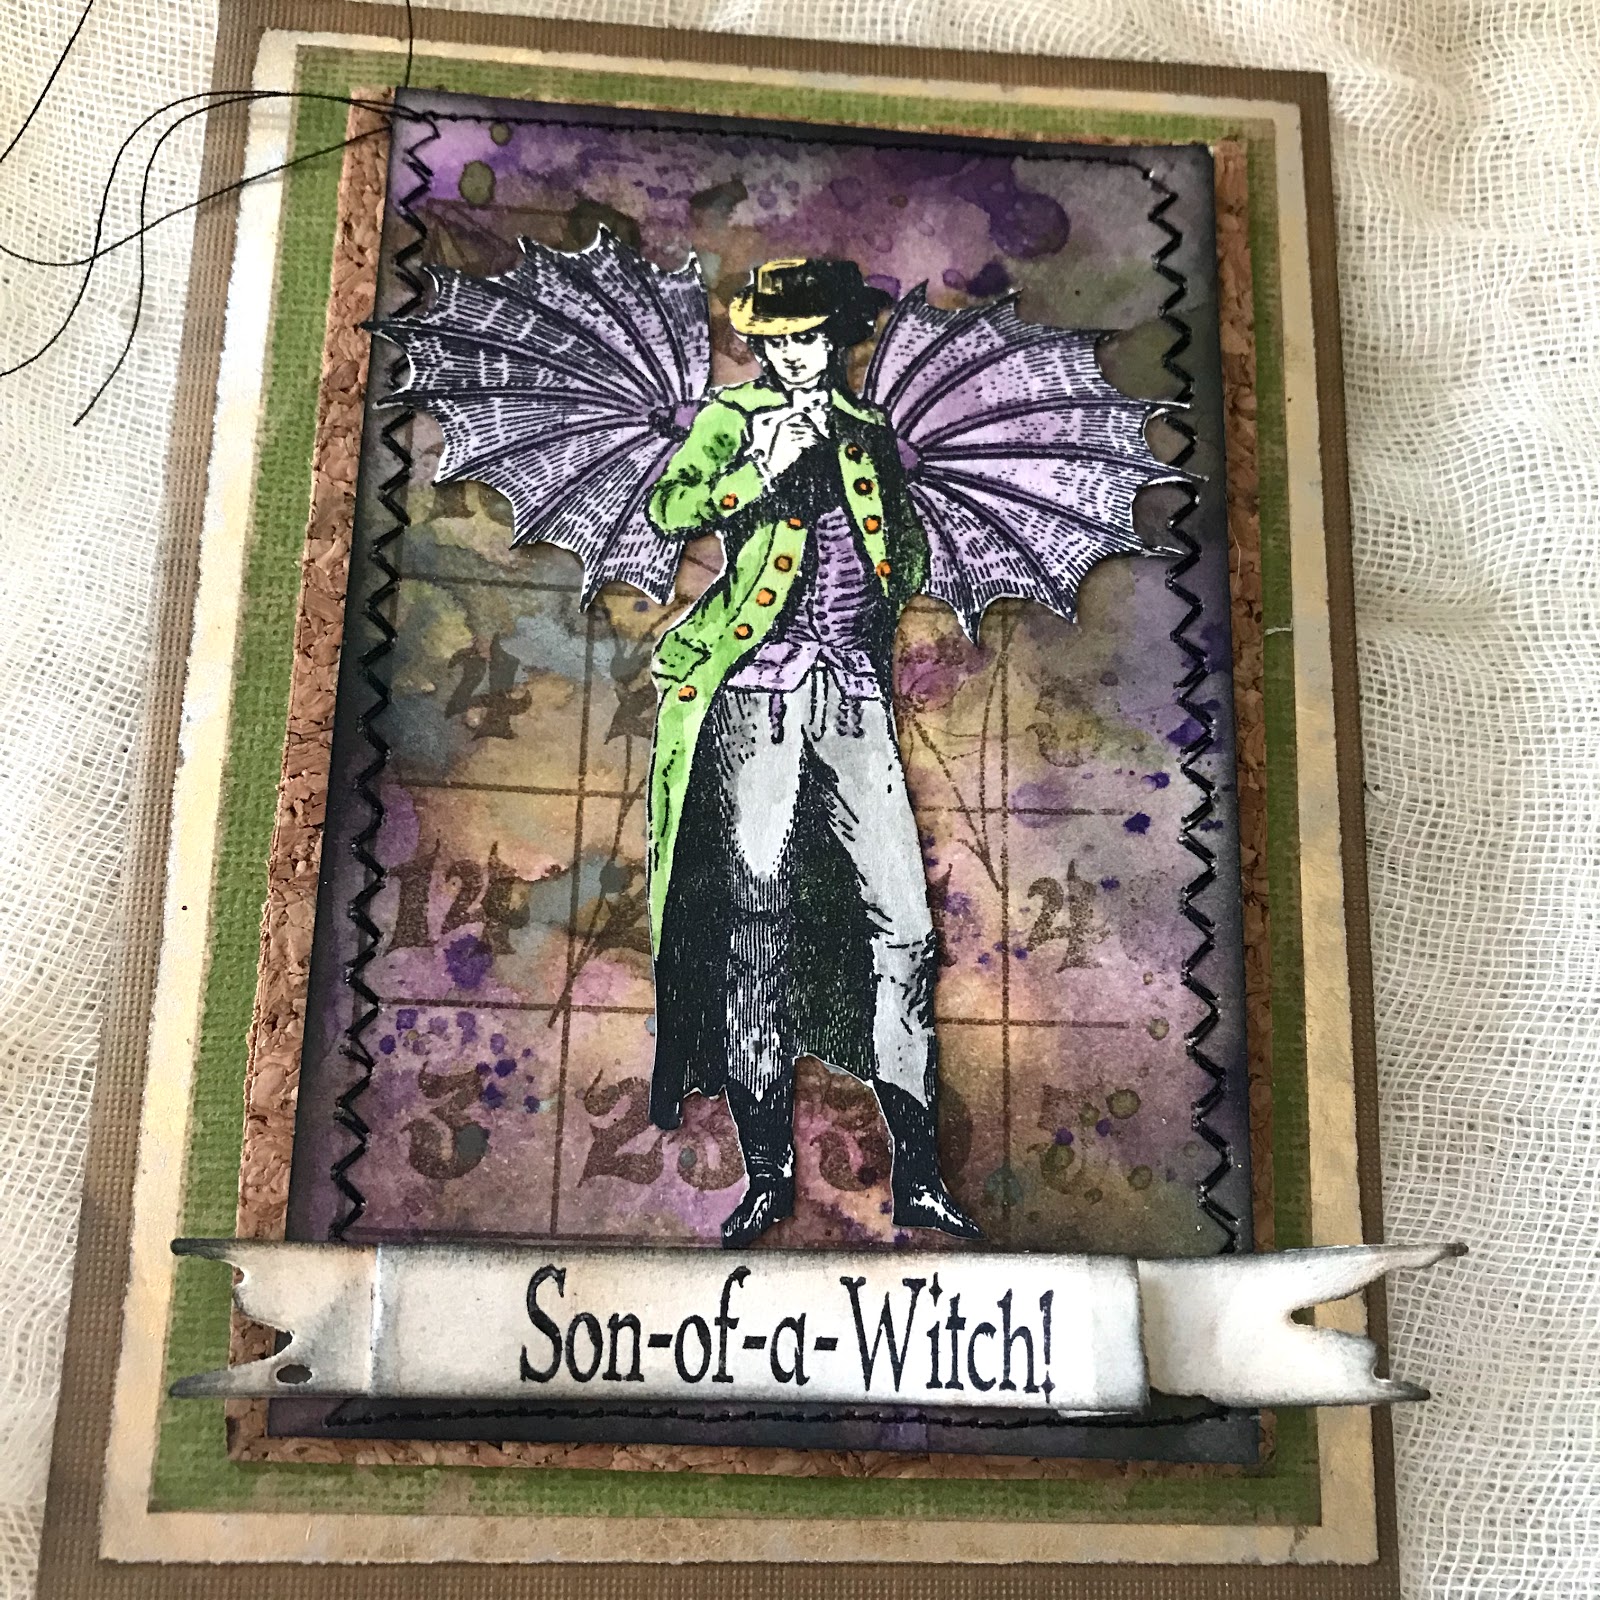
Son of a Witch!

Hi Everyone,
I am up on the Blank Page Muse blog today with this grungy Halloween card. 'Tis the season for witches, but let's not forget the Warlocks! This dapper Steampunk dude just screams Halloween to me.


On your craft mat smoosh on the purple shades of  Distress ink and run your Distress Mixed Media Heavystock paper through so the entire surface is covered. Wipe your ink up( wipe ink up between each layer)  Dry the base layer and smoosh more purple on the craft mat to get splats and dots. Dry this layer.

 Smoosh greens on the craft mat and tap the paper into the ink.  Don't rub or you'll get mud.  Dry the greens.

Smoosh on Hickory Smoke Oxide ink and tap the paper into the ink.  Let this layer air dry.  It's important to let the Oxide air dry to get the oxide effect.
Stamp the Halloween Bingo Board on the background using Coffee archival ink.  Edge the paper with black soot DIstress ink.  Stitch all around the edge of the cardstock.
Using the Tattered Banner Die cut out the banner and stamp on the Oh, Son-of- a-Witch stampin Jet Black Archival Ink.  You can alter your stamps by either not inking the word or snipping the saying apart.  For this card the "oh" wasn't used.  Stamp the saying onto the banner. Ink the banner using Black SOot and Pumice Stone Distress Ink  Adhere the banner to the bottom of the background. 


Stamp the Steampunk Gentleman on heavy watercolor cardstock.  Color in the gentleman using a waterbrush and Distress Markers (Hickory Smoke, Dusty Concord, Mowed Lawn, Dried Marigold, Antique Linen, and Mustard Seed)  Cut out the gentleman and then ink all the edges with black soot ink.  Glue the Steampunk Gentleman to the background.


The rest of the card is just layered up with various cardstocks.


I hope you like my Steampunk warlock!
Happy Halloween,
Jess


Monday, October 1, 2018

Halloween Surprise Box

Hi everyone,


I am up on the Gypsy Soul Laser Cuts blog today with a tiny Matchbox Theater.  I absolutely love how this turned out and I hope you do too.

The theater has two pieces, start with the exterior piece first (the box).
Paint all of the outside seams with Black Soot Distress Paint.  Cover the box with paper from the new Halloween Paper Pad from Tim Holtz.  Watch your cuts so you can line up the pattern.  Using your Xyron Sticker maker adhere all the paper to the box and glue it together.

Emboss two pieces from the Circle Doily Set.  The outer circle was embossed using Emerald Creek's Mercury Rising.  The inner circle used Candy Orange.  The candy orange is super bright, almost fluorescent, so I toned it down using Mushroom Alcohol ink.  
Cut out the kitty from the Halloween side order and attach her to the doily.  Attach the doily to the top of the matchbox. 
Now it's time to work on the interior. 


Paint the interior piece of the theater except for the back panel.  Cover the back panel with Halloween Paper.  

The rest of the interior box was stamped using the Web stamp from an older Tim set(CMS093) and emboss using Emerald Creeks Hammered Metal.  At this time you can glue your box together.

Stamp, color, and die cut your witch from the Michael's exclusive set.  
Create a wobbler for the witch head.  Using a 1/2 inch circle punch cut out two circles.  Wrap a thin gauge wire around a marker a few times and snip it so you have a tiny spring.  Tape the edge of the spring to one of the circles and repeat for the other side.   
Using strong adhesive attach your witch to the wobbler. Make sure the depth of the wobbler works.  You don't want the witch to get caught when you're trying to open the box.  I added some halloween rub ons to the front of the interior box. 
Check it out! 


She's so fun.


The interior box just slides inside the wrap and you're done!
Enjoy!! 

Jess


Tuesday, April 10, 2018

Black, white, and blue all over

HI Everyone,
I know my post title sounds like a bruise, but no no one was hurt making this card! Our current challenge over at the Blank Page Muse is using black, white, and one color. 
I started this card by using my stamp platform to stamp the Vintage Lady with wings.  Using the platform to stamp her allowed me to make sure I got a really crisp image since she has a ton of detail. I stamped her using Jet Black archival and colored her in using a combination of markers, inks and crayons. I stamped a second image to play with color choices and combinations. 
You can see in the image that wound up on the card I used multiple colors on the wings and darker colors on her skirt.
For the layer directly behind her, I stamped the Floral Distressed Vintage Medallion and covered it with a blue embossing powder.  I used a textured paper and a light hand when stamping.  To stamp the medallion I just used the unmounted rubber and rolled it directly onto my cardstock.  I often don't use a block or platform when I want an imperfect or loose image.  
For the background, I used black textured cardstock and the Chain link Pattern Background stamp. I just stamped around the edges and then used a black and white embossing powder. 
Before I added the lady to the card I did some messy stitching around the edges of the card using black thread. I layered up the papers and added a very thin strip of a darker blue paper directly behind the bird cage lady. 
Using black and white pens I added some marks and inked the edges just a bit. 
I hope you join us for the challenge! Don't forget there are prizes to be won if you play along.
Jess


Thursday, March 15, 2018

Spring in Paris

Hi Everyone,
I am so honored to be a Guest Designer for the Frilly and Funkie blog today. 


The current theme is "Knock on Wood."  I was asked to incorporate some type of wood into my art.  I decided to start with a medium size Etcetera tag from Tim Holtz.
I covered the tag in a piece of paper from the Tim Holtz Wallflower paper pack, using Distress Collage Medium to adhere it to the tag.  
I flicked on Distress Paint in Black Soot, Tarnished Brass, and Picket Fence.
My next step was to tint this image I had of the Eiffel Tower.  I used Distress Markers in Broken China and Mowed Lawn to give it a hand tinted look.    
My first wood element is this mini framed panel from Tim Holtz.  This is one of the small frames that comes in the two pack. 

I painted the frame using Picket Fence Distress Paint and then spritzed it with Walnut Stain Distress Spray Stain.  I used a very tiny paint brush to add Tarnished Brass Paint to the edges.  I rubbed Distress Crayon in Walnut Stain on the frame to darken it up just a bit.  
My second wood element is a Tim Holtz Vignette box.  I whitewashed the box using Picket Fence and then used industrious stickers on the front.  I used alcohol ink in gold and mushroom to color the 
stickers. 
 The outside edge has a wrap of decorative tape from the Tim Holtz Rose pack. 
I filled the box with flowers and Tim Holtz beaded berries that were colored using gold alcohol ink. 
My third wooden element is a Tim Holtz ruler.  I sprayed the ruler with Tea Dye and Walnut Stain Spray Inks.  
Here's another yummy shot of the flowers.

I added Tim Holtz Typography letters that were colored using Distress Paint in Tarnished Brass.  Once the paint was dry I added alcohol ink in Mushroom and Distress Crayon in Black Soot to give them some patina.  

The Tim Holtz paper dolls  were given a pop of color with Distress Markers. 
I added them to the edge of the frame and gave them some flowers.  
For finishing touches I added Prima flowers and leaves.  They were given a spritz of Distress Spray Stain in Walnut Stain. A large strip of vintage Dresden was added to the side too.  

The top corner and bottom corner got a little stencil treatment.  I used a Crafters Workshop stencil and Ranger Texture paste for some dimension.  The color was added using Distress Crayons in Walnut Stain, Vintage Photo, and Black Soot.  

Sari ribbon and a Tim Holtz loop pin add interest to this corner.  
I hope you enjoyed my tutorial and are inspired to enter the challenge.  

Jess


Friday, November 17, 2017

Giving Thanks

Hi Everyone, 


I have a quick and easy project for you today.  I love the new Tim Holtz Gift Card Holder die from Sizzix.  Thanksgiving and Christmas are right around the corner and gift cards make the perfect gift.
There are multiple thinlets in the set so I took photos so you can see what each piece is when I put it all together.

There is also a little gift tag die, but I didn't use that one.  I used the Tim Holtz Etcetera paper pad and Kraft core to cut my pieces.
I ran Pumice Stone ink around the edges of the patterned paper and Vintage Photo on the Kraftcore before I glued the pieces together.
Now I am going to work on my embellishments.  I will be using watercolor paper and Magenta's Nuance Powders.  The Nuance Powders come in little jars.  A little bit of this product goes a LONG way.  I poked a hole in the top of the jars using a push pin.  I get really good control this way.  When I am done the pin goes back in and keeps the powder from spilling. 
See those little speckles? That's a couple taps of the Red and the Scarlet Nuance Powder on dry watercolor paper.
This was with a spritz from my water bottle.  It looks kind of like fireworks.
This was with more water and a couple more taps. 
For this piece I used water and then added the powders, just to show you the difference.
I needed more than just red so I grabbed my Distress Oxides in Antique Linen, Fossilized Amber, and Vintage Photo.  I smooshed them on my craft mat and spritzed.  

Using the same watercolor paper I ran my paper through the inks.  Remember to dry between layers so you don't get mud!
I used my Sizzix Autumn Gatherings Strip die to cut out my leaves, acorns, and wheat. Be sure to ink the edges of your cut outs so you don't see the white.  I used Vintage Photo to ink mine.  
To color my paper dolls I used Distress Markers in Ripe Persimmon and Spiced Marmalade.  I just scribble right on the doll and move the color using a cotton swab.  
I clustered up some of the pieces and decided I needed leaves so I used my Nuance Powder Chartruse for color.  I used my Zip Dry to glue them down and added the "thanks" chit chat sticker.  
The bow was missing something and faux stitching was added using my Black Pen.  
The top just slides up and there are little notches to hold the gift card. 
The final touch was adding a vintage marker and acorn charm.   
I hope you try making your own.  
I would love you to stop over at the My Rusty Crown blog today and check out my tutorial for this cute gift card holder.
I hope you all have a wonderful Thanksgiving!
Jess

Disclaimer Notice

I've received products/compensation as part of the Gypsy Soul Laser Cuts Design teams. My projects, however, are 100% my own.