Showing posts with label Baked Texture. Show all posts

Tuesday, May 29, 2018

The Traveling Salesman

Hi Everyone,
I made this a couple weeks ago, but hadn't had a chance to blog it yet.
Meet the Traveling Salesman.
I used a mixture of new and vintage pieces here.


It was nice to create without a deadline or project in mind.


Fiddling with the details is always the best part. 

Even the edges got a rusty makeover. 

I hope you like him as much as I do. 
Jess


Monday, April 2, 2018

I've got a birthday coming up(it's a big one)

Hi Everyone,
I am up on the Gypsy Soul Laser Cuts blog today with my crown fit for a rusty queen.


I don't want to admit it, but I have a rather big birthday coming up.  I thought maybe having a crown would ease the pain a bit.  I'm not a frilly girl.  I'm a grungy girl and my crown needs to fit me. 

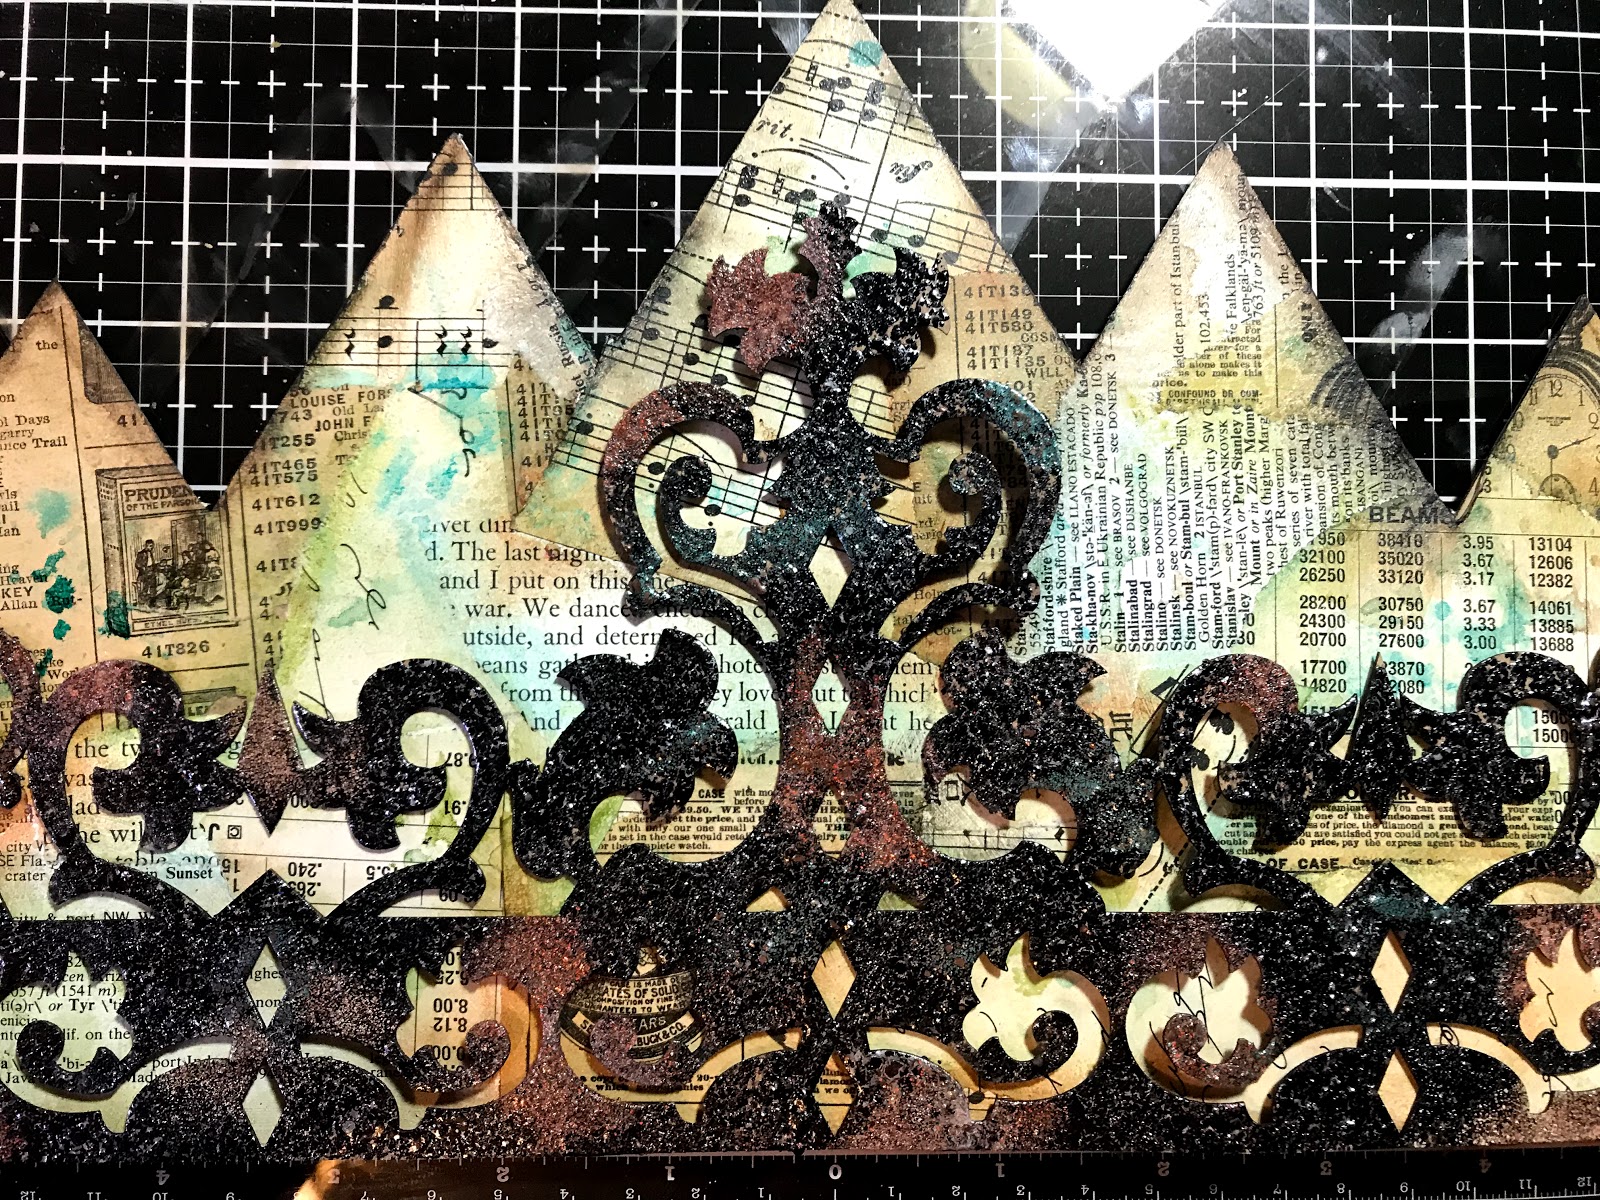
I started by covering my crown with tons of vintage paper.  I used old dictionary pages, sheet music, catalog pages, shorthand practice sheets, and more.  I used Distress Collage medium to adhere it to the crown and once it was dry I cut it down.   
I then added lots of Distress Stain in Mowed Lawn, Peacock Feathers, and Walnut Stain.  I added Distress Inks and Oxides in the same colors, Once the base colors were down I went back with Distress crayons to highlight edges.  I used Walnut Stain, Rusty Hinge, Hickory Smoke, and Black Soot.   

To make the fancy front piece I used  Baked Texture embossing powders.  I used Rocky Road for the base and then added Vintage Patina, Dirty Sand and Chunky Rust.   I glued on the front piece and let it sit overnight. 
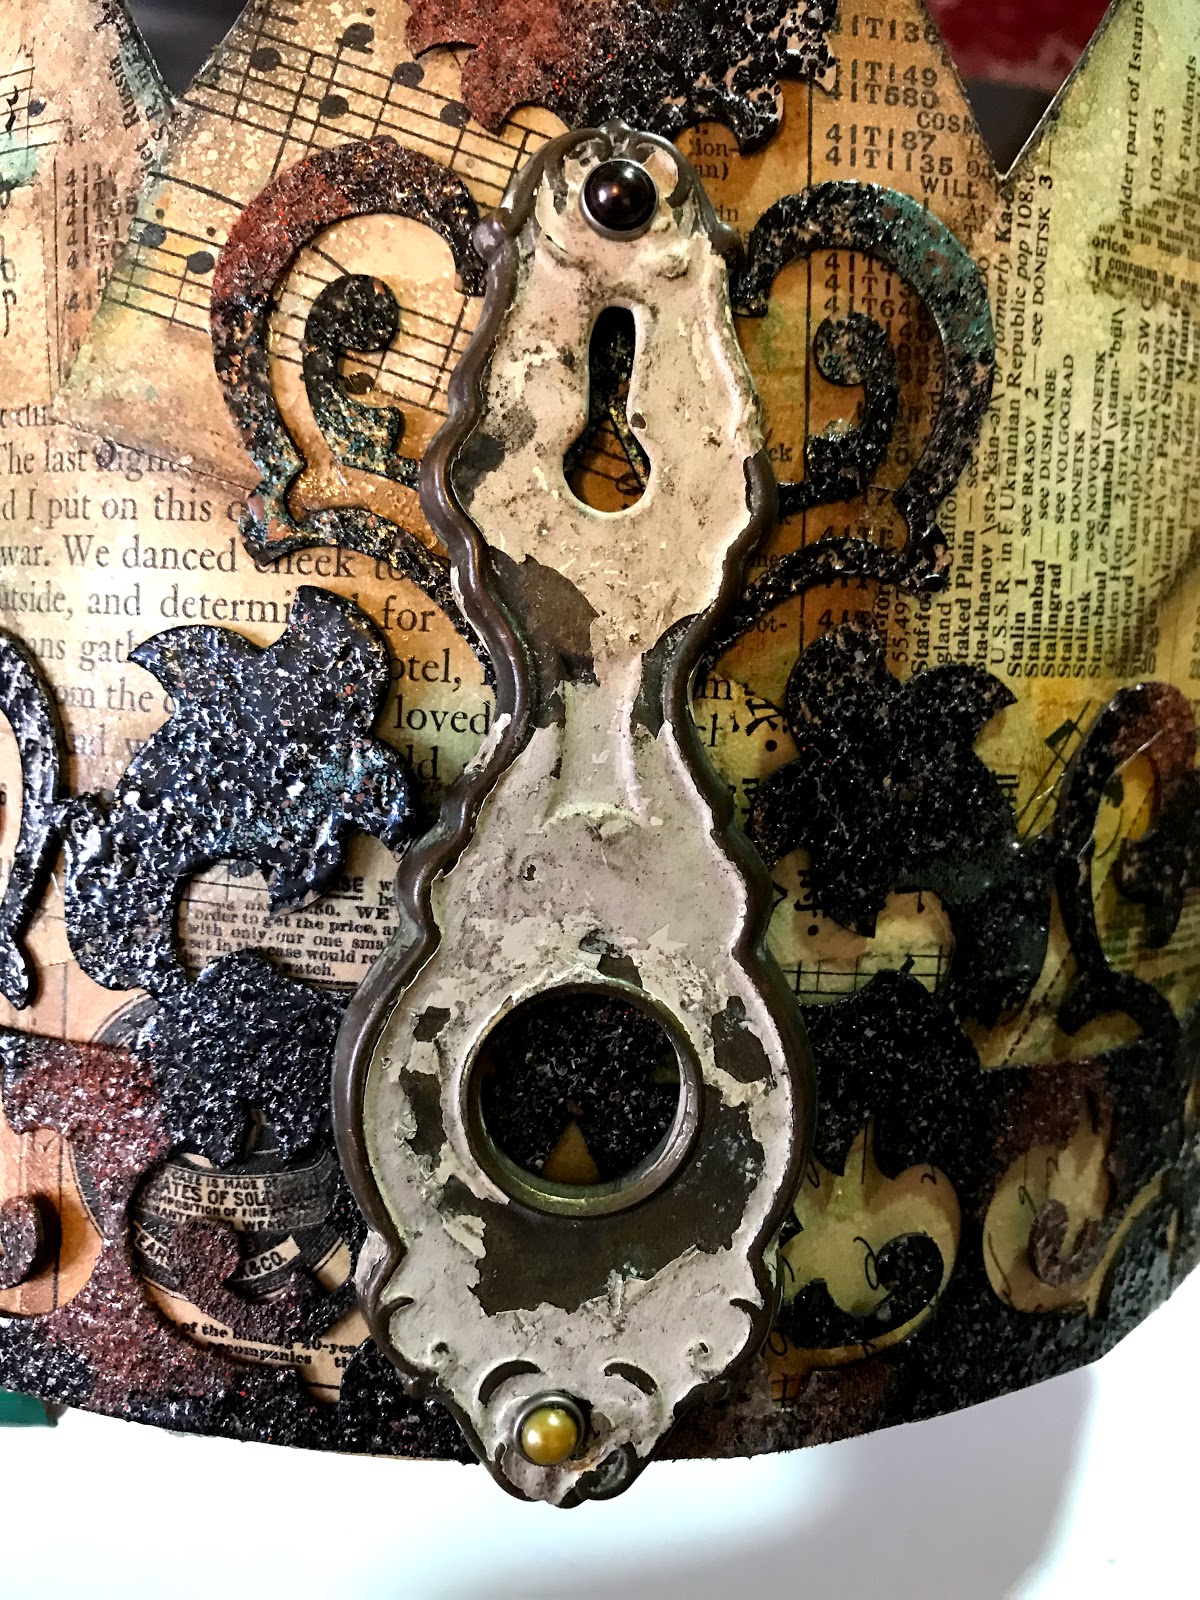
I had this cool old door plate that I adhered to the crown using brads.  
I added an old bingo number to the center of the door plate. 
I added metal flowers, with a bingo marker I colored using Distress Oxide in Peacock Feathers and Vintage Patina Baked Texture powder, to each side of the crown.
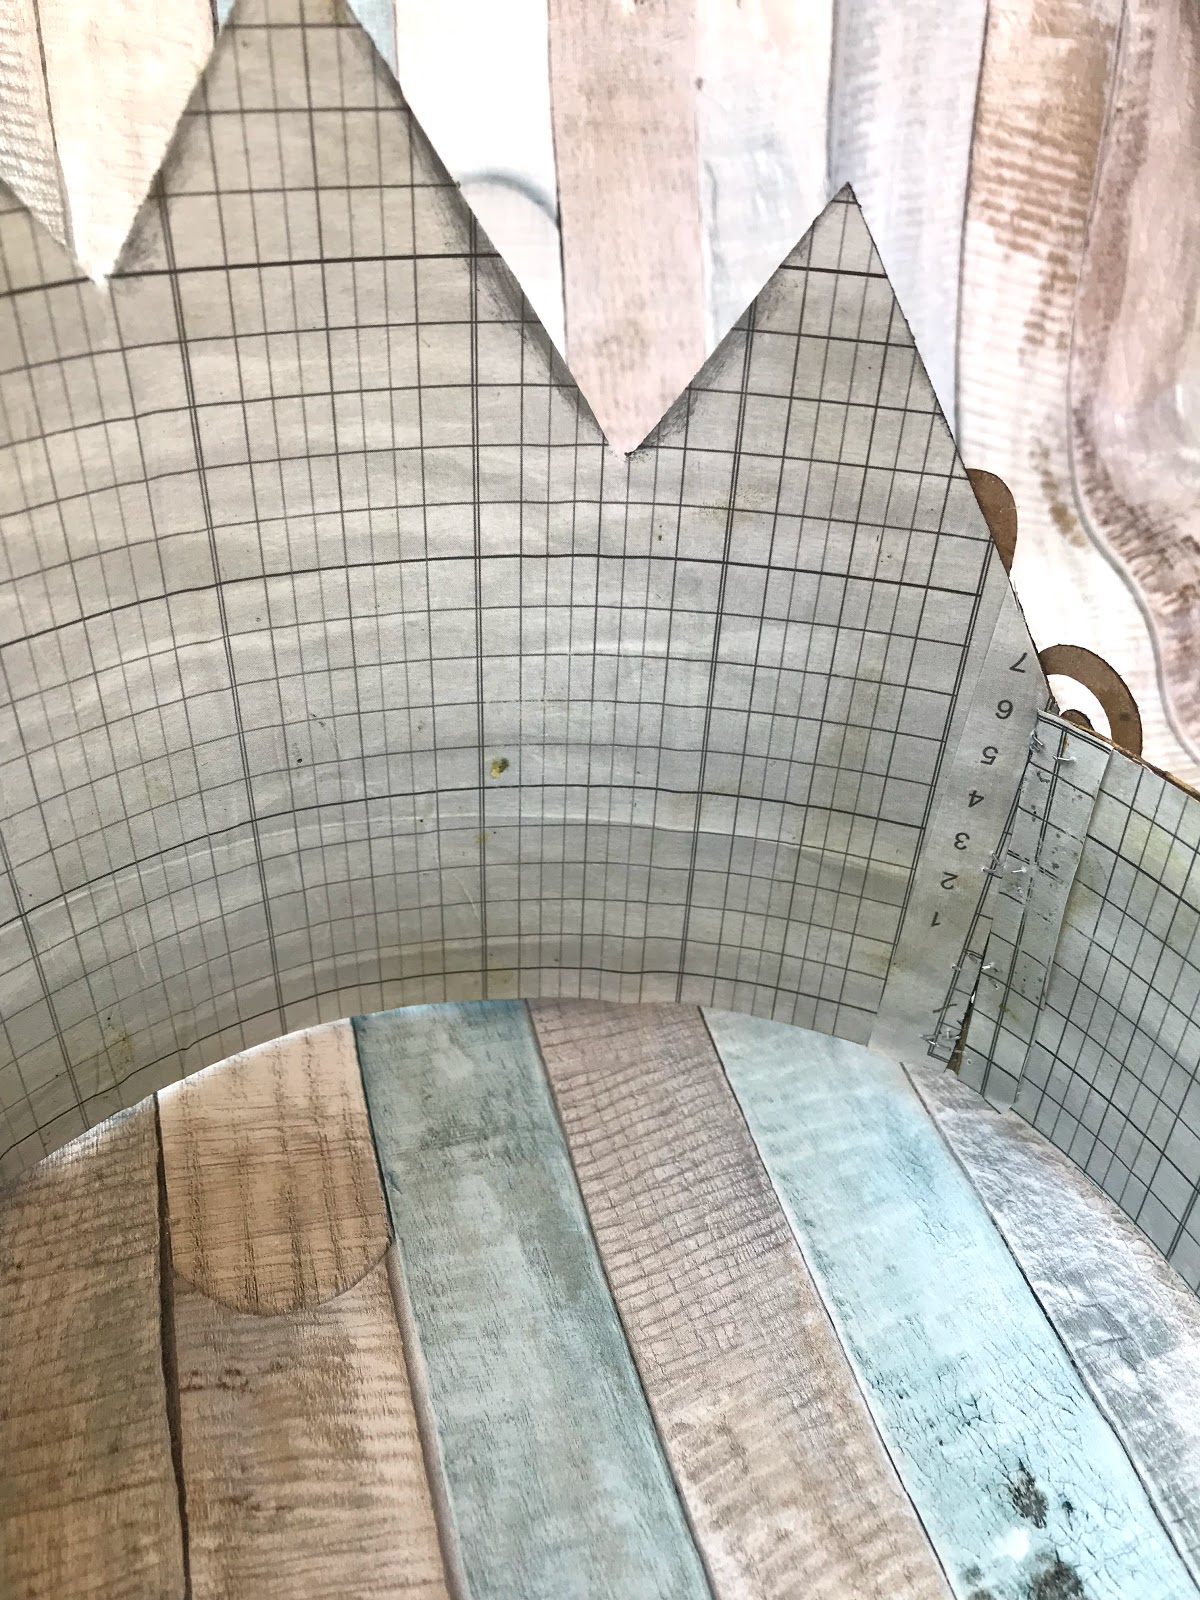
The inside of the crown is lined with graph paper.  You can see here I attached the band using my  tiny attacher.  
This is the back of the band.  
This is obviously not my head, but you get the idea. 

This was really simple to make and you could really use this crown in so many ways.  I hope you enjoyed my grungy take! 
Jess

 I am entering this into the Simon Says Stamp Monday Challenge- Trio( I used a trio of Tim Holtz on here using his inks, stains, and crayons)

Monday, March 5, 2018

Steampunk Goddess

Hi Everyone,
Jess here today with my first post of the month for Gypsy Soul Laser Cuts.  
I am not a steampunk girl.  It's not really in my wheelhouse.  I dabble here and there, but when I saw this Steampunk Cage Dressform I knew I had to make something with it.  Honestly, it was super easy to make, so today's tutorial will be super short.

Cover your base using Seth Apter's new Baked Texture Embossing Powders.  The base layer here is Rocky Road.  The different patches of color are from Dirty Sand, Chunky Rust, and Patina Oxide. 
Here's another shot.
It's gorgeous and you don't have to prep the chipboard before applying the powder.  I just slapped on the embossing ink and went to town.  The secret to the layering is really just heating up the base layer(in this case the Rocky Road) and sprinkling on the color you want to add.
The dress form was covered with a thin layer of gesso and then I added Distress Oxide Ink in Cracked Pistachio. 
I covered that with Ancient Amber Embossing powder and added gears.   The wings are covered with the same ink and then embossed using Vintage Beeswax and sprinkled with Patina Oxide and Deep Sea embossing powders.  
Her back has a key to wind her up.  
I colored a vintage chandelier crystal using Alcohol Ink in Mushroom and hung it from the center of the gear to complete the piece.  
Where the pieces joined together I used black paint to hide the raw chipboard. 


I hope you like her! 
Jess

Disclaimer Notice

I've received products/compensation as part of the Gypsy Soul Laser Cuts Design teams. My projects, however, are 100% my own.