Saturday, May 12, 2018

Drinks with my girls


Hi Everyone, 
I have a fun tropical tag for you.  I am sharing this on the Gypsy Soul Laser Cuts blog today. I used one of the tags from the  Extra Large Tag set for the background here.  I created this tag to share as part of a new stamp release for Blank Page Muse Stamps.  One of the Gypsy Soul Laser Cuts Design Team Alumni drew all of these stamps.  Pam Bray is a woman that wears many hats!

Cover your Extra Large Tag with cardstock and stamp with Distress Ink in various shades of green.  I used stamps from the Blank Page Muses Tropical Dreams set.  Once your leaves are stamped cover the entire tag with Antique Linen Distress Ink and spritz with water. 
Stamp the hibiscus flower using Stampin Up ink in tip top taupe. This completes the background of your piece.
Paint the Flowers using Folk Art paint in color shift Green Flash and the flower centers in Distress Paint in Abandoned Coral and Picked Raspberry.  
I doubled up the small flower and one of the large flowers on the top of the tag.  The top flower was stamped with the Pineapple stamp to add some texture.  

The other large flower helps ground the girls.  
The big hats and flowers called for big drinks too! I think most of you know by now that I am pretty snarky and this sentiment was perfect for this tag.  I did a bit of scribbling using gel pens and paint on the tag to complete it.  
I think this would be a really fun gift for your best friend! I hope you're inspired to create a tag too.
Jess

Simon Says Stamp Ombre Challenge(their drinks are ombre)

Monday, May 7, 2018

ATC Journal

Hi Everyone,
I'm up on the Gypsy Soul Laser Cuts blog today showing you this awesome ATC ticket journal that will be coming soon to the Gypsy Soul Laser Cuts store.


Start by adding a thin layer of gesso to the journal on the front and the back.  Once it is dry paint with Deco Art Fluid Acrylic Paint in Titan Buff.  Using Distress Collage medium adhere small pieces of Tim Holtz Tissue wrap and Collage paper to each side.  Be sure you cover the entire journal with Collage Medium as it makes it easier to move around your color later.
Once the collage medium is dry add stamps using archival inks. I used stamps from the Tim Holtz Entomology set, Sideshow, Classics #6, and Mixed Media.  I used archivals in Potting Soil, Jet Black, Coffee, and Hydrangea. 
After you are happy with your base you can add color using Distress Crayons(black soot, walnut stain, vintage photo); paint(Dina Wakley Gilt and Tim Black Soot); and gel pens.
Cut a piece of the honeycomb and emboss(Emerald Creek Charred Gold) it. I added bits throughout the journal and just cut the pieces to size as I went.   
The crown is colored with a gel pen.

Here the honeycomb and bee are colored using a gel pen. 

These little bits are the centers of the comb. They are supposed to be waste, but you can always put those little bits to good use.  
To hold the journal together I used a large vintage pin I just purchased at a local junk show. The cover has a story stick and a quote token from Tim Holtz. 
Here are a few closeups for you too. 
Enjoy!
I'm entering this into the Frilly and Funkie Neutral Point of View Challenge. 
Jess

Wednesday, April 25, 2018

New Stamps from Blank Page Muse Part 2

Hi Everyone,
I am back today with the project I created using Cathy Frailey's new Soulful Dolls stamps. 
This is a canvas pennant flag that I grunged up using Distress Inks in Worn Lipstick, Vintage Velvet, and Fossilized Amber.  I used Tim Holtz's Floral stencil and used the various ink shades to add the flower pattern. 
Once the flower pattern was on there I flicked on Distress Paint in Black Soot and Dina Wakley Paint in Gilt.  I used Distress Crayons around the edge of the banner.  
The chipboard frame(Gypsy Soul Laser Cuts) was embossed using Charred Gold Embossing powder(Emerald Creek).  I cut a piece of yellow Tim Holtz cardstock to fit in the frame. Then using the Fossilized amber and the stencil, I added more flowers. 
The doll stamp is stamped in Jet Black Archival and then colored using Distress Crayons.  I added wings and colored them the same way.  SHe is holding a tiny love letter and wearing a paper flower in her hair.
I used foam tape to raise her up in the frame a bit.  The sentiment is also stamped in Jet Black Archival and mounted with foam tape.  
Large paper flowers finish out the banner.  

I hope you like the new stamps as much as I do! 
Happy stamping,
Jess


Tuesday, April 24, 2018

New Stamps from Blank Page Muse Part One

Hi Everyone,
I am super excited to be showing you the new stamps from the Blank Page Muse. 
My first two projects feature new stamps from Pam Bray.  Pam's new set is called Art Journaling Mixed Media Stamps Set 1. 
How cute is this background?! 

I love the background on this one too.  It looks like birch bark to me.  

Now, I was a bad crafter and didn't take  photos of the process.  I can walk you through how I created them though.  
This is the only process photo I shot.  I used the Sketchy Doodle Bricks to create the background.  I love this stamp.  I think it's my favorite in the set.  It has a very 1950's vibe.  I used Jet Black Archival Ink and stamped it filling my tag. 
I blended Squeezed Lemonade, Picked Raspberry, and Twisted Citron Distress Inks on the background using my blending tool.  A pop of Black Soot on the edges finished it out.  
I added a paper doll from Tim Holtz.  I gave him some funky pants and a bow tie using patterned paper.   There are two flowers in the set.   Using the flower that has the stem, I stamped it twice on white shrink plastic using the Jet Black Archival. I colored them using Distress Crayons in Twisted Citron and Picked Raspberry.  I used my heat gun to shrink the flowers and then added some stickles to the center.  
A bit of twine made pup's leash.  A tiny scrap of paper created his collar(his collar matches his owner's pants).  
Snarky chit chat finishes out this tag.  

The second tag came together really quickly.  
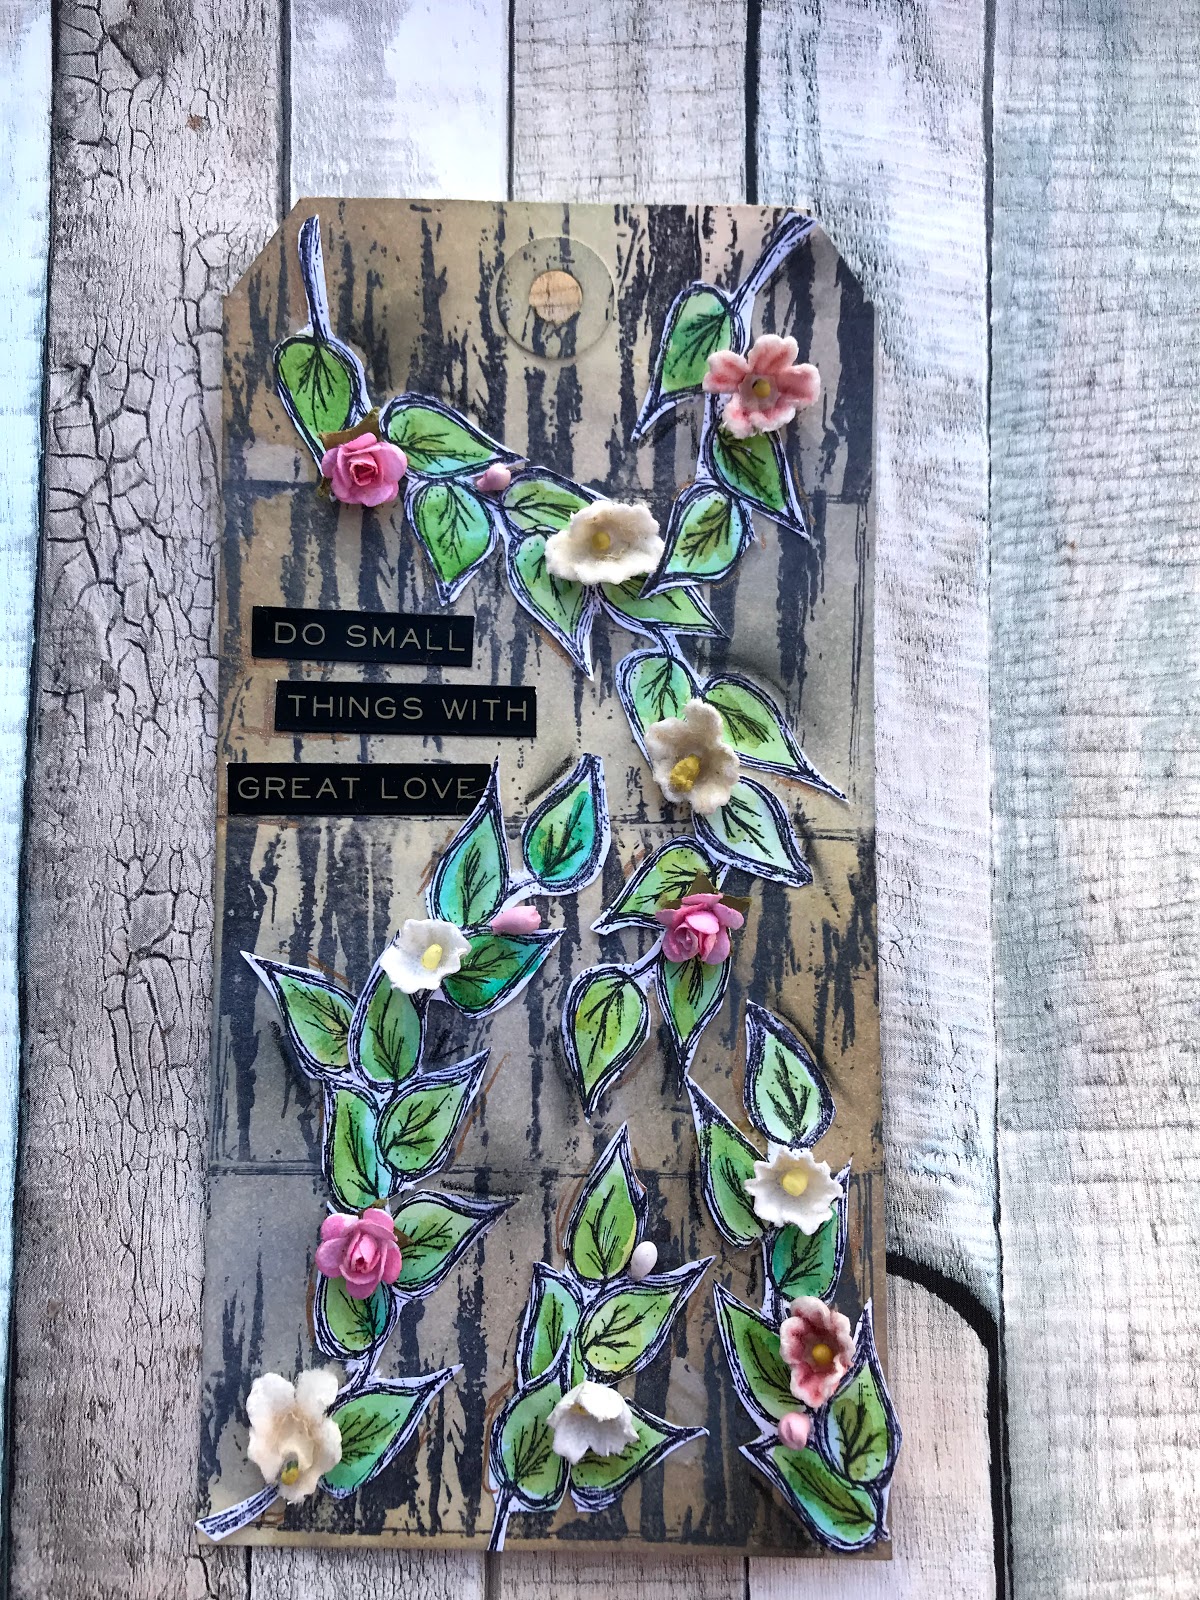
I used the Corrugated Stripe Pattern to create the background.  I stamped it using Jet Black Archival.  Then to color it I used Hickory Smoke, Old Paper, and Antique Linen.  You can also see the stickers from Tim Holtz here and I used gel pen for a pop of bling. 

I stamped the Doodle Leaf Vine Border several times using Jet Black Archival.  I then put some ink from my pads onto my glass mat and using my water brush added color to the leaves.  I used Crushed Olive, Lucky Clover, and Mowed Lawn.    
I fussy cut them out and placed them on the tag.  Once they were glued down I added some vintage flowers and some flowers from Little Birdie Crafts.  
I used a stablio pencil for some shadows and gold gel pen to pick up on the gold in the stickers. 

I hope you check out the new set.  For a limited time it is being offered for only $14.99!!! And it is being offered as the full set or you can buy them individually.  The price is better if you order the whole set(you're going to want the whole set).  
Pop back tomorrow to see another new set!

Happy Crafting!
Jess


Monday, April 16, 2018

Beautiful Girl Pennant

Hi Everyone,
I am back with my second post of the month for Gypsy Soul Laser Cuts.  Today I have a pennant for you. 

I love this technique for making art pennants.  You can make really stunning backgrounds. 
Start by adhering tissue wrap to a canvas pennant using Pellon EZ Steam II.  Once the tissue is firmly attached trim it to size. 
Color your pennant using Distress inks, paints, and crayons.  Emboss the edge in gold.  
Yo can see there is a lot of detail on here.  Lots of inky layers and flicks of paint too. 
Paint your mini journaling block with a cream color and let dry.  Add a layer of gesso to your Layered Bella Frame.  Emboss your Medium Fairy using Oil Rubbed Bronze from Emerald Creek. 
Use Distress Crayons to color your journaling block.  
Emboss the back of the Layered Bella Frame using Ancient Amber from Seth Apter. Color the front using Distress Crayons.  The finished frame has white gel pen around the edge to look like stitching. 
Adhere your frame to the journaling block. Use a bit of foam tape to pop the fairy in the frame. 
Glue the whole piece to the pennant.  
Add your Big Chat stickers and using a Stabilo pencil outline the words a bit.  Add dots with a white gel pen.  
Use a Distress Marker to color the edge of vintage seam binding and wet to make color feather and wrinkle the binding.  Run the seam binding through the slot in the pennant and create your hanger.  Add a large fluffy bow made out of the seam binding.  
I hope you enjoyed the tutorial!
Jess

Disclaimer Notice

I've received products/compensation as part of the Gypsy Soul Laser Cuts Design teams. My projects, however, are 100% my own.