Showing posts with label collage medium. Show all posts

Monday, February 4, 2019

You altered my heart

Hi Everyone,


I was totally inspired by a class Tim Holtz just taught at the recent Creativation show(and he was inspired by Paula Cheney).  I wanted to create something similar to what I had seen done, but put my own twist on it.


Start by running the solid half of your Steampunk heart through your die cutting machine using a 3d embossing folder.  Spritz the chipboard on both sides before using the embossing folder so the chipboard really gets nice texture.
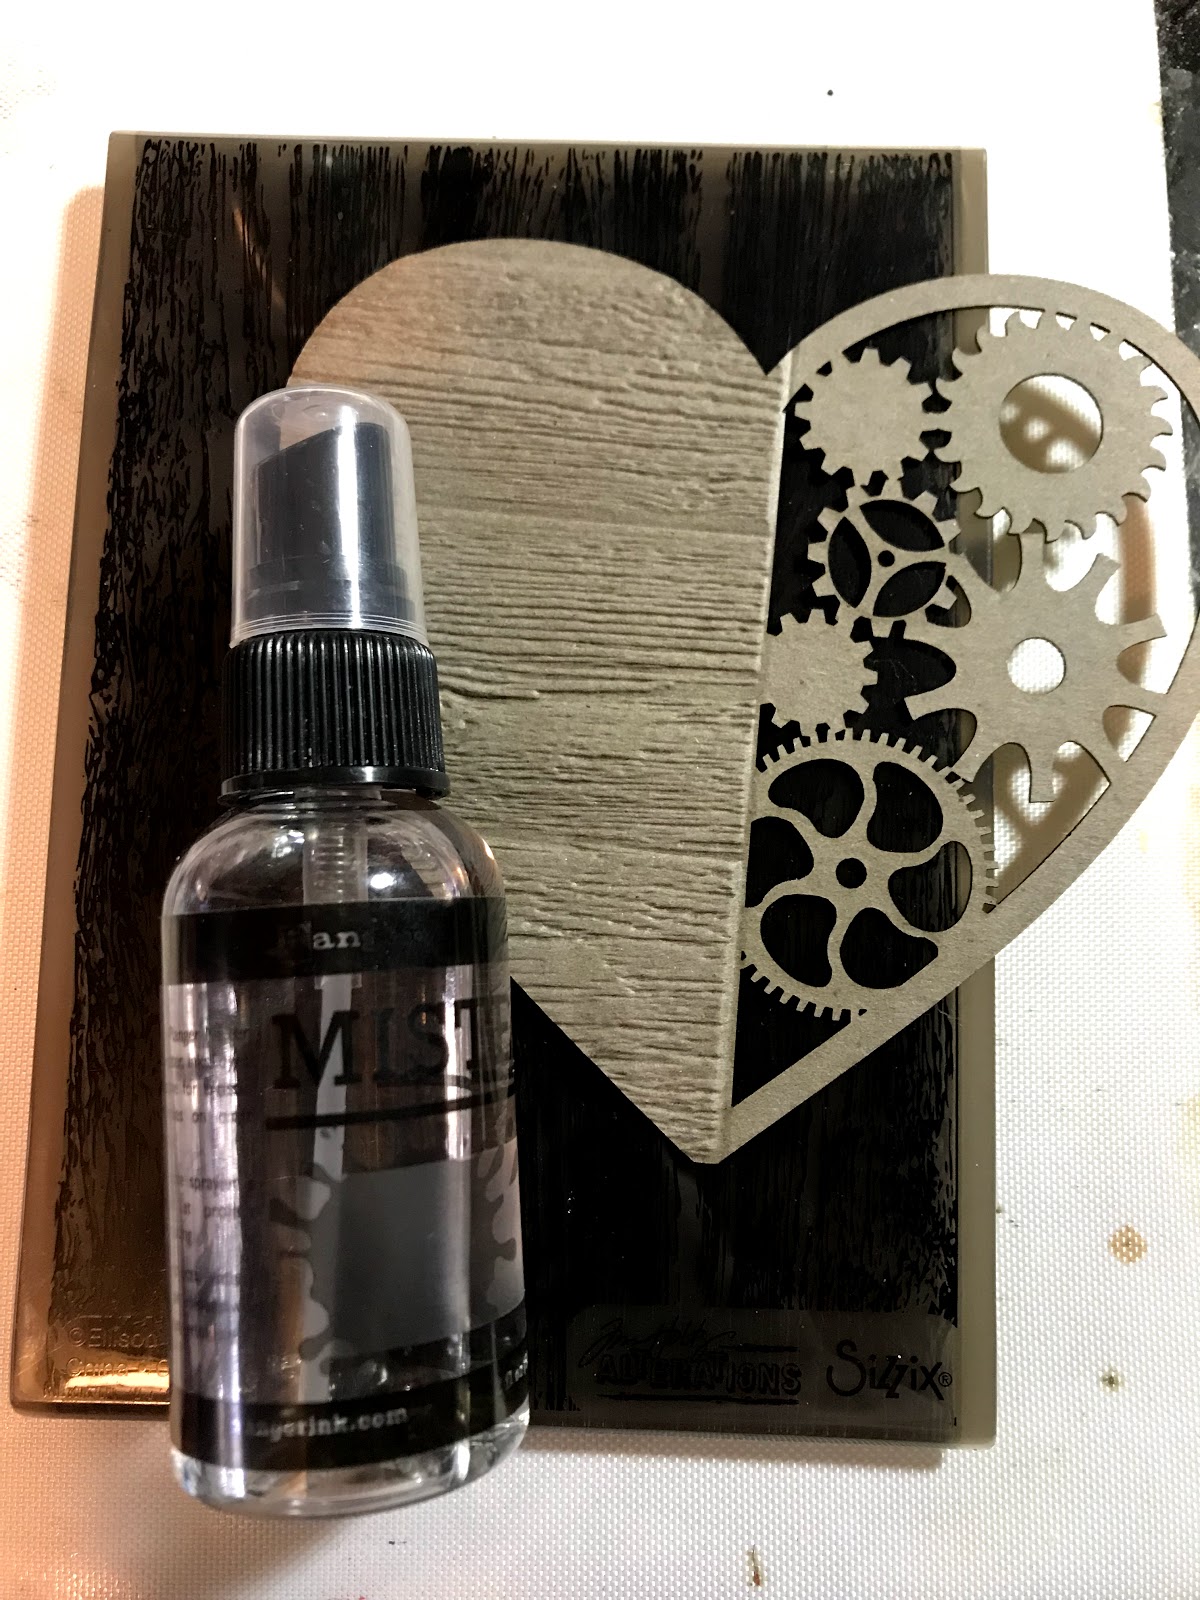
Using collage medium adhere Floral college paper to the embossed half of the heart.  I did a thin layer on the heart and adhered the collage paper.  I applied another layer on top and really worked the paper in with my fingers so you could see the embossed texture.
Paint the gear side of the heart using Dina Wakley media paint in Umber.  Paint the gears using Dina Wakley Media paint(Gilt and Ancient) and Tim Holtz Distress Paint(Brushed Pewter).  Add metal gears on top of some of chipboard gears for dimension.  Add embossing powder and crackle texture paste randomly on the heart for even more visual interest.  When the crackle paste is dry rub in a bit of Gathered Twigs Distress Crayon.

Take one of your Extra Large Tags and cut about three inches off the bottom.  Cover the entire tag with patterned paper.  Add bits of ephemera and adhere them to your tag.  I used a mix of vintage and reproduction ephemera here.  I love to mix old and new.  The entire tag gets a coat of collage medium. 
Once the collage medium is dry smoosh Distress Oxide inks onto your craft sheet and tap the tag into the ink.  The ink will stay beaded up on the craft sheet and you get neat splotches of color.  When you have a bit of color on your tag spritz with water and allow to air dry. Do this step several times until you achieve the color you like.
   Use the mini gear stencil from Tim Holtz to add a bit of grit paste to the top corner.  

Then add random blobs of grit past on the sides of the tag.  Once the paste is dry, use the same Oxide inks to color the grit paste.  Add Distress Crayon in Black Soot to the edges of the tag.  Splatter the tag with white, black, and gold paint.  
Using foam tape adhere the heart of the tag.  Give the paper doll a layer of clear gesso and color in his suit using Distress Marker in Mowed Lawn. Add a resin flower to his suit.  Glue the ruler to the heart and using foam tape adhere the man so he appears to be sitting on the ruler.  
Use Chit chat stickers to create your sentiment.  
Color in the word token using Distress Crayon in Picket Fence and add a jump ring.  Take an old paint brush and add a jump ring to the top. Add the rings to a vintage laundry pin and stick the pin through the fabric at the top of the tag.  The fabric at the top of the tag is actually a piece of my clean up rag I use in the studio.  I just cut a piece off because I really liked the colors on it.  To complete my tag I took some gel pens and made marks all over the piece.


Happy Monday
Jess


Monday, December 17, 2018

Good tidings ATC journal


Hi Everyone,
I have a really fun project to share with you that I created for Gypsy Soul Laser Cuts.
This ATC ticket journal is the cutest thing ever.  


I made one of these a few months back.  You can check out that post here.  When I was creating my spring themed journal all I could think about was how cute this would look done up for Christmas.
The basic steps are the same as the Spring journal.  Prep the journal by painting it.  Using collage medium, add Tim Holtz Christmas Collage paper randomly to each page.  

Once all of your collage paper is down add stamps using a permanent ink. I mostly used the Tim Holtz Holiday Postmark Set(but if you look closely you will spy stamps from about 5 other sets).  You can also use paint on your rubber stamps, just make sure you clean them off right away.  Once it's dried it will be on there forever.  The funky green branches you see here are stamped.  Stamp in a green paint and then add red berries with the end of a paint brush.  

 These are all of the inside pages.  I put a photo on every other page and the opposite sides are just fun piles of ephemera.
Most of the photos got a little something to dress them up for the holidays.  
These little anter brads just crack me up.  I used some of the Tim Holtz holiday snippets, a photobooth photo, and a chit chat sticker here too. 
This guy's hat and scarf are from the Christmas Shape Set.  Both pieces were embossed using Emerald Creek powders.  The hat is Mercury Rising and the scarf is the Spiced Candy and then there is a layer of Vintage Beeswax.    
Her wintery broach is from the Snowflake shape set and covered with Distress Glitter.  
Here are the rest of the pages.  This one has a little 3d stag sticker. 

Her santa hat is a brad.

The peppermints are made out of perler beads. 

I love the vintage Christmas seal on this page.  

The tree is from the Christmas Shape Set.  It was heat embossed using Charred Gold from Emerald Creek.    

I did my cover last.  The ribbon is glued under the frame and it has an eyelet in it.  The buckle is attached with a brad that you can see on the backside of the page.  The chip quote is embossed with Charred Gold on the edges 
The center of the poinsettia is the brad that is holding on the buckle.    
The buckle was a great way to hold this guy together since it's pretty chunky.  

I hope you enjoy this little book.  I had a blast making it.  Have a very Merry Christmas! I hope there is no coal in your stocking.


Wednesday, May 10, 2017

The Sound of Music

Hi Everyone,
I am so excited to be sharing this project with you today.  I am the guest designer over at Frilly and Funkie today.  I was so happy to hear that the challenge theme is the Sound of Music. I am a huge music fan. When I am home there is almost always music on.  My taste is pretty varied too.  You never know what song might pop on the iPod next!

My first concert was Madonna back in the 80's. I was ten.  It was out in Foxboro Massachusetts, where the Patriots play.  We had nose bleed seats.  She looked like an ant.  I still know all of the words to her songs.  Ok, enough about me, let's get to the project.

I started by covering my canvas with Collage Medium and Melange Tissue Wrap.  I like bumps and wrinkles, so I squashed it around a bit.  I added a layer of Collage Medium to the top and some bits got Crazing added.

Once the canvas was dry I added texture paste through my mini stencil from set 25. Then I layered on my color using Broken China and Faded Jeans Oxides inks on the base.   I went Distress Crayon crazy using every shade of blue.  Once all of the blues were on I added some walnut stain to random edges.


I took some old sheet music and added it to the back if the canvas using Collage Medium and Crazing Medium.

 While the sheet music dried I worked on my interior piece.  I cut a piece of matboard, added a piece of paper from the 8x8 Etcetera pad, and inked the edges in Pumice Stone.

I cut heavy chipboard using the Crescent Moon and Stars die.  The moon was covered with Antique Linen Distress Glitter.

The various stars are covered with different things, some are covered with Pumice Stone Distress Glitter, some with Emerald Creek Hammered Metal Embossing Powder, and some with Emerald Creek Charred Gold Embossing Powder.  The moon and the stars covered with Distress Glitter were grunged up a bit using Distress Ink in Pumice Stone, Ground Espresso, and Vintage Photo.

My little paper doll is colored using Worn Lipstick Distress Marker on her dress. I used the same color for her bow, but I used my Oxide ink to color it.  I love how it is a bit darker.  


When the back was dry I colored it using Hickory Smoke, Walnut Stain, and Vintage Photo Distress Crayons.  I sliced it up like a very uneven pizza and colored the edges again.
I have to admit when I turned my canvas around and saw this I was pretty nervous.  I used my glue gun and glued the curls to the edge of the canvas.

I added in my moon and stars.  I used foam tape to adhere them to the background.  I then added my little girl and her clipping sentiment(there's that Madonna reference).

I stepped back to look at the canvas and something just wasn't right.  It didn't look finished.  I took out my girl and added a mask to the moon.  I splattered in Black Soot, Picket Fence, and Tarnished Brass  Distress Paints.  I added Dina Wakley Sterling for some heavier splats.  I popped my girl back in and added her wand.

I cut the Quote Chip using my Tonic scissors and added Tarnished Brass Paint to the edges.

The finishing touch was using metallic gel pens and my black Fude ball to add scribbles all over.
Here are a few more detail shots.


I hope you like here and thank you so much for stopping by!

Jess


Mix It Up Challenge Blog- Embossing( some of my stars are embossed)
Love to Create Challenge- Anything Goes Mixed Media


Monday, March 6, 2017

Spring Chics

Ah,  spring. I have some spring chics for you today.
 I made these for Gypsy Soul Laser Cuts.  Be sure to stop by the blog and see the other wonderful creations the DT has been making.


I started by coating my tag with a layer of collage medium and add bits of ripped tissue wrap.  Next I scribbled a light layer of  Distress Crayon in several colors.


In the one you see here I used colors that reminded me of a sunset.  I placed a stencil over the tag and rubbed away some of the crayon using an almost dry baby wipe.

I buy the cheapest baby wipes I can find.  They tend to be rough and pretty dry(not exactly what you'd want to use on a baby's bottom, but awesome for crafting). For the final step on the tag I added speckles of black and gold paint.  I also used some gold paint and just smeared it with my fingers.

Obviously, this is a close up of one of the other tags, but you can see the speckles. 


I took one of the bird nests from the For the Birds set. I inked the top part using brown Distress inks. The bottom piece is embossing using Emerald Creek's San Tropez Tan.


I cut out a vintage lady and plopped her in the nest.  I decided the tag needed a bit more interest so I used a stencil and distress crayon to make the tracks down the side. Once the sentiment was added I randomly scribbled around on the tag.


I decided she needed some friends so I made a couple more tags using the same technique and different bits of the For the Birds set.
This girl had her house made with Emerald Creek's Salted Navy and Hammered Metal embossing powders.  

This one used the San Tropez Tan on the top and I ran my Distress Crayons over it to make it darker in areas.  

I hope you like the girls and try to make some of your own!
Simon Says Stamp Make your own Background Challenge
A Vintage Journey- All aboard challenge

Disclaimer Notice

I've received products/compensation as part of the Gypsy Soul Laser Cuts Design teams. My projects, however, are 100% my own.