Showing posts with label fractured ice. Show all posts

Wednesday, January 10, 2018

Mistress of Myself

I am super excited to share my first post for The Blank Page Muse Rubber Stamp Company!  Our theme this month is Turquoise, Silver, and Sparkle.  Here's what I came up with for you.
I started by using an image from the A Wing Above the Rest Stamp Set.  This little beauty comes with some wings already, but I wanted to add a little more.  Once I stamped my image I just trimmed off the wings. 
I colored the Image using Distress Crayons and a waterbrush.


The chipboard wings were painted a shimmery turquoise and then embossed.  

I stamped the Chain link Pattern Background onto tissue paper.  I then adhered the tissue to a canvas banner using Pellon Ez-Steam. 

Once the tissue is adhered I colored it using inks in various blue hues.  I love embossing the edges for a grungy look. 

I sprinkled embossing powder randomly on the pennant and heat to set. 

I stamped the sentiment from the Words by Jane Sentiments set and then edge using black ink. 

Finally. I adhered everything to the pennant and used black tulle behind the focal point.  


Don't forget to stop by the blog and the facebook page for more inspiration!
Jess

Monday, December 18, 2017

Christmas House Ornaments

Hi Everyone,


I've got a quick last minute ornament or gift tag for you.
Start with your Simple House Ornament cover both sides in the paper of your choosing. I added a bit of shimmer using my clear shimmer pen.  I tried to capture it in the photos, but it's so subtle.  

Apply a thin layer of white acrylic paint to both sides of your Snowflake Border.  You won't need the whole border.  I placed mine on top of my ornament and got a basic placement idea and then trimmed it accordingly.  
Once your paint is dry emboss the snowflakes using Fractured Ice Embossing powder. 


Color your Tim Holtz paper doll using Distress Markers.  I also added some stickles for sparkle. 
Glue your snowflakes to your house(be sure you don't cover the hole in the top of the ornament).  Add your people using some foam tape for dimension.  Add stickers from the Tim Holtz Christmas clippings stack.  A little bakers twine and your ornament is finished.   


I liked this so much I made a second ornament using the same process, but these snowflakes are embossed with Charred Gold.The paper doll had a tiny jingle bell added to his hand.
Have a very Merry Christmas,
try it on Tuesdays- Twinkle, Twinkle
A Vintage Journey- Winter Wonderland
Mixed Media Monthly- Challenge 43


Sunday, December 17, 2017

Dashing through the snow

Hi Everyone,
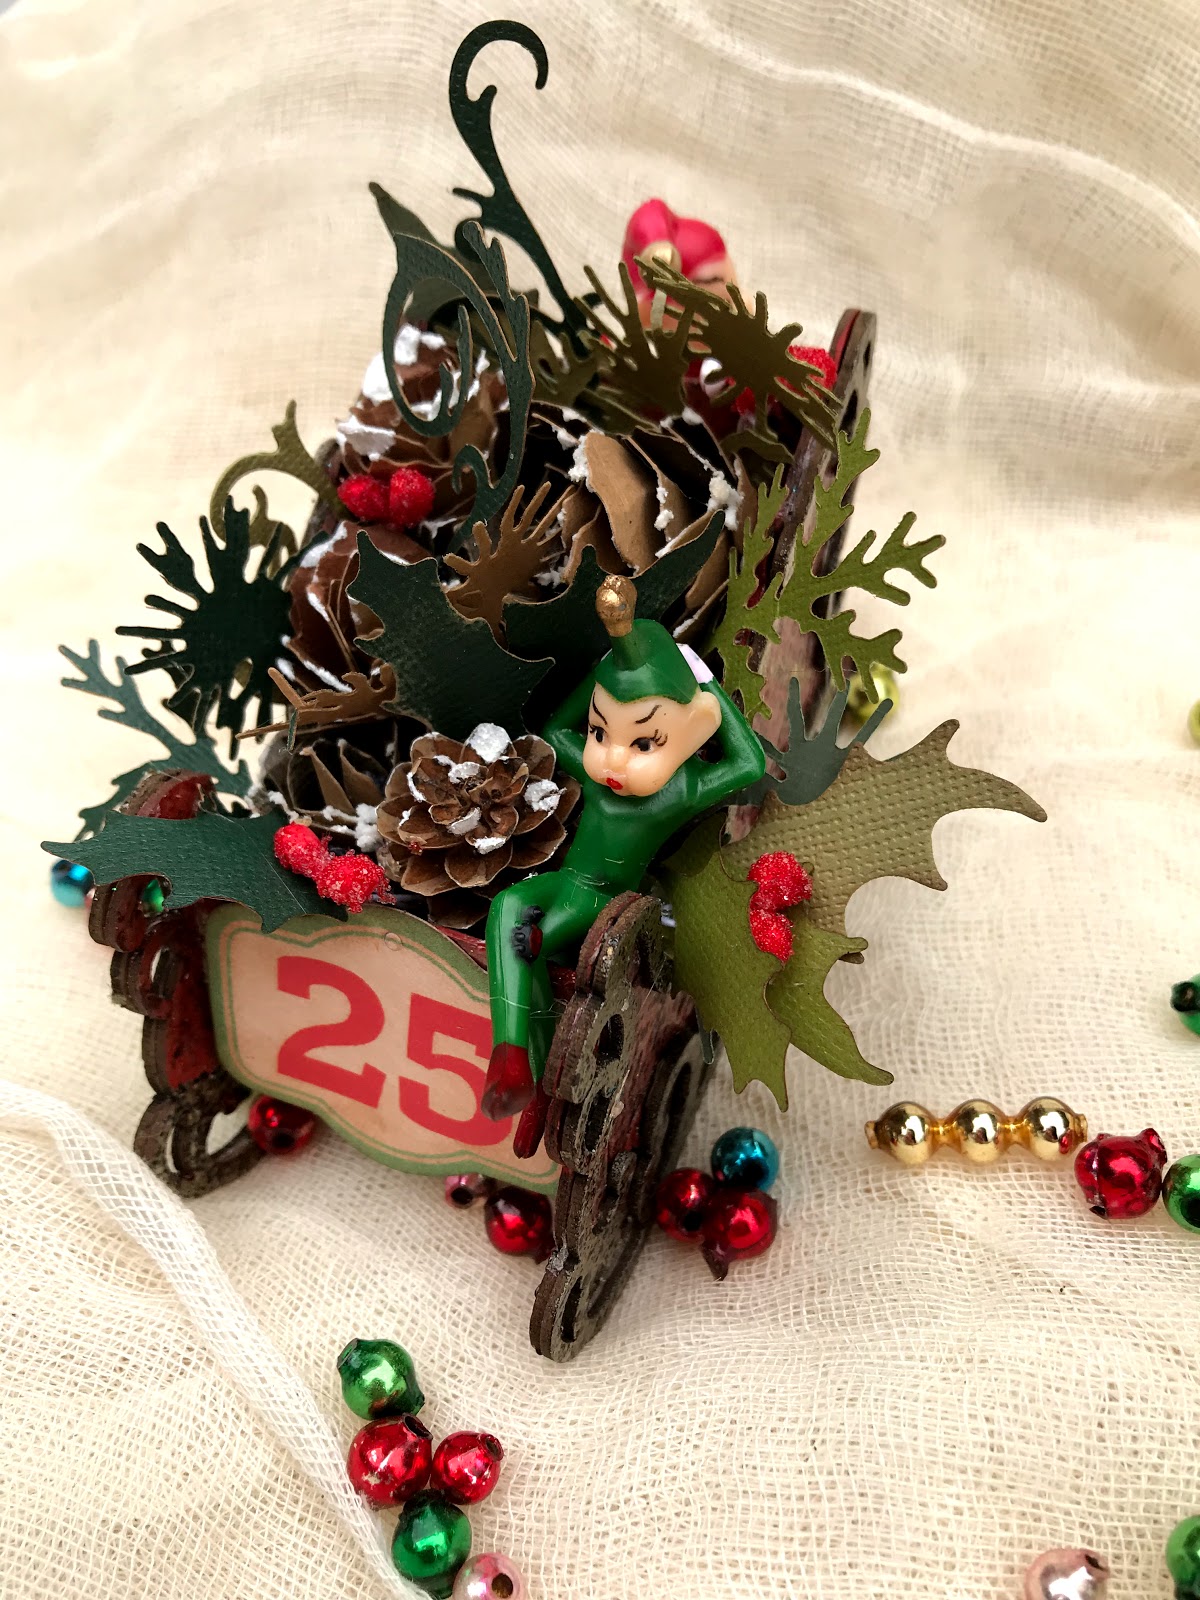
I have the cutest little sleigh ornament for you today.

I started with my slight ornament from Gypsy Soul Laser cuts.

Paint all of the solid pieces using red acrylic paint.  

Emboss the fancy edge pieces using Charred Gold embossing powder. 
Cover the solid slight pieces in Fractured Ice embossing powder and then glue on the fancy gold parts.  The sleigh has slots and tabs, making it easy to assemble.  I always assemble my pieces together before I start any project so I can be sure I assemble them correctly when I am done embellishing them. 
Another great tip- if you emboss a lot you need to invest in one of these Embossing Daubers.  They are amazing!
Cut out a bunch of greenery using the Tim Holtz Holiday Greenery Die.  Then cut out several pinecones using the tattered pinecone die.
Add grit paste and Soft Fallen Snow Embossing Powder or Distress Rock Candy Glitter to add snow to your pinecones. 
There are several pieces from the Tim Holtz Christmas Ephemera pack that fit right in the front of the sleigh. You could also cut a piece of paper to fit and stamp out names if you would want to use these as place card holders.   I chose the vintage pricing sign and aged it using Vintage Photo Distress Ink. 
Color several Beaded Berry Stems. I used Candied Apple Distress Stain to color mine.  
Once all of your greenery, pinecones, and berries are ready you fill the sleigh.  
I added the vintage elves to the sleigh for my finishing touch. 
Look at the sparkle from the Fractured Ice!
This little guy is hanging on tight!
This little guy is relaxing.  
Here's a little aerial view so you can see how everything is just tucked in to fill the sleigh. 

Happy Crafting!

Sunday, November 19, 2017

My unsung hero

Hi Everyone, 
I have am up on the Emerald Creek Dare Blog today and our current dare is Unsung Heroes.  My mum is my unsung hero.  She works so hard and always has time for everyone and everything else.  She is the one that instilled the love of creating in me.  I remember being 8 or 9 and doing craft fairs with her selling my little lace and bead ornaments.  She's my biggest cheerleader and supporter, so I wanted to make her a little something. She is a reader and a sewer, so I came up with this oversized bookmark. 
I started with a large heavy weight chipboard tag from Gypsy Soul Laser Cuts and painted it with a very thin layer of White Acrylic paint.  
The I added my stamps using my Tim Holtz stamping platform. This is the back.
This is the front. The butterfly has a layer of Fractured Ice Embossing powder over the Black Soot Archival ink and the sentiment(from the Fallen Blossom set) has Onyx Frost embossing powder for shimmer.  

Once I layered on all of my stamps I colored the images on the front using Distress Crayons and Dina Wakley scribble sticks.  

I added the button brads and made the thread using Oil Rubbed Bronze powder right over a line drawn with a pen.  
The top of the tag was embellished with seam binding, twine, and the Handmade charm. 

Here you can really see the Fractured Ice over the black.  I added scissors to the body of the butterfly. 

The back was colored using Magenta's Nuance Powders and the entire piece was edged with charred gold.  
Here is the finished piece. 
Who is your unsung hero? Be sure to enter the dare and you can win money to the store!
Jess


Items from Emerald Creek:

Monday, July 3, 2017

Frida Shrine

Hey Everyone,
It's been a bit since I have posted.  I have been busy attending my very first crop and teaching.  Today I created this for Gypsy Soul Laser Cuts.


I worked on this piece while attending the crop.  I had a lot of fun, but man I did not get much done! I was there for a full day and just managed to squeeze this out under the wire.

I started with the back piece of the Reliquary- Tower Top.  I used a very thin layer of gesso and then painted it with Abandoned Coral Distress Paint.  Once my paint was dry I used a Ripe Persimmon Distress Crayon through a stencil.  The edges got a rough coat of Emerald Creek's Salted Wine Embossing Powder.  

I used one piece of the Folding House Shrine for the next layer.  I gessoed and then used Mermaid Lagoon Distress Paint.  The stenciled flowers were made using various Distress Inks.  Why am I not listing them? Well...
I decided this wasn't enough. It looks cool, but it wasn't popping enough for me.  The relics and Artifacts skull has a coat of Vintage Distress Collage Medium and then a light layer of crackle medium.  I rubbed Black Soot Crayon into the cracks and her teeth.  The eyes and nose have a thin layer of black acrylic paint.  The wings are from Rubber Moon.  I colored them using Distress Oxide Inks in Wilted Violet, Fossilized Amber, and Spiced Marmalade.  
I went back to the Reliquary- Tower Top and added some more layers
Distress Oxides in Spiced Marmalade, Fossilized Amber, and Vintage Photo made it perfectly grungy.  
The House Shrine got a layer of Fractured Ice Embossing Powder and some Charred Gold on the edge.  Distress Oxide inks Cracked Pistachio, Broken China, and Vintage Photo make this layer just right.  
I added tiny tattered floral flowers to the skull and they are tipped with a bit of Vintage Photo Distress Crayon.The Wings were edged with Charred Gold Embossing powder.  I added scribbles using gel pens.  
I thought the quote was appropriate since I didn't have my craft room at my fingertips and I had to work with what I brought.  I also like that it is a nod to Frida since she was limited in her mobility, yet the need to create was always there.  
Jess

Disclaimer Notice

I've received products/compensation as part of the Gypsy Soul Laser Cuts Design teams. My projects, however, are 100% my own.