Showing posts with label tiny tattered floral. Show all posts

Monday, November 19, 2018

Simple Christmas


Hi Everyone,
I don't do simple a lot, but when you need to bust out a bunch of Christmas cards I find simple is best!  Today I have two cards that use the same base, but I have changed them up just a tiny bit and the feel is very different on both. 


  The Star Medallions from Gypsy Soul Laser Cuts come in a set of three.  For these two cards I used the small and medium medallions.  Paint both of the medallions using Dina Wakley paint in Gilt.  The small medallion got some pearl dots added to the points and a gumdrop colored with mushroom alcohol ink in the center.
For the background on this card use navy blue paper and emboss it using the Sizzix 3d Winter Snowflakes Embossing folder.  Cut out your sentiment using the Tim Holtz Holiday Words Script die. It's hard to tell here, but there is a tiny line of gold paper layered underneath the embossed paper.  
Mount your background on to  a white card.  

Add your bling and you're done! 
The pink card follows the same idea, but the center is made using the tiny tattered floral die and the festive foliage die from Tim Holtz.  


That's it! You could bust out all of your Christmas cards in an afternoon making them like this!

Monday, October 15, 2018

Greetings from Regions Beyond


Hi Everyone,

I am up on the Gypsy Soul Laser Cuts Blog today with a wicked little vignette box.
Start by taking a wooden vignette box and layering it on top of your Mini Botanical Journaling Block.  The blocks come in a set of three, so you can play with different sizes.
Cut the house out of the Haunted House Oval.  Trim it down so it fits inside the vignette box.  Emboss the piece with Emerald Creek's Mercury Rising embossing powder.

Treat the outside of the box using Distress Oxide inks in Forest Moss, Hickory Smoke, and Ground Espresso. 

Add a crackle medium.  I really glopped it on so it looks chunky. Mixed with the Forest Moss Oxide ink the box looks a bit moldy.  Moldy is good at Halloween time!

Add paper to the back of the box and glue it in place.  Glue the house to the background.  Add fabric tape all around the edges of the shadowbox and set it aside. 
Use the largest of the Mini Botanical Journaling Blocks and cover the entire piece with gesso.
Add your sentiment cut from the Tim Holtz Halloween script, Christmas Script, and Holiday Words.  
Time to start adding Distress Crayon.     
Add crayon and move it around using your fingers.  
Cover the front using the same technique.  Add more saturated colors on the flowers and leaves. A bit of Distress Paint in Tarnished Brass gets smudged all around the edge of the block. 


Cut the bats and moon out of the Haunted House Oval.  Emboss the bats using the mercury rising powder.  Emboss the moon using Charred Gold.  


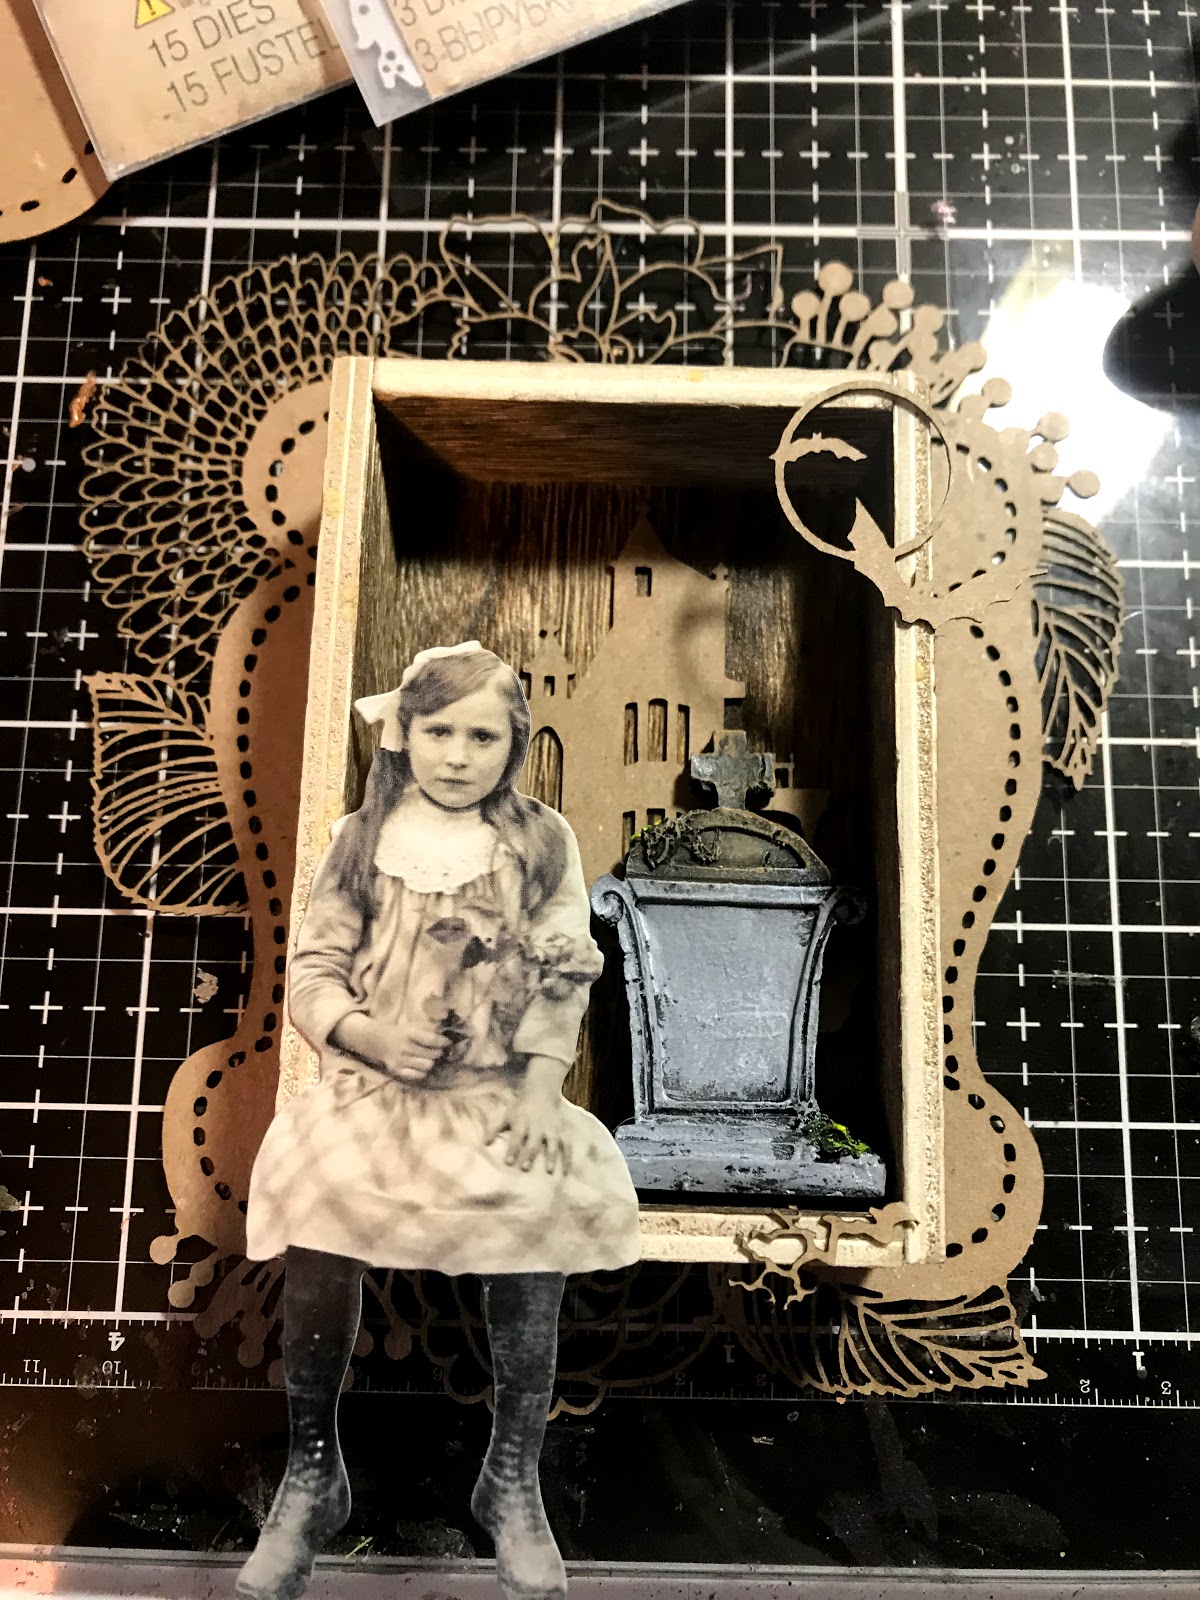
Glue the shadowbox to the center of the journaling block.  Add the bats to the front of the box.  Glue in a Tim Holtz tombstone with rub ons added.  Glue on the paperdoll.  Don't forget to give her a bouquet of dead flowers wrapped in mummy cloth. Cut a small slit around her hand and she appears to actually be holding the bouquet.

Make a bunch of tiny tattered florals and glue them in a cascade on the top of the vignette box.  A bit of leftover mummy cloth from the bouquet was put to good use up here.  A tiny skull bead aged with mushroom alcohol ink adds an element of surprise. 

Add a wooden finial that has been painted with Black Soot Distress Paint and a bit of Tarnished Brass. A bit of fabric tape that is around the edge of the box is wrapped around the finial.  Mummy cloth and a few more flowers complete the base. 
Here's the back of the Mini Botanical Journaling block all done up.
Happy Haunting!
Jess


Haunted Halloween  Challenge Frilly and Funkie


Monday, July 3, 2017

Frida Shrine

Hey Everyone,
It's been a bit since I have posted.  I have been busy attending my very first crop and teaching.  Today I created this for Gypsy Soul Laser Cuts.


I worked on this piece while attending the crop.  I had a lot of fun, but man I did not get much done! I was there for a full day and just managed to squeeze this out under the wire.

I started with the back piece of the Reliquary- Tower Top.  I used a very thin layer of gesso and then painted it with Abandoned Coral Distress Paint.  Once my paint was dry I used a Ripe Persimmon Distress Crayon through a stencil.  The edges got a rough coat of Emerald Creek's Salted Wine Embossing Powder.  

I used one piece of the Folding House Shrine for the next layer.  I gessoed and then used Mermaid Lagoon Distress Paint.  The stenciled flowers were made using various Distress Inks.  Why am I not listing them? Well...
I decided this wasn't enough. It looks cool, but it wasn't popping enough for me.  The relics and Artifacts skull has a coat of Vintage Distress Collage Medium and then a light layer of crackle medium.  I rubbed Black Soot Crayon into the cracks and her teeth.  The eyes and nose have a thin layer of black acrylic paint.  The wings are from Rubber Moon.  I colored them using Distress Oxide Inks in Wilted Violet, Fossilized Amber, and Spiced Marmalade.  
I went back to the Reliquary- Tower Top and added some more layers
Distress Oxides in Spiced Marmalade, Fossilized Amber, and Vintage Photo made it perfectly grungy.  
The House Shrine got a layer of Fractured Ice Embossing Powder and some Charred Gold on the edge.  Distress Oxide inks Cracked Pistachio, Broken China, and Vintage Photo make this layer just right.  
I added tiny tattered floral flowers to the skull and they are tipped with a bit of Vintage Photo Distress Crayon.The Wings were edged with Charred Gold Embossing powder.  I added scribbles using gel pens.  
I thought the quote was appropriate since I didn't have my craft room at my fingertips and I had to work with what I brought.  I also like that it is a nod to Frida since she was limited in her mobility, yet the need to create was always there.  
Jess

Sunday, November 6, 2016

My Spirit Cannot be Caged

Hi Everyone,
Since my crafting mojo seems to be on a hiatus right now I thought I would revist some Fairy Cages I made when I was on the Unruly Paperarts design team.  The theme was "Winging It" and those of you that follow me here and on other social media know I am a sucker for a good fairy.


I bought these tiny bird cages on clearance and stashed them knowing that I would find a use for them. I use images from Lisa's Altered Art all the time. She has fantastic ballerinas, women, children, and wing images. When I was playing around one day I discovered some of the girls would fit right in the cages. I added wings to them to make them into fairies. They got all gussied up with tulle skirts, feathers, and bits of bling.


I added a ton of flowers to the bottoms of the cages. Some of the flowers I made and some I purchased. I didn't want the cages to close, so the flowers spill out and wrap around the bases.


The base on this one is a giant wooden spool that is wrapped with twine.


The base on this one is a plaster pillar of some sort (again from the craft hoard). I added a little birdy to the outside of the cage and it's done!


Here's hoping my mojo comes back soon!

Jess

Thursday, September 8, 2016

Guest posting for Emerald Creek

Hi Everyone,
I'm back guest posting for Emerald Creek Craft Supplies today. The theme up on the challenge blog is superheroes. When I heard this my first reaction was "crap."  Don't get me wrong I love superheroes, but making art with and about them? I really had to put on my thinking cap.  I took this theme and went extreme. I made something to celebrate, someone I consider, an art superhero. Frida Kahlo.

I've always admired Frida's work, but I have been reading more about her as a person. She was a total bad ass! What's more of a superhero personality must than being bad ass?!


She overcame major injuries and incorporated her pain, her joy, her anger, and her love into her art.

She didn't care what society thought about her. She was truly living as her authentic self. I think that is what art is all about, trying to find your authentic self.
Who is your art superhero? 
Jess


Supplies you can find from Emerald Creek:

Other supplies:
Trophy cup
Styrofoam ball
Memo pin
Chit chat
Cardstock
Seam binding
Tiny tattered floral die
Skull bead
Head Pin
Vial Label
Remnant Rub


Sunday, May 22, 2016

Guest Posting on Our Creative Corner

I am so excited to be guest posting over at  Our Creative Corner today! My mermaids won their Return of the Challenge challenge.  Here is the project I created for them.  Please pop over and check it out there too.


I started by using my gelli plate, stencils, and acrylic paint to make my background on a canvas tag.

My focal image is from the Tim Holtz Winged Things stamp set.  The little fairy is colored using Distress Inks and Crayons.

 I made the tiny tattered floral flowers and branches using the tissue paper and collage medium technique I showed a couple posts back.

Once they were dry I ran them through my die cutting machine and added some bling to the flowers.
I stamped on the tag using Archival ink and used white acrylic paint to highlight areas.  Black Soot Distress Crayon darkened up the stitching around the tag.  I also scribbled with my black Fude ball pen around the fairy and the sentiment.
What have you been crafting?
Jess

Disclaimer Notice

I've received products/compensation as part of the Gypsy Soul Laser Cuts Design teams. My projects, however, are 100% my own.