Showing posts with label freshly picked rose stamp. Show all posts

Sunday, September 17, 2017

Oh, Canada

Here is my little ode to Canada.  I have only been there once, that's a story to tell over an adult beverage!  I have to say that I have met some truly lovely people through crafting and the Canadians have been some of the best.
This piece is in the current issue of Creative Scrapbooker Magazine.  

 I didn't take step out photos, but I used plain tissue wrap to create my base that covers the canvas board.  I stamped it with the Freshly Picked Rose and Kimilese 3 in archival ink.  I then colored it using various Distress Crayons. I know you can't really see it on here, but I promise they are under there.  
I distressed and layered on some paper.  The dress form is from a Tim Holtz Sizzix diecut and then dry embossed.  I ran my embossing ink over the top and used Charred Gold to pick up the embossing. 
I took a piece of white cardstock and colored it using Magenta's Nuvo Powders and then used the   Kimilese 3 Stamp and Charred Gold for the extra pop.  Each leaf was cut using the Tim Holtz Fall Foliage strip die. The leaves are layered on to make a skirt.  I added Tombow tabs to give some dimension.  
The flower band(contact Emerald Creek to get this) was colored with gold and red alcohol inks.
I colored seam binding using Distress Stains and tinted the vintage flowers the same way.  
A bit of Distress Crayon around the stickers completes the panel.  
Thanks for checking it out,
Jess
  

Sunday, June 18, 2017

Leo and Shelly- love at first sight

This month over at the Emerald Creek Dare blog we are having a Surf and Turf challenge.  Here is my quirky take. Meet Leo and Shelly.  As soon as they saw one another they knew it was love.  

  A little while back I created this stage.
It made me think of old circus sideshows.  I created the project I am sharing today to add to the cast of characters.  

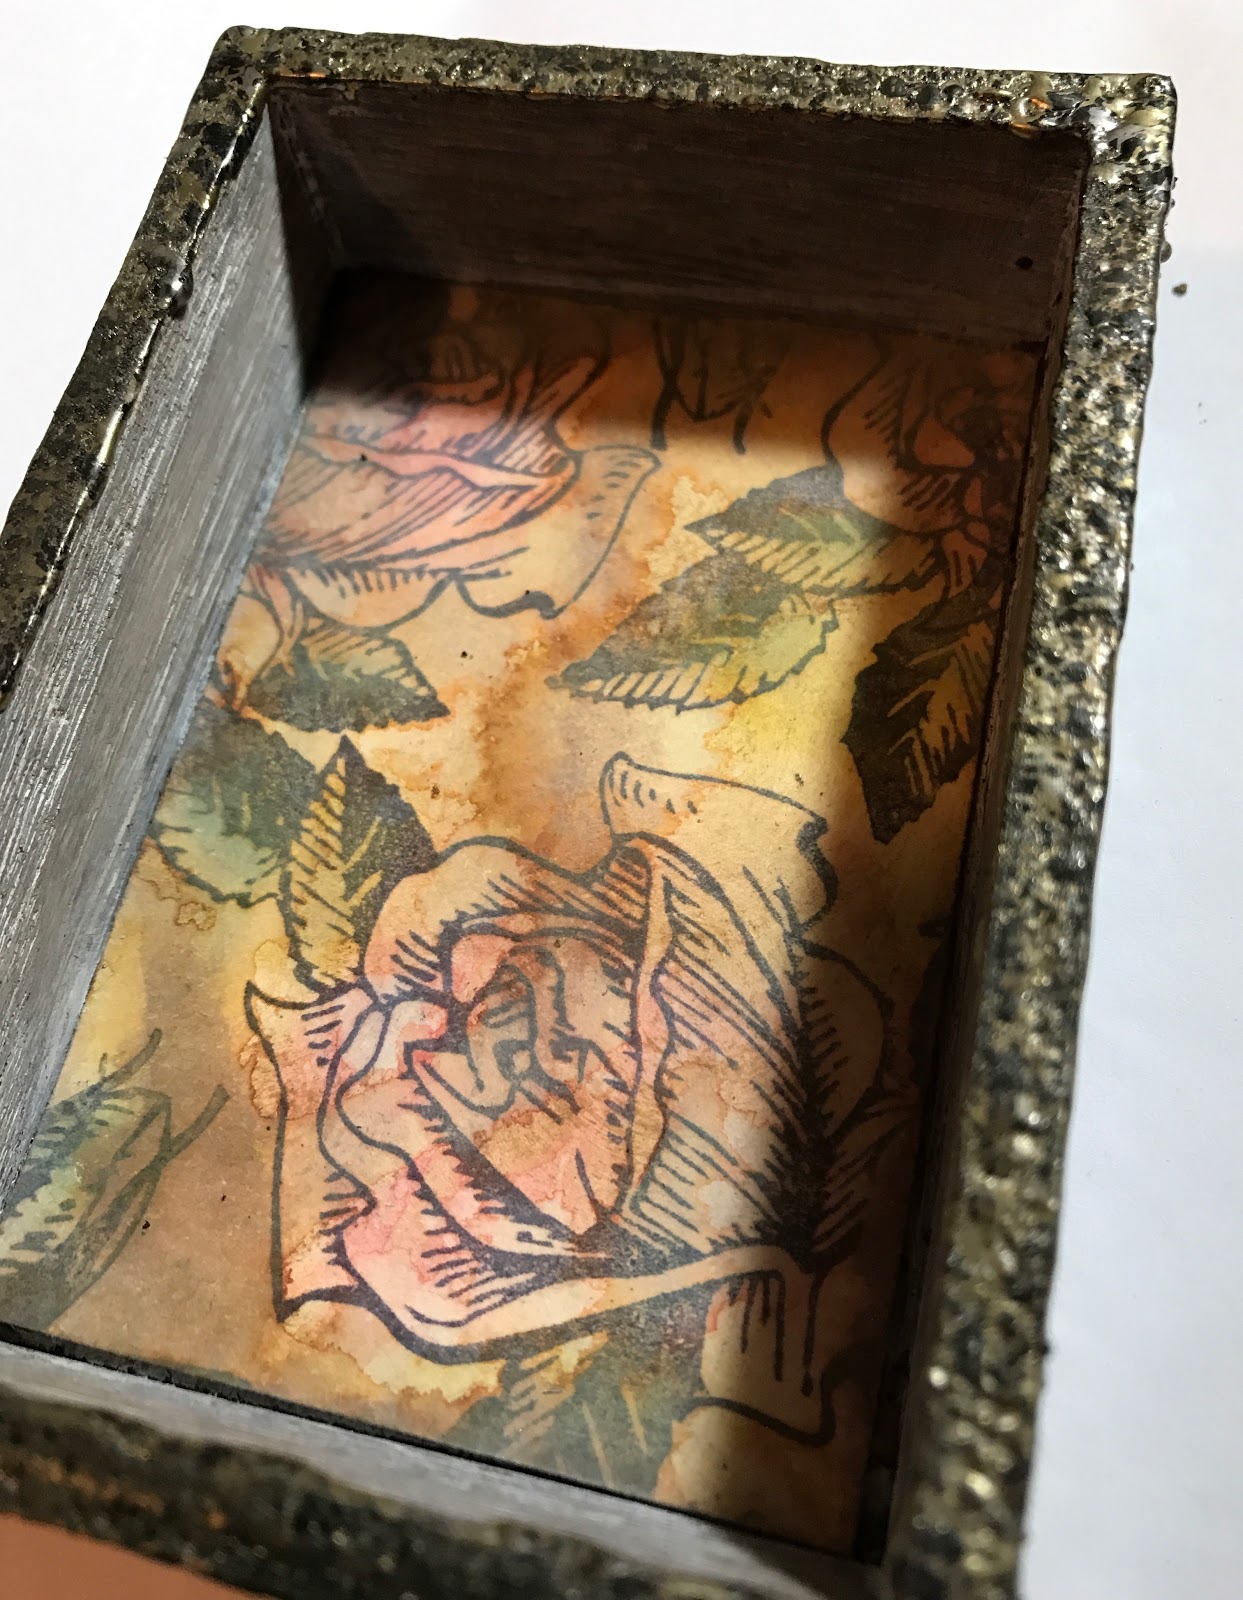
I started with my Tim Holtz vignette box and gave it a quick wash of watered down white acrylic paint.  
I added a layer of Fractured Ice embossing powder.
Doesn't it look like wood that has been exposed to the elements for too long?

The front edges of the box got a layer of Charred Gold.
For the inside of the box I used Distress Mixed Media Heavy stock paper.  I stamped my Fresh Picked Rose Stamp using Hydrangea Archival Ink. 
Using my Distress Oxides I colored the Roses(Worn Lipstick, Mowed Lawn, Broken China) and then added a bunch of Vintage Photo to make it look weathered.
I wanted the background to look like water stained old wallpaper.  

The rest came down to details.  
Shelly's shell head is the Cerith Seashell Stamp.  I stamped it on shrink plastic and colored it using my Dina Wakley Scribble Sticks.  
I have no idea where this image came from, but I love it! I added a little resin rose for the added touch of dapper. 
The finials are covered with Charred Gold and Distress Crayon to take some of the shine off.   The big charm is the Handmade charm just turned around with a clipping sticker on it.  The same Oxide inks I used on the background are on the sticker.  A teeny key and lock charm are tied on with blue twine.  
Don't forget to pop over to the blog and enter the dare yourself.  You can win a gift card to the Emerald Creek store! 
Jess


Thursday, February 16, 2017

Painting the Roses Red

I'm painting roses red today, no really! I will show you how I did it too. 
Start by stamping the Freshly Picked Rose Stamp in Antique Linen Distress Ink.
Color in your rose using various distress markers.  I scribbled on my craft mat and then picked up the color using a water brush.  The Antique Linen just kind of disappears when you color with the darker inks.  You don't have to be perfect.   

Once your image is dry you want to stamp the  Freshly Picked Rose Stamp in a black archival ink.  Don't aim to go directly on top of your original image, stamp just slightly off. 

Cover your entire card with a thin layer of Vintage Distress Collage Medium. Once the medium is dry use your Vintage Photo Distress Crayon around the edges of your rose paper.  Stamp your sentiment.  

Emboss the edge piece using Charred Gold Embossing Powder.  

Adhere your rose to a piece of red core-dinations paper.  Adhere the rose piece to the card.  Glue on your bunny key.  
Don't tell the queen what you did.  But now you know the secret to painting roses any color you wish!
You can enter the Emerald Creek Dare this month and win some money to the store.  Check it out.  
Jess

I am also entering this into the Frilly and Funkie Out of the Cold Challenge
Simon Says Stamp Monday- use your favorite tool challenge(my heat gun is always close at hand).
Simon Says Stamp Wednesday- Fantastic Florals Challenge


Disclaimer Notice

I've received products/compensation as part of the Gypsy Soul Laser Cuts Design teams. My projects, however, are 100% my own.