Showing posts with label vignette box. Show all posts

Monday, June 10, 2019

Adventure Awaits My True Friend


It's time for a new Monday Challenge!
The theme this week is Vacation!


I started by covering my vignette box inside and out with a thin layer of Picket Fence Distress Paint.  Once the paint was dry I used college medium to adhere the travel collage paper to the outside of the box.  A bit of Tarnished Brass Distress Paint was added here and there on the outside of the vignette box.
Using a piece of matching travel paper from the 8x8 etcetera pad, I glued it to the back the inside of the box.  I sanded the paper so the map appears aged and covered it with Pumice Stone Distress Ink.  The final touch was to splatter on some Black Soot Distress Paint. I snapped one of the ruler pieces in half.  I just held mine in my hand and snapped it.  I didn't want it to be even.  If you wanted an even cut you could cut it with your craft knife or even use a pair of Tim's scissors to snip it.  I wrapped the ruler in a piece of craft thread and added the compass charm.   I then glued the ruler inside the box about two thirds of the way down.


A couple clipping stickers were added to the top of the box.  I centered them so they would be above the baseboard doll's head.  Then outlined them using a gold paint pen.
The bottom part of the box has a vintage clock face.

The baseboard doll was colored using a Distress Crayon in  Cracked Pistachio.  The tiny flower was colored using Wild Plum alcohol ink and added to her hair.  Two sets of transparent wings were added to her back using foam tape.  The wings got a tiny bit of Wild Plum alcohol ink and some Tarnished Brass Distress Paint added to them.  I glued a little clipping sticker to her center and then I glued the doll to the box using several bingo markers to hold her upright.

The bottom of the box is covered with vintage paper flowers.


I covered the lace baseboard frame with crackle texture paste and let it air dry.  Once the crackle was dry I sprayed it with Distress Oxide Sprays(Pumice Stone and Cracked Pistachio). Some of the crackle flaked off and I was totally okay with this. The exposed areas suck in the spray and you get all that wonderful oxidization.

I took a ribbon from the Ideaology Ribbon and bow assortment and colored it using Tarnished Brass Distress Paint.  Before the paint is fully dry, I wiped some off to expose the metal underneath.
I used a chip quote and banged up the edges by running it along my desk.  The edges got a coat of Tarnished Brass Paint.

The finial was painted with Black Soot Distress Paint and then given a couple sprays of the same Oxide Colors I used on the frame.   The little grooves were painted using the Tarnished Brass Paint.

Using a strong glue I added the fence to the back of the frame and then glued the frame to the vignette box.
I hope you enjoyed my take on this weeks theme.  And now it's your turn to create a Vacation themed project!
Jess


As always Simon Says Stamp will be giving away $50 voucher to shop at the fabulous Simon Says Stamp Store


Do you use Instagram ?  If so please add  #sssmchallenge so we can see your entries there too


You have until Monday 8am Ohio time. 1pm UK time, 2 pm CET to join in 

Monday, October 15, 2018

Greetings from Regions Beyond


Hi Everyone,

I am up on the Gypsy Soul Laser Cuts Blog today with a wicked little vignette box.
Start by taking a wooden vignette box and layering it on top of your Mini Botanical Journaling Block.  The blocks come in a set of three, so you can play with different sizes.
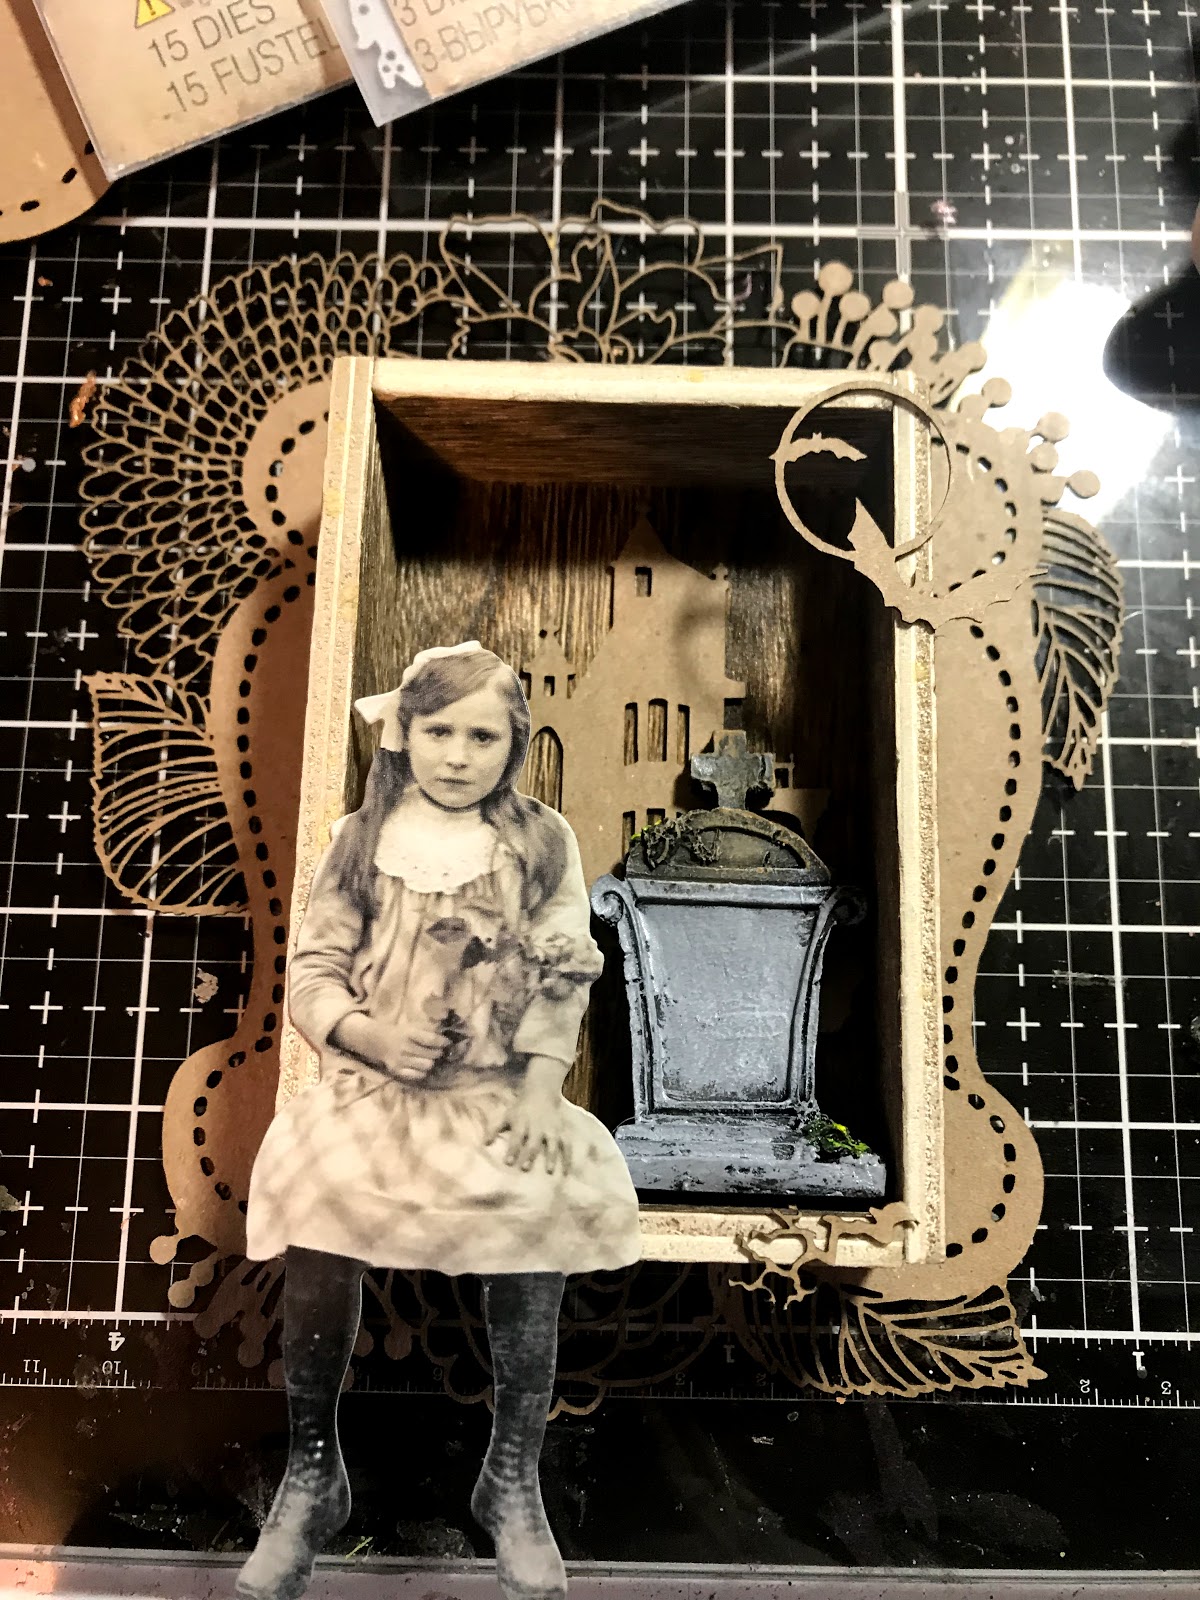
Cut the house out of the Haunted House Oval.  Trim it down so it fits inside the vignette box.  Emboss the piece with Emerald Creek's Mercury Rising embossing powder.

Treat the outside of the box using Distress Oxide inks in Forest Moss, Hickory Smoke, and Ground Espresso. 

Add a crackle medium.  I really glopped it on so it looks chunky. Mixed with the Forest Moss Oxide ink the box looks a bit moldy.  Moldy is good at Halloween time!

Add paper to the back of the box and glue it in place.  Glue the house to the background.  Add fabric tape all around the edges of the shadowbox and set it aside. 
Use the largest of the Mini Botanical Journaling Blocks and cover the entire piece with gesso.
Add your sentiment cut from the Tim Holtz Halloween script, Christmas Script, and Holiday Words.  
Time to start adding Distress Crayon.     
Add crayon and move it around using your fingers.  
Cover the front using the same technique.  Add more saturated colors on the flowers and leaves. A bit of Distress Paint in Tarnished Brass gets smudged all around the edge of the block. 


Cut the bats and moon out of the Haunted House Oval.  Emboss the bats using the mercury rising powder.  Emboss the moon using Charred Gold.  


Glue the shadowbox to the center of the journaling block.  Add the bats to the front of the box.  Glue in a Tim Holtz tombstone with rub ons added.  Glue on the paperdoll.  Don't forget to give her a bouquet of dead flowers wrapped in mummy cloth. Cut a small slit around her hand and she appears to actually be holding the bouquet.

Make a bunch of tiny tattered florals and glue them in a cascade on the top of the vignette box.  A bit of leftover mummy cloth from the bouquet was put to good use up here.  A tiny skull bead aged with mushroom alcohol ink adds an element of surprise. 

Add a wooden finial that has been painted with Black Soot Distress Paint and a bit of Tarnished Brass. A bit of fabric tape that is around the edge of the box is wrapped around the finial.  Mummy cloth and a few more flowers complete the base. 
Here's the back of the Mini Botanical Journaling block all done up.
Happy Haunting!
Jess


Haunted Halloween  Challenge Frilly and Funkie


Friday, September 15, 2017

The Strange Story of Amelia Hardy

Hello Everyone,
I love creating for Halloween. I have a creepy project for you today with a full tutorial over on the My Rusty Crown Blog.  Pop over and have a look.  Here's a little taste of what awaits!


Jess

Sunday, June 18, 2017

Leo and Shelly- love at first sight

This month over at the Emerald Creek Dare blog we are having a Surf and Turf challenge.  Here is my quirky take. Meet Leo and Shelly.  As soon as they saw one another they knew it was love.  

  A little while back I created this stage.
It made me think of old circus sideshows.  I created the project I am sharing today to add to the cast of characters.  

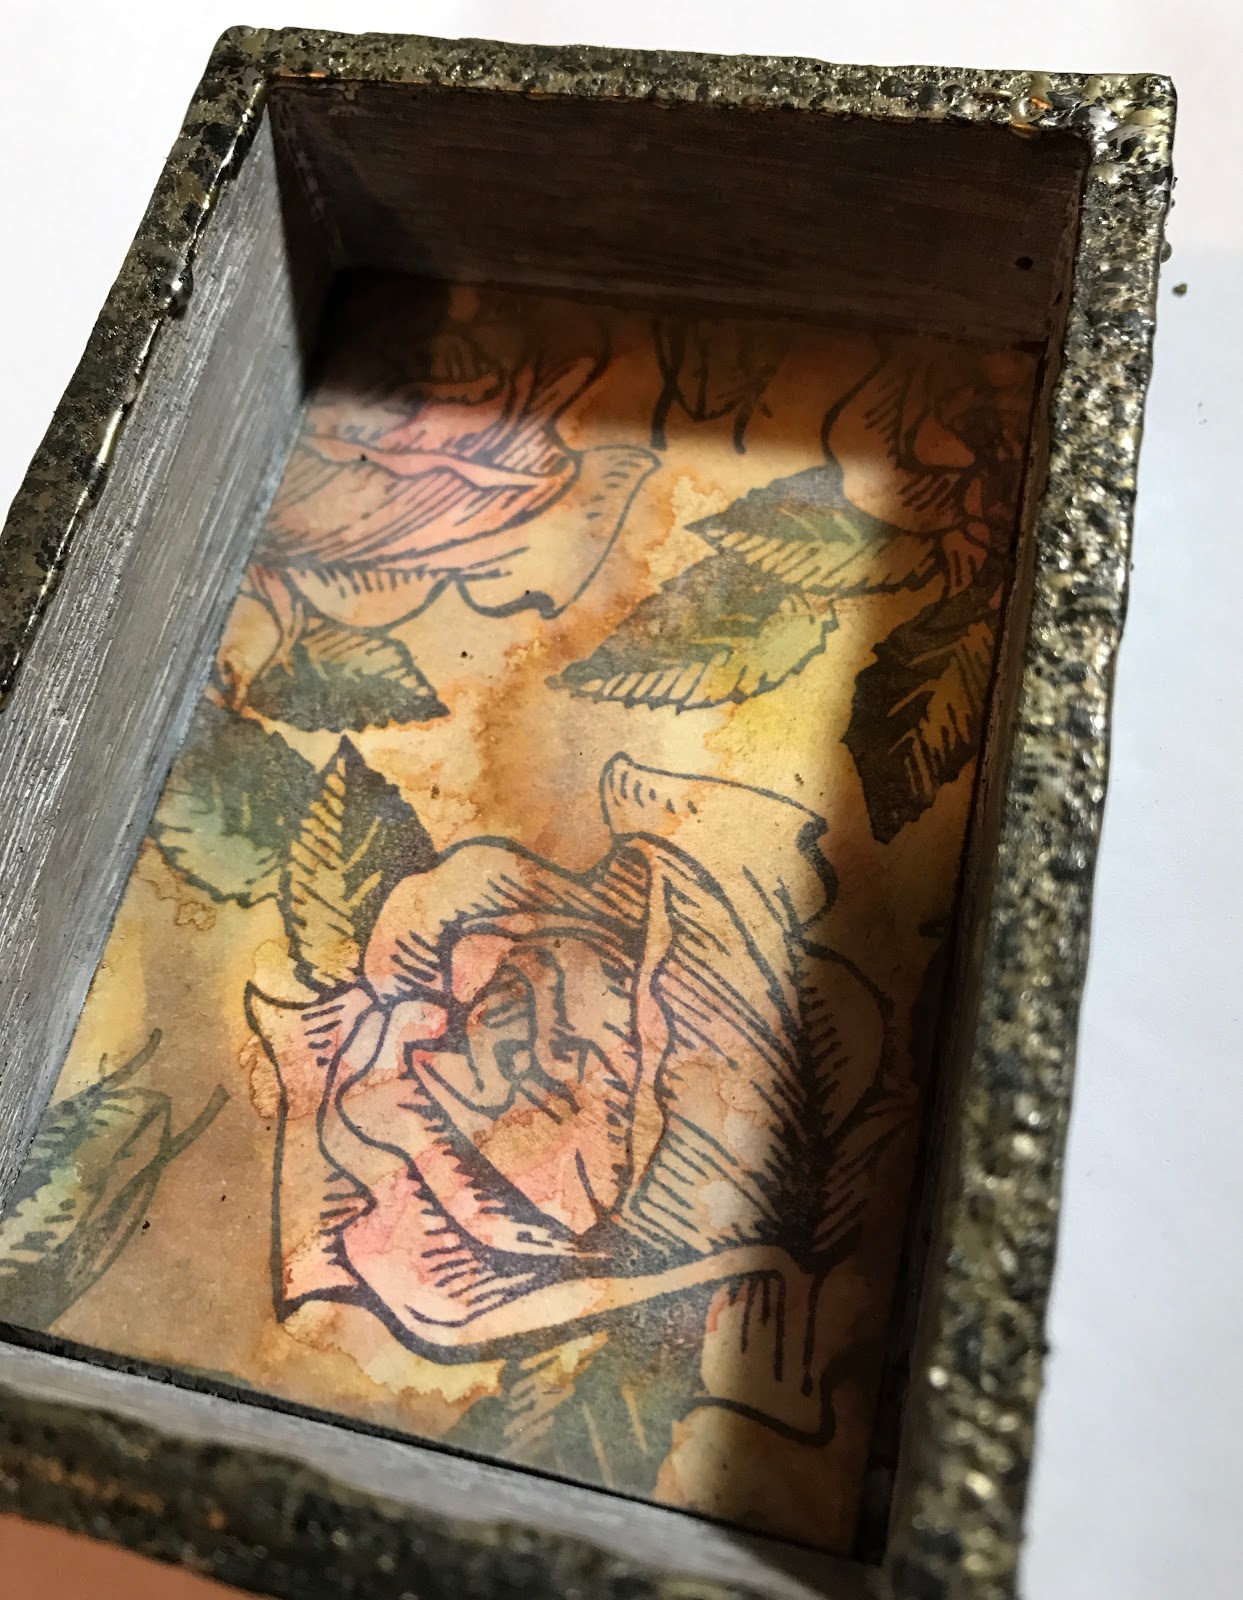
I started with my Tim Holtz vignette box and gave it a quick wash of watered down white acrylic paint.  
I added a layer of Fractured Ice embossing powder.
Doesn't it look like wood that has been exposed to the elements for too long?

The front edges of the box got a layer of Charred Gold.
For the inside of the box I used Distress Mixed Media Heavy stock paper.  I stamped my Fresh Picked Rose Stamp using Hydrangea Archival Ink. 
Using my Distress Oxides I colored the Roses(Worn Lipstick, Mowed Lawn, Broken China) and then added a bunch of Vintage Photo to make it look weathered.
I wanted the background to look like water stained old wallpaper.  

The rest came down to details.  
Shelly's shell head is the Cerith Seashell Stamp.  I stamped it on shrink plastic and colored it using my Dina Wakley Scribble Sticks.  
I have no idea where this image came from, but I love it! I added a little resin rose for the added touch of dapper. 
The finials are covered with Charred Gold and Distress Crayon to take some of the shine off.   The big charm is the Handmade charm just turned around with a clipping sticker on it.  The same Oxide inks I used on the background are on the sticker.  A teeny key and lock charm are tied on with blue twine.  
Don't forget to pop over to the blog and enter the dare yourself.  You can win a gift card to the Emerald Creek store! 
Jess


Thursday, March 30, 2017

The Easter Fairy

I will put wings on anything(in case you hadn't already noticed that about me).  I was playing around and made this little Easter fairy today.  
I lined the inside of my vignette box with paper from the Etcetera pack and gave it a layer of crackle medium.  When the crackle was dry I added distress crayon in Hickory Smoke and Bundled Sage.   
The sparkle on the edge is the thin roll of design tape from the Chatter pack. I colored it using alcohol inks.  
I'm still playing with the paper dolls and gave her wings from the botanical layers.  The paper flower in the back is from the botanical layers set too.  I added color using Distress Markers.  The other flowers are vintage from the hoard, as are the spools, the bunny, and the egg.  

Jess


Simon Says Stamp Monday- Things with Wings Challenge
Country View Challenge- Inspired by Tim Holtz 

Disclaimer Notice

I've received products/compensation as part of the Gypsy Soul Laser Cuts Design teams. My projects, however, are 100% my own.