Tuesday, April 10, 2018

Black, white, and blue all over

HI Everyone,
I know my post title sounds like a bruise, but no no one was hurt making this card! Our current challenge over at the Blank Page Muse is using black, white, and one color. 
I started this card by using my stamp platform to stamp the Vintage Lady with wings.  Using the platform to stamp her allowed me to make sure I got a really crisp image since she has a ton of detail. I stamped her using Jet Black archival and colored her in using a combination of markers, inks and crayons. I stamped a second image to play with color choices and combinations. 
You can see in the image that wound up on the card I used multiple colors on the wings and darker colors on her skirt.
For the layer directly behind her, I stamped the Floral Distressed Vintage Medallion and covered it with a blue embossing powder.  I used a textured paper and a light hand when stamping.  To stamp the medallion I just used the unmounted rubber and rolled it directly onto my cardstock.  I often don't use a block or platform when I want an imperfect or loose image.  
For the background, I used black textured cardstock and the Chain link Pattern Background stamp. I just stamped around the edges and then used a black and white embossing powder. 
Before I added the lady to the card I did some messy stitching around the edges of the card using black thread. I layered up the papers and added a very thin strip of a darker blue paper directly behind the bird cage lady. 
Using black and white pens I added some marks and inked the edges just a bit. 
I hope you join us for the challenge! Don't forget there are prizes to be won if you play along.
Jess




Monday, April 2, 2018

I've got a birthday coming up(it's a big one)

Hi Everyone,
I am up on the Gypsy Soul Laser Cuts blog today with my crown fit for a rusty queen.


I don't want to admit it, but I have a rather big birthday coming up.  I thought maybe having a crown would ease the pain a bit.  I'm not a frilly girl.  I'm a grungy girl and my crown needs to fit me. 

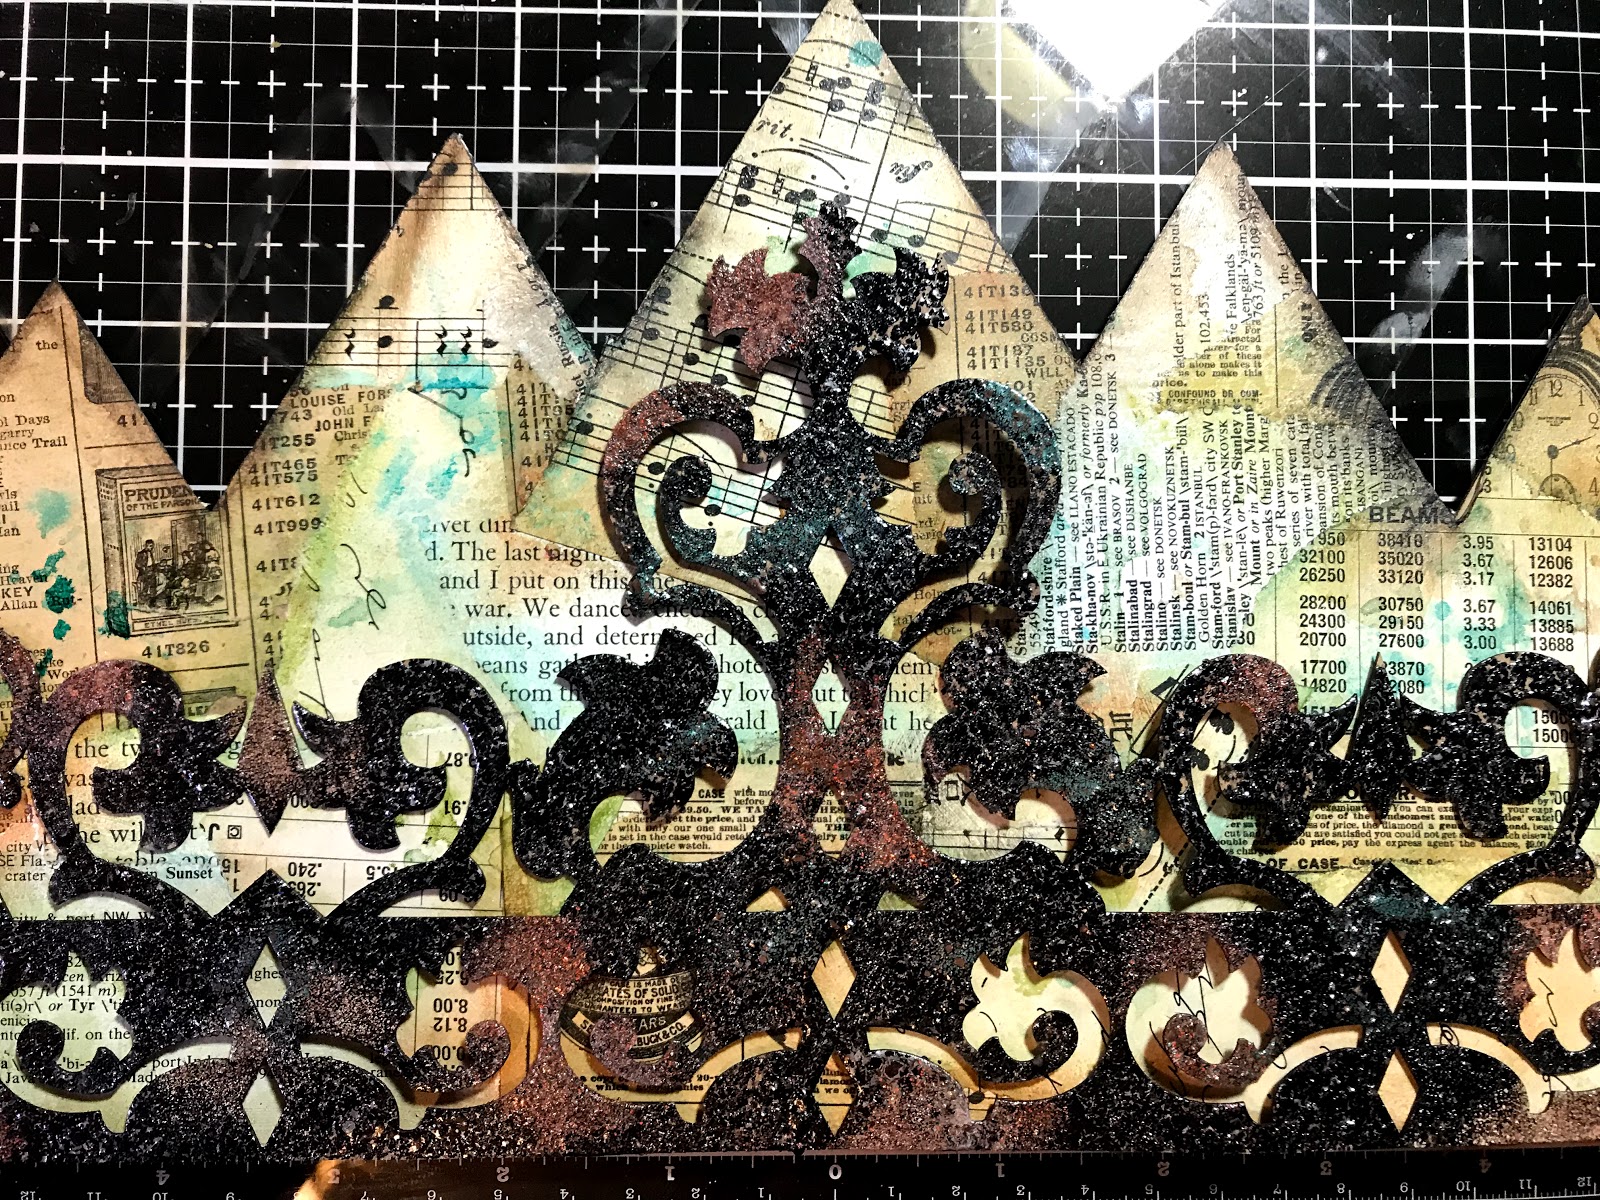
I started by covering my crown with tons of vintage paper.  I used old dictionary pages, sheet music, catalog pages, shorthand practice sheets, and more.  I used Distress Collage medium to adhere it to the crown and once it was dry I cut it down.   
I then added lots of Distress Stain in Mowed Lawn, Peacock Feathers, and Walnut Stain.  I added Distress Inks and Oxides in the same colors, Once the base colors were down I went back with Distress crayons to highlight edges.  I used Walnut Stain, Rusty Hinge, Hickory Smoke, and Black Soot.   

To make the fancy front piece I used  Baked Texture embossing powders.  I used Rocky Road for the base and then added Vintage Patina, Dirty Sand and Chunky Rust.   I glued on the front piece and let it sit overnight. 
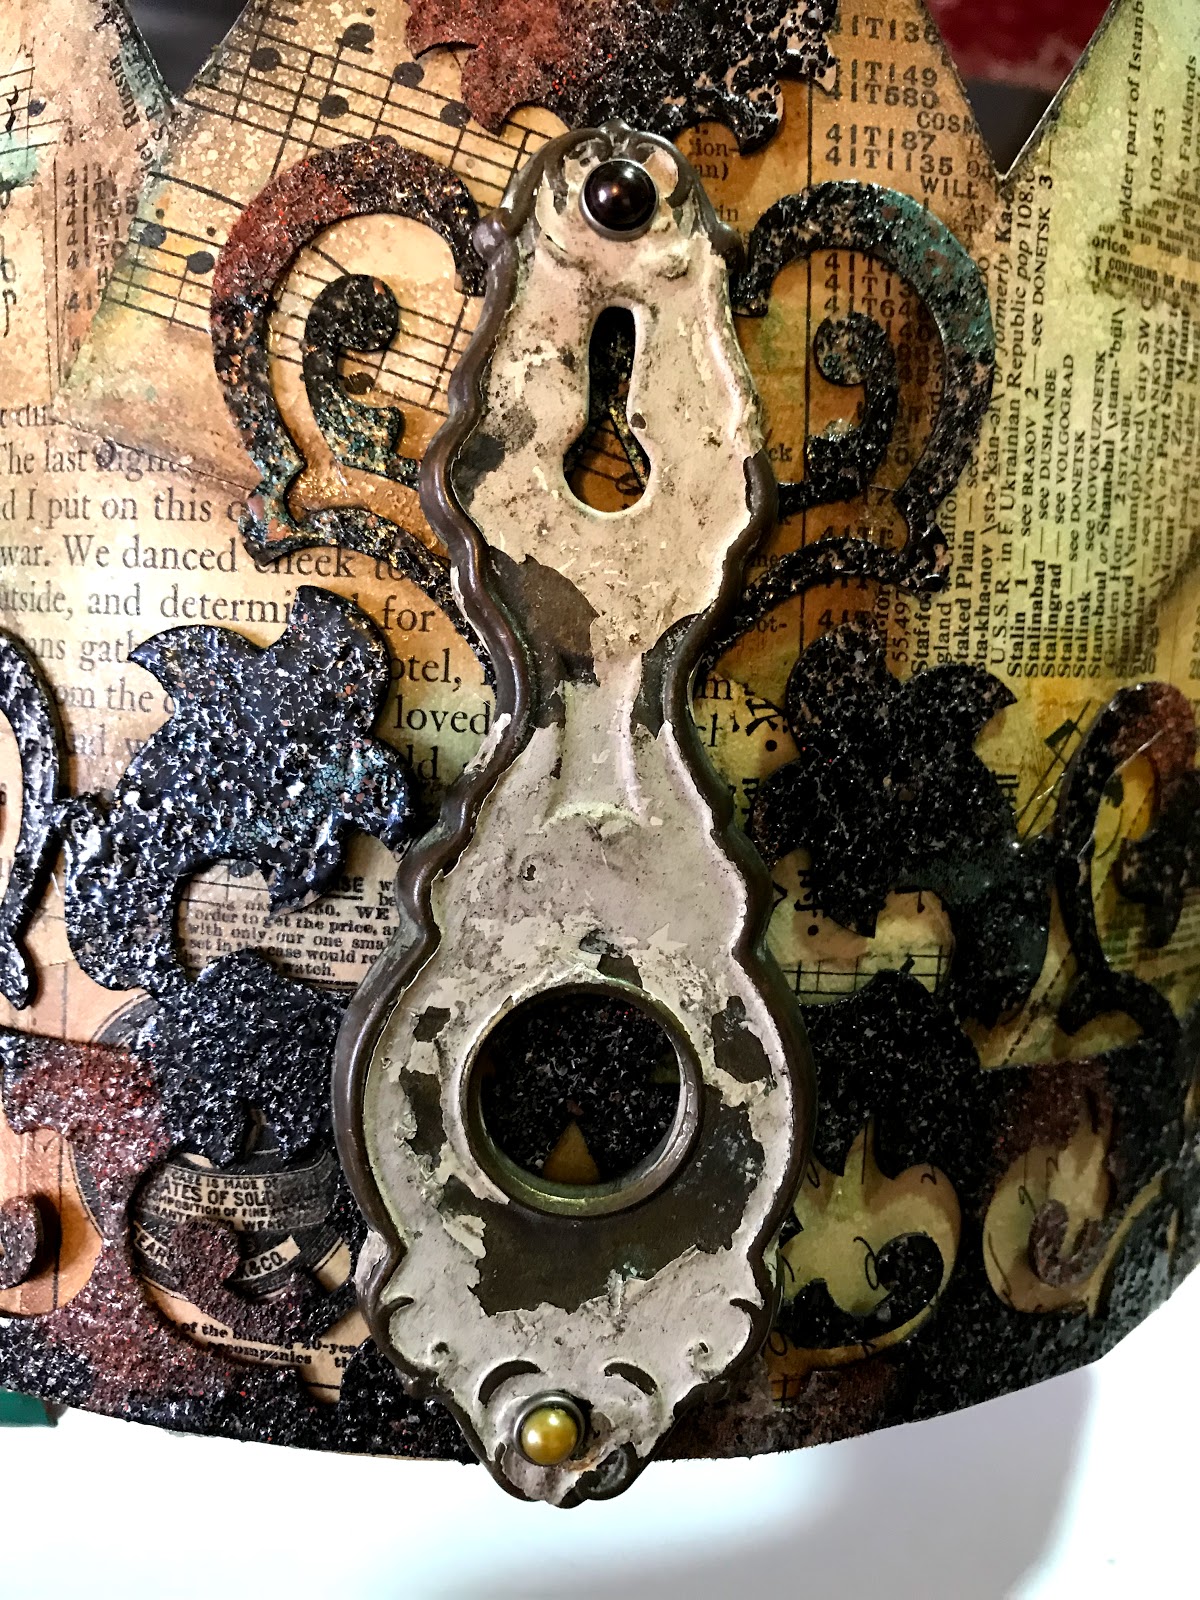
I had this cool old door plate that I adhered to the crown using brads.  
I added an old bingo number to the center of the door plate. 
I added metal flowers, with a bingo marker I colored using Distress Oxide in Peacock Feathers and Vintage Patina Baked Texture powder, to each side of the crown.
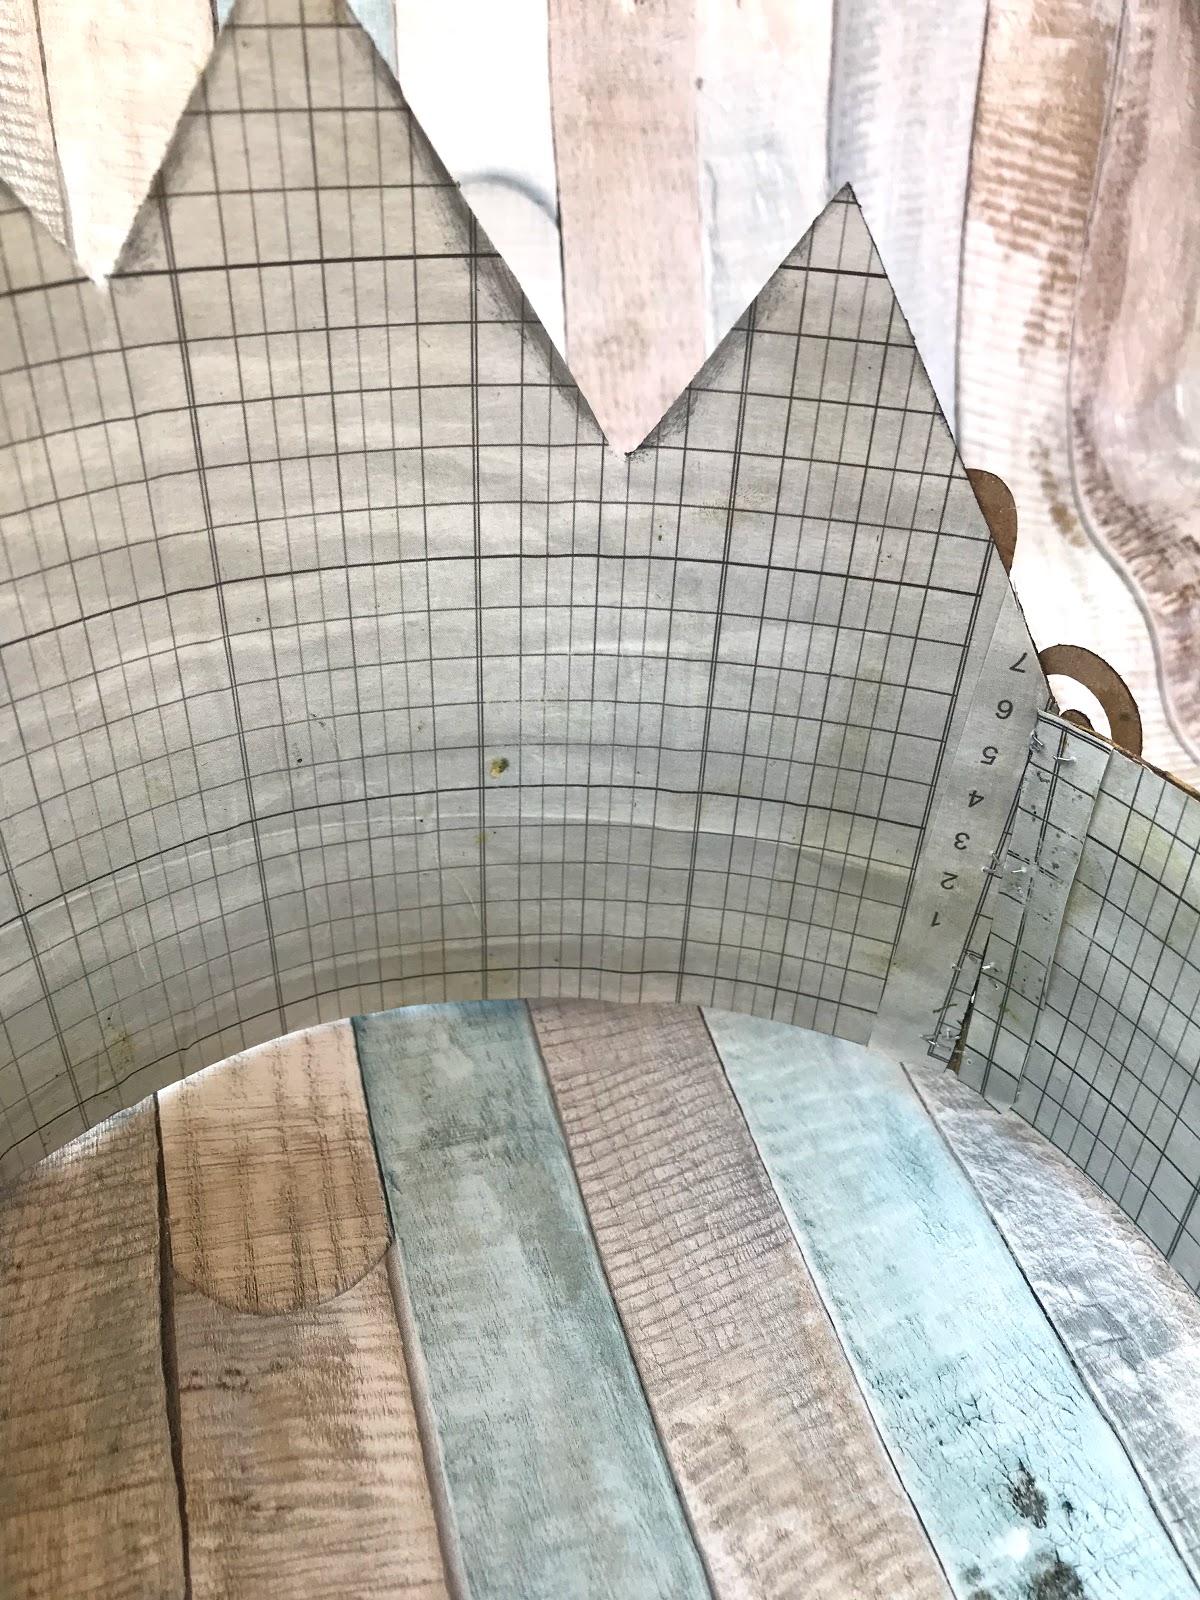
The inside of the crown is lined with graph paper.  You can see here I attached the band using my  tiny attacher.  
This is the back of the band.  
This is obviously not my head, but you get the idea. 

This was really simple to make and you could really use this crown in so many ways.  I hope you enjoyed my grungy take! 
Jess

 I am entering this into the Simon Says Stamp Monday Challenge- Trio( I used a trio of Tim Holtz on here using his inks, stains, and crayons)

Monday, March 26, 2018

Which way do I turn?


Hi Everyone,
Are you directionally challenged like I am? I seriously can get lost in a paper bag. 
Check out my tutorial on how to create this card over on the Blank Page Muse Blog today.
Jess

Monday, March 19, 2018

Try to Cooperate

Hi Everyone,
Back with my second post of the month for Gypsy Soul Laser Cuts. 

The base of this project is a small Tim Holtz Etcetera tag and the Botanical Journaling Blocks fit on them perfectly! 
 They make a great background piece and really create a nice focal point.  This is the medium sized block and there are three in the set.  
I knew I wanted to use this image and I put a Mini Petal Corner crown on her head.  The crown has been embossed using Seth Apter's Baked Texture powder in Ancient Amber.  I added a brad to the center for her jewel.   
The base tag was covered with Tim Holtz Wallflower paper and then splattered with various Distress paints and inks. 
The journaling block was covered with gesso and then painted using various shades of green and brown Distress Paint.  The spaces between the stitches were inked using a gold gel pen.  

The edge of the frame was inked using Distress Ink in Peeled Paint and then Distress Crayon in Black Soot was used to darken the edge and draw your eye in toward the center. 
The Layered Frame Bella Oval was placed on top of the journaling block.  This frame has a front and a back, but for this project I just used the top piece.  This piece was left completely raw.  I really liked how it picked up the browns in the background paper.  
You can see I played around with the placement quite a bit on this piece.  Things got moved up, down, and all around  
This is what I landed on for final placement.  I used foam tape to attach her since the chipboard frame is directly behind her.  I didn't want her to wind up with a big bump in the middle of her body. 
Flowers were added to the top.

The snarky chit chat sentiment was placed in her lap and a vintage brass token was added to the bottom corner to balance the piece.  

Happy Crafting!

Thursday, March 15, 2018

Spring in Paris

Hi Everyone,
I am so honored to be a Guest Designer for the Frilly and Funkie blog today. 


The current theme is "Knock on Wood."  I was asked to incorporate some type of wood into my art.  I decided to start with a medium size Etcetera tag from Tim Holtz.
I covered the tag in a piece of paper from the Tim Holtz Wallflower paper pack, using Distress Collage Medium to adhere it to the tag.  
I flicked on Distress Paint in Black Soot, Tarnished Brass, and Picket Fence.
My next step was to tint this image I had of the Eiffel Tower.  I used Distress Markers in Broken China and Mowed Lawn to give it a hand tinted look.    
My first wood element is this mini framed panel from Tim Holtz.  This is one of the small frames that comes in the two pack. 

I painted the frame using Picket Fence Distress Paint and then spritzed it with Walnut Stain Distress Spray Stain.  I used a very tiny paint brush to add Tarnished Brass Paint to the edges.  I rubbed Distress Crayon in Walnut Stain on the frame to darken it up just a bit.  
My second wood element is a Tim Holtz Vignette box.  I whitewashed the box using Picket Fence and then used industrious stickers on the front.  I used alcohol ink in gold and mushroom to color the 
stickers. 
 The outside edge has a wrap of decorative tape from the Tim Holtz Rose pack. 
I filled the box with flowers and Tim Holtz beaded berries that were colored using gold alcohol ink. 
My third wooden element is a Tim Holtz ruler.  I sprayed the ruler with Tea Dye and Walnut Stain Spray Inks.  
Here's another yummy shot of the flowers.

I added Tim Holtz Typography letters that were colored using Distress Paint in Tarnished Brass.  Once the paint was dry I added alcohol ink in Mushroom and Distress Crayon in Black Soot to give them some patina.  

The Tim Holtz paper dolls  were given a pop of color with Distress Markers. 
I added them to the edge of the frame and gave them some flowers.  
For finishing touches I added Prima flowers and leaves.  They were given a spritz of Distress Spray Stain in Walnut Stain. A large strip of vintage Dresden was added to the side too.  

The top corner and bottom corner got a little stencil treatment.  I used a Crafters Workshop stencil and Ranger Texture paste for some dimension.  The color was added using Distress Crayons in Walnut Stain, Vintage Photo, and Black Soot.  

Sari ribbon and a Tim Holtz loop pin add interest to this corner.  
I hope you enjoyed my tutorial and are inspired to enter the challenge.  

Jess


Saturday, March 10, 2018

Snarky ATCs

Hi everyone, 
The theme this month over on the Blank Page Muse blog is ATCs. 

The technique I am using to create my background has been around for a while now, but I recently saw a tutorial from Jenny Marples and she reminded me how fun this can be. 

I started by stamping my Flower Stamps from the Flower and Bird Sketches set on to a blank piece of tissue wrap.  If you are going to try this technique be sure to use a permanent ink when stamping this bit. 
Once the ink was dry I flipped my tissue over and painted the flowers using very bright colors.  I dried the paint and then stamped the Flowers and Leaves Border using a brown permanent ink. 

This is what the correct side of the tissue looks like.  Isn't that cool?!

I covered my ATC in dictionary paper.  

I glued down my tissue and then stitched around the edges.  

I added my paper doll, sentiment, and flower charm.  To complete the card I added some ink to the edges and around the paper doll. 

The second card was done basically the same way, but I didn't stitch the edges.  
 Don't forget to enter into the challenge that can be found on the Blank Page Muse blog! 
Happy Crafting,
Jess


Disclaimer Notice

I've received products/compensation as part of the Gypsy Soul Laser Cuts Design teams. My projects, however, are 100% my own.