Showing posts with label distress sprays. Show all posts

Monday, August 21, 2017

Wicked Witch

 Hi Guys, 
I am posting for Gypsy Soul Laser Cuts today.
 Meet the sweetest wicked witch ever.  

Using a gel medium, cover your art doll with the paper of your choosing.  I covered the front and back of my doll using pages from an old shorthand book. 
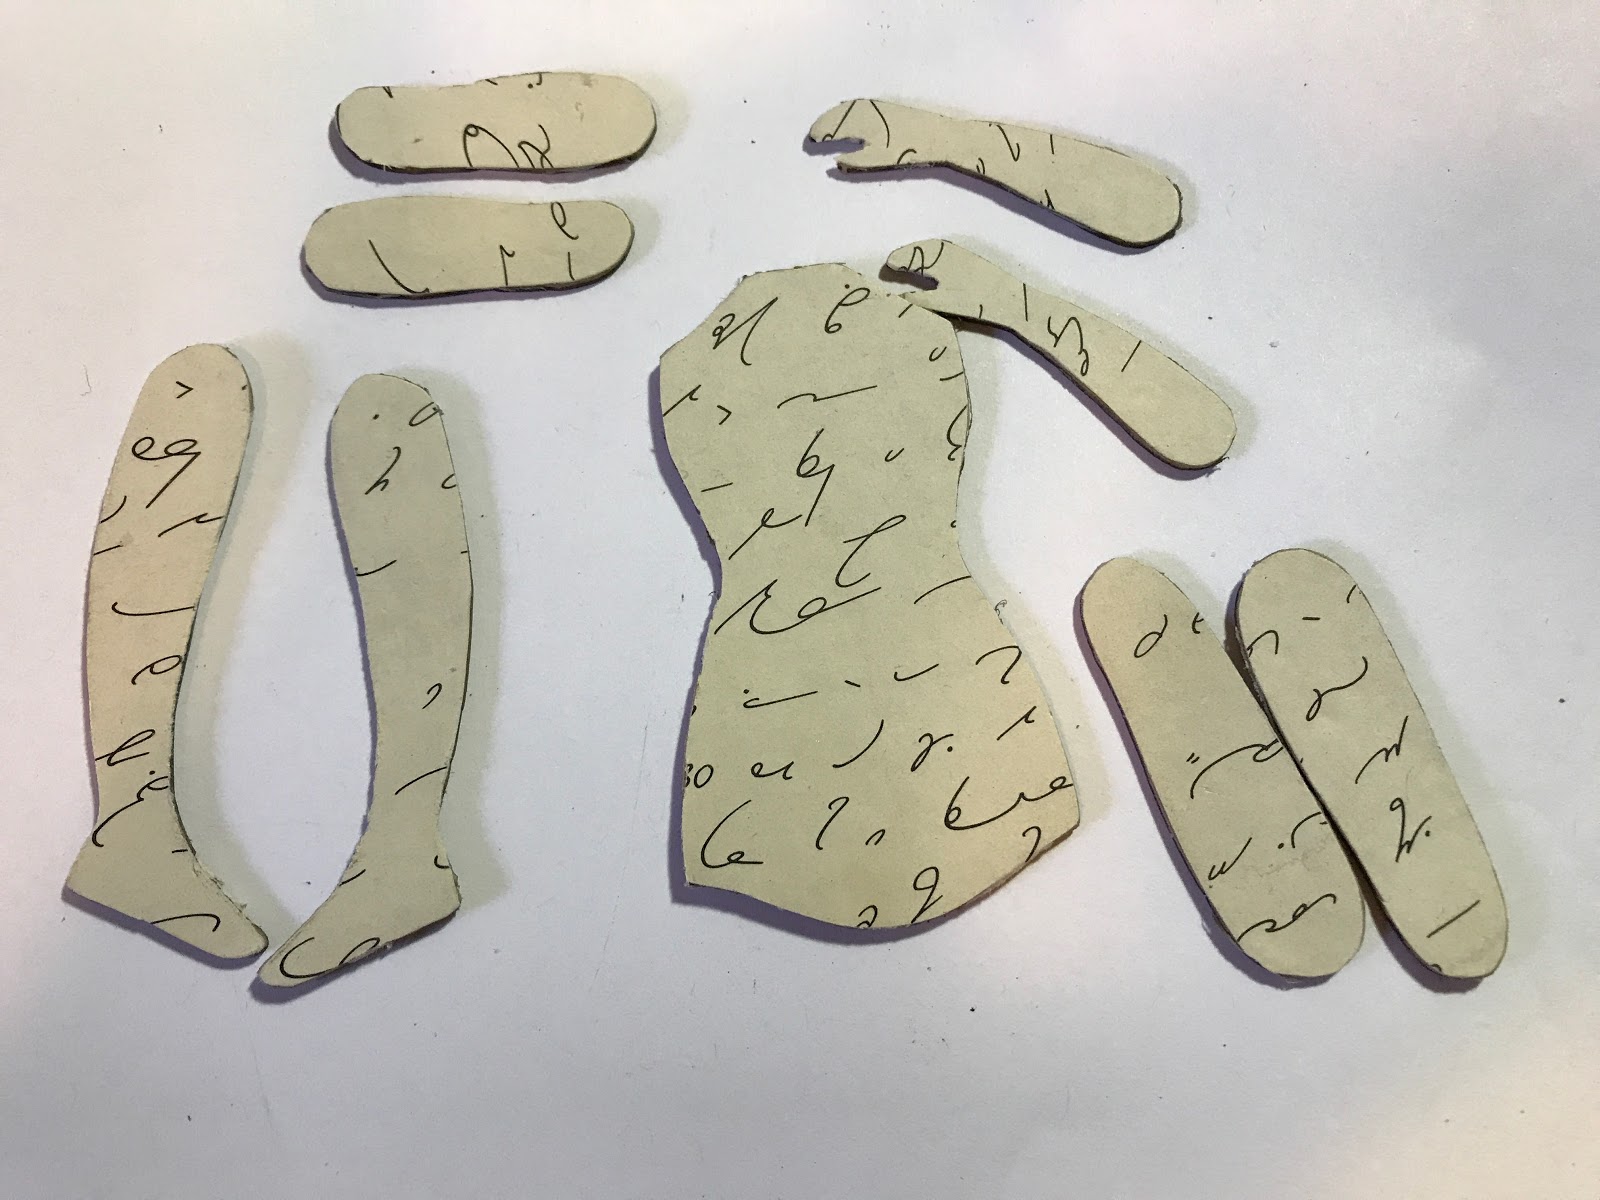
Go around all of your edges with Distress Ink in Antique Linen. Using an awl make holes in your doll for her joints and put her together using brads.  
You might notice she is missing her head. I used an image and then popped a witch hat on her head. 
I just glued the head to the body.  
The witch hat is mounted on a scrap of chipboard that was the edge of something I had from Gypsy Soul.  I ran the hat through my Xyron sticker maker and then just trimmed the chipboard around my new sticker.  The fabric on her hat is that same as her skirt.  I took white cheese cloth and sprayed it with Distress Stains.  The vintage bingo marker has a little spider rub on. 
The Bird Cage is covered with Emerald Creek Embossing Powders.  Instead of carrying a bird, she has a little bat in there.  
I cut her boots put of cardstock.  They are a little wonky since I freehanded them, but witch shoes don't have to be pretty.  

I love the brad on her belt and the necklace details too.
Here she is one more time.
Jess


Medium Art Doll
Bird Cage

Wednesday, February 17, 2016

Down the rabbit hole


 I have been very quiet on here.   I will get back to posting regularly again soon.  I promise! Here's a little something I have over on the Altered Pages Blog today.

Let me know what you think,
Jess

Tuesday, December 8, 2015

Merry Christmas from all the girls


I have to admit when I started working on this panel I wasn't sure where it was going.  The background is Barn Door Distress Spray, a gold glimmer mist, and white paint flicked on after the sprays were dry.  Once I saw the red and gold shimmer I knew it had to go Christmas.  I layered on some green polka dotted paper, random text paper, and vintage ledger paper.


Wednesday, October 21, 2015

Retro Holiday Fun

I have the cutest kitten ornament over on Altered Pages today.  Check out the kitschy fun!
What have you been crafting?
Jess

Wednesday, October 7, 2015

Wednesday, August 5, 2015

Don't forget to Fly project reveal

It's no secret that I love anything with wings- butterflies, fairies, birds, you name it.  I decided it was time to make my own feathers and here is the result.  


Ok. Here comes the tutorial.  There are a ton of pictures today.  

 Take your chipboard base and cover it with a couple layers of gesso.  Once the gesso is dry I sanded it a bit to remove the tooth.  I then used white paint and a stencil in random patches all over the chipboard.  While the paint was drying I placed bits of washi tape on the base. 
 When the paint was dry I used several brown distress inks to color the gesso.  The paint acts like a resist and you can easily see the pattern.  


I then used watered down black acrylic paint and flicked it all over using a paint brush.  
I used flower rub ons to finish the base of the background.


To make my feather I used a paper wrapped wire stem typically used for floral design.
 I trimmed the wire to about 13 inches and then folded it almost in half.  I twisted the ends together and then glued it on my Wedding Cut Out Cardstock from the Robin's Nest. 
I cut the paper into 4 even pieces.  I used one piece for the bottom of the feather and the second for the top.  I tried this a couple different ways.  The first time i glued the paper and put the wire on top.  The glue spread too much and made it too difficult to cut correctly(it didn't have he feathery look I was going for).  The second time I put a bit of glue on my fingers and just rubbed it all over the wire.  This kept the glue where I needed it and kept the two pieces of paper together.  I set the feather aside to dry for about an hour. 
Once the feather was dry I traced a rough feather shape out. 
I trimmed the paper and then snipped all the way around the edges right into the center where the wire is. 

I colored the feather using various Distress ink sprays and Perfect Pearl shimmers. 
The bottom exposed wire is wrapped in the same washi tape I used on the chipboard base. 
The feather is topped off with some green jute and a smidgen of Leafy Green Straw.
I printed a quote from JM Barrie, the author of Peter Pan, on plain ivory cardstock. 
I inked and smudged the print a tad.  A tiny Tinkerbell from the Funkie Junkie boutique charm adds a bit of whimsy to the piece. 
Three Forest Brown Mini Dew Drops help draw your eye around the piece. 
A big fluffy bow made out of silk sari ribbon completes the wall hanging. 
I hope you try to make your own feathers.  I made a brightly colored one too using the same technique and it is awesome! 
What have you been crafting?
Jess

Wednesday, July 8, 2015

CC3 Challenge 32- Hello Possibility

I love plugging my way through the Compendium of Curiosities book with Linda Ledbetter and her curiosity crew.  This go around Linda had us try the Frosted Film technique.  I have never tried Frosted Film before.  I have had it sitting in my Tim treasure box for quite some time now.  I have to tell you my first try was a dud, but then I came up with this little beauty.  

I can't tell you the Frosted Film technique(that's part of the challenge), but I can tell you I will definitely be using this technique again.  Look at the dimension on the wings!
The background is made with several shades of green distress ink: Mowed Lawn, Peeled Paint, and Crushed Olive.  I added Fossilized Amber and Vintage Photo on the edges to warm it up.  Then I flicked a bit of water to break the color up.  A few spritzes of Vintage Photo marker added the speckles.  I used the trellis die to cut paper from the Wallflower collection.  The inside bits are from The Robin's Nest.   I love the tiny tattered flower in the corner too.  That is a must own die set.  The crinkle ribbon is dyed using Fossilized Amber and a bit of Tea Dye.  

Here are a couple closeups of her wings.


I love that they are see through.  In case you haven't noticed I have a thing for wings! 
The Funkie Junkie  is the sponsor for the CC3 Challenge this go round.  I am also submitting this to the Frilly and Funkie Say Something Challenge(that's the Funkie Junkie's challenge blog).  

I hope you enjoyed stopping by today!
What have you been crafting?
Jess


Saturday, July 4, 2015

Keep room in your heart for the unimaginable

This little girl, from Tammy Tutterow, was smiling at me and I knew I had to use her on a project.  I fussy cut her and gave her a bit of color using Fossilized Amber.  While she dried I worked on something to put her on. 
I took a 5x7 canvas panel and covered it with tissue paper.  I put a layer of matte gel on the canvas and put the paper on top.  I then applied another layer of matte gel.  I squished the paper around to get some wrinkles on there.  Wrinkles add great texture; and if you goof and make wrinkles when it was intended you can say you meant to do it! I dried the whole thing with my heat gun.  
 I smeared on some Distress paint in Broken China and Bundled Sage.  I used my finger to move the paint around.  I sprayed the canvas with water to move it around even more.  I dried it with my  heat gun, between each layer I blast with my heat gun.
Next I grabbed my Tattered Angels Simply Sheer in Cozy Yellow and randomly spritzed. I mixed some Jacquard Pearl Ex in Copper and water to spritz on too.   


After this was dry I used Distress Spray in Tea Dye.  I squeezed my fingers around the sprayer to give more droplets than a fine mist.  

Now it is time to start layering.  I knew I wanted to use the little girl and I found this fantastic saying.  The saying led to me giving her giant wings.  I used my trellis die and added that to the side.  I didn't use any of the internal pieces so the tissue could still show through.  At this point none of this is glued down.  I don't usually glue until I have everything set in case I change my mind.  
Here is why I don't glue.  Here are a couple things I tried before settling on my final layout.  At one point I had a key, a compass, and an arrow on here too! 
The wooden bits are old game pieces.  I have no idea what the metal number is from, but I bought a bunch at a junk show. 


I love how her wings are so big they hang off the canvas.  She is popped up using foam tape.  The wings are popped with a double layer of tape for extra height.   You can see I added some rub ons to draw your eye around the piece.   
Here she is all finished. She looks pretty pleased with herself. 
I am submitting this to Colour Arte for review.
What have you been crafting?
Jess


Tuesday, May 26, 2015

Never Lose Your Little Girl Heart


I recently sent this project out to an Instagram buddy to thank her for some paper roses she made for me.  I have met some many wonderful crafty people on Instagram!
I made this little girl quite quickly. It only took about an hour from start to finish.

Take a canvas panel and paint it all one color(I used Mowed Lawn Distress paint).  Once it is dry add accent colors by smudging, flicking, and pressing the cap all over the canvas.  
I used some vintage sheet music on the corners and adhered it with matte gel.  

The page behind her is a book page that I aged with distress inks and sprays in Antique Linen, Walnut Ink, and Vintage Photo.  There is a piece of scrapbook paper directly behind the photo.

Her bow and parts of her dress and colored with distress markers.  I also tinted her flower with the marker too.  Once I wet the flower the distress ink ran into the flower to color it.  The dress color is mimicked by the color of the scrapbook paper. 
I printed the words on the computer and colored them to match the book paper.  


The crinkle ribbon is colored with Spun Sugar and Worn Lipstick Distress stains.  
I mounted everything using foam tape to add dimension.  A big flower added to the bow and it's complete! 

What have you been crafting?
Jess

Wednesday, May 20, 2015

Mini Affirmations

 I have some altered coasters for you today.  I love to use coasters for the base of my work.  They are light and cheap(bonus points for being absorbent).   They are also great for sending out happy mail since a stamp usually covers the cost of mailing it out.  
Paula Cheney had a great tutorial on her blog using Distress Sprays and the new Micro Glaze that I had to try. 
This was my first attempt and it came out much darker than I had anticipated.  I think the Rusty Hinge Distress Paint on the edges was a tad much.  Not the look I was going for, but I still really like it.  I also love the old paper someone was using for their math homework or figuring out their monthly budget.  I smudged some gesso on the side to brighten it up a tad.  


This is the same background paper I used on the first coaster.  See what I mean about it being darker than I anticipated! I put a sari ribbon bow on this one.  


Here you can see how I colored the photos using either Distress Markers or Distress Ink.  She is totally rocking that resin flower.  


This is the brightest of the bunch.  I used Peacock Feathers to color the modeling paste instead of spraying it after I used the stencil.  The edges on this one are inked using my favorite Pumice Stone Ink. 


This coaster is a tad smaller than the other three.  I used the tiny tattered floral die to make my flowers.  They are so easy to make.  I did a bunch and tossed them in a jar to grab when I need them.  I didn't do modeling paste on here since most of the background is covered.  I still stenciled a bit using Distress Paints in Worn Lipstick and Antiqued Bronze.  

Simon Says Stamp Monday X,Y,Z Challenge (I used my X-acto knife to trim my papers, a bunch of Yellow (paper, distress markers to tint the photos, and alcohol ink) and my favorite Zip dry glue).
What have you been crafting?
Jess

Friday, April 17, 2015

Adventurous Bird Wallhanging


Hi everyone,
I made an altered canvas panel for you today.  
This is the first time I have used my Tattered Pine cone die.  Holy moly! These roses were so easy to make.  I used several shades of The Robin's Nest glitter card stock to make these.  

Once I made my roses I cut some greenery and just put everything on my canvas to see how I wanted to arrange it.  I used some of Gina's Designs laser cut birds on here too.  

I added color to the canvas using Heidi Swapp Sprays, Distress Spray Stains, and Distress Inks.  I also used Tim Holtz's Rays Stencil and a random chicken wire stencil for added layers.  


I dyed my seam binding ribbon using the above Distress Stains.  I wet the seam binding and then run it through the color I have smudged on my craft mat. 

To add my saying I used my clear alphabet clings and Archival ink in Potting Soil.  


Stamping this out took a long time, but I think it was worth it! You can see the birds got a little stamping on them too.  

Here's a close up of the flowers.  The edges are inked with Pumice Stone distress ink.  In addition to the roses I made some random curly flowers using my Tapered Fringe die.  The back of these were sprayed with Tattered Angels.  


I hope you enjoyed seeing my canvas today!
Stop by the Robin's Nest to check out their great product and sometimes I am featured on the blog too.

What have you been crafting?
Jess


Disclaimer Notice

I've received products/compensation as part of the Gypsy Soul Laser Cuts Design teams. My projects, however, are 100% my own.